主机投产
#1 点击COMMISSION HOSTS,上线工作负载域主机
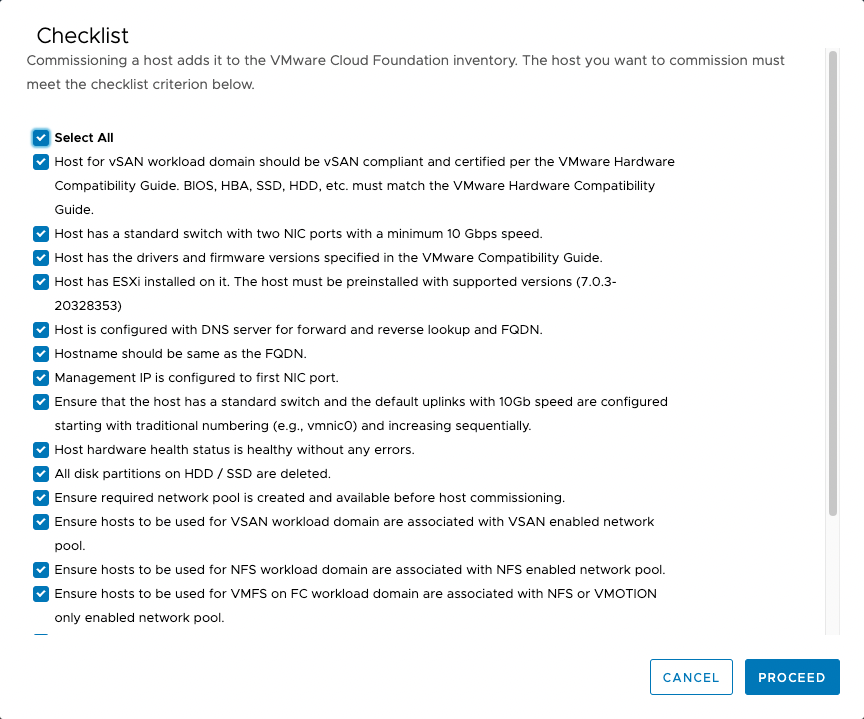
#2 确认检查列表
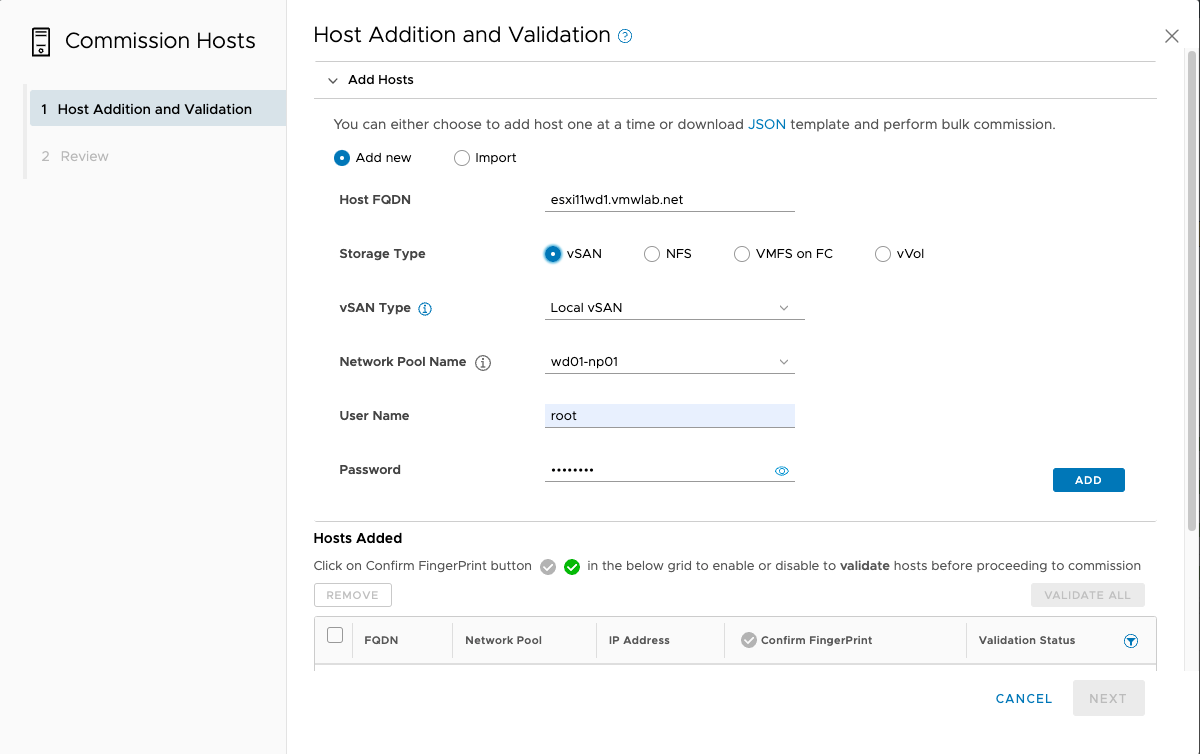
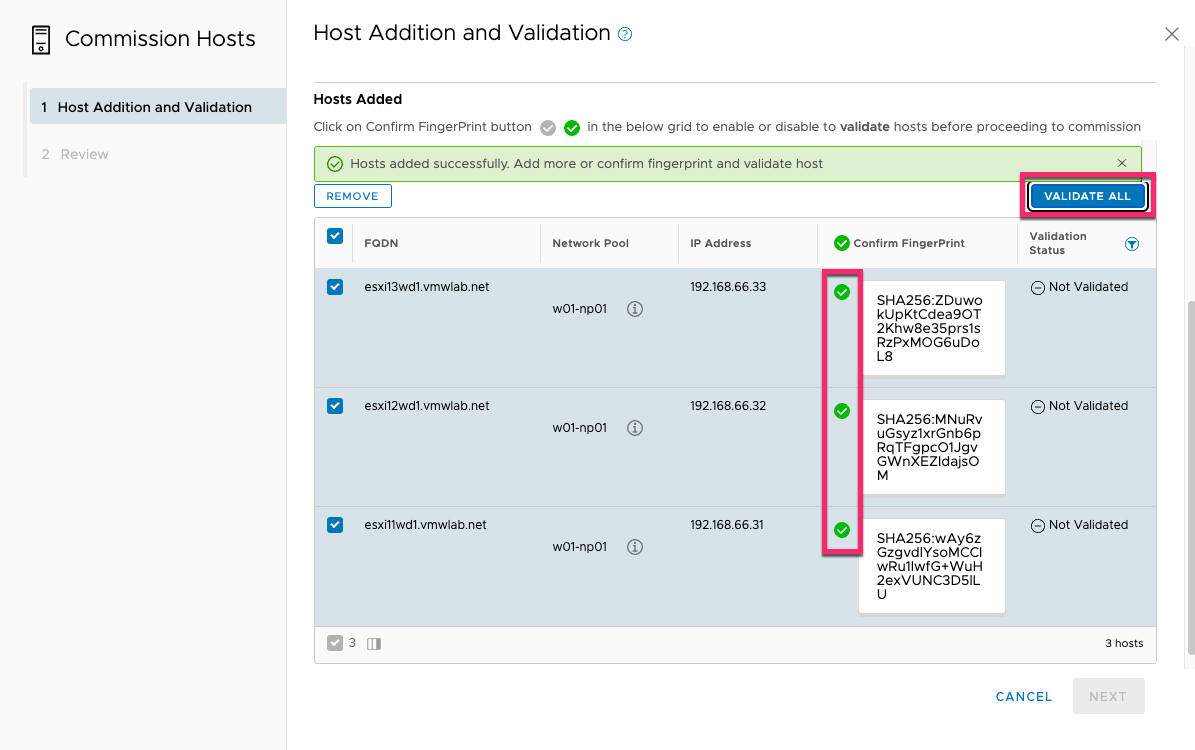
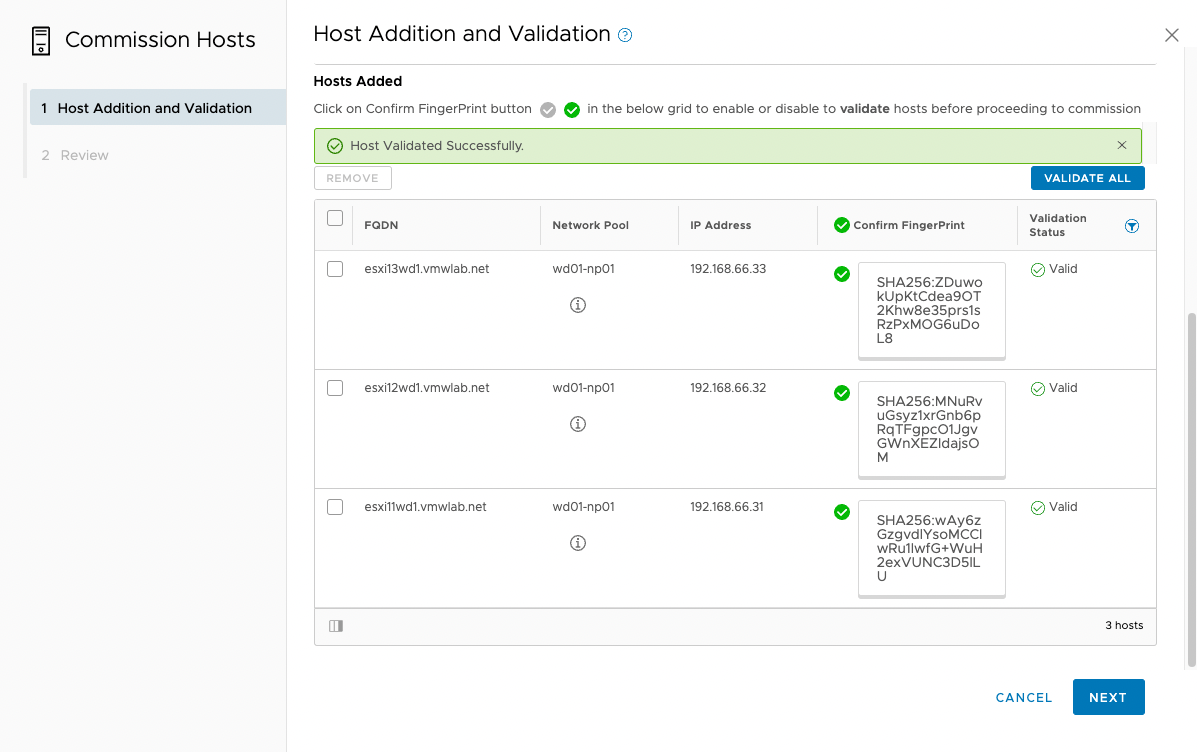
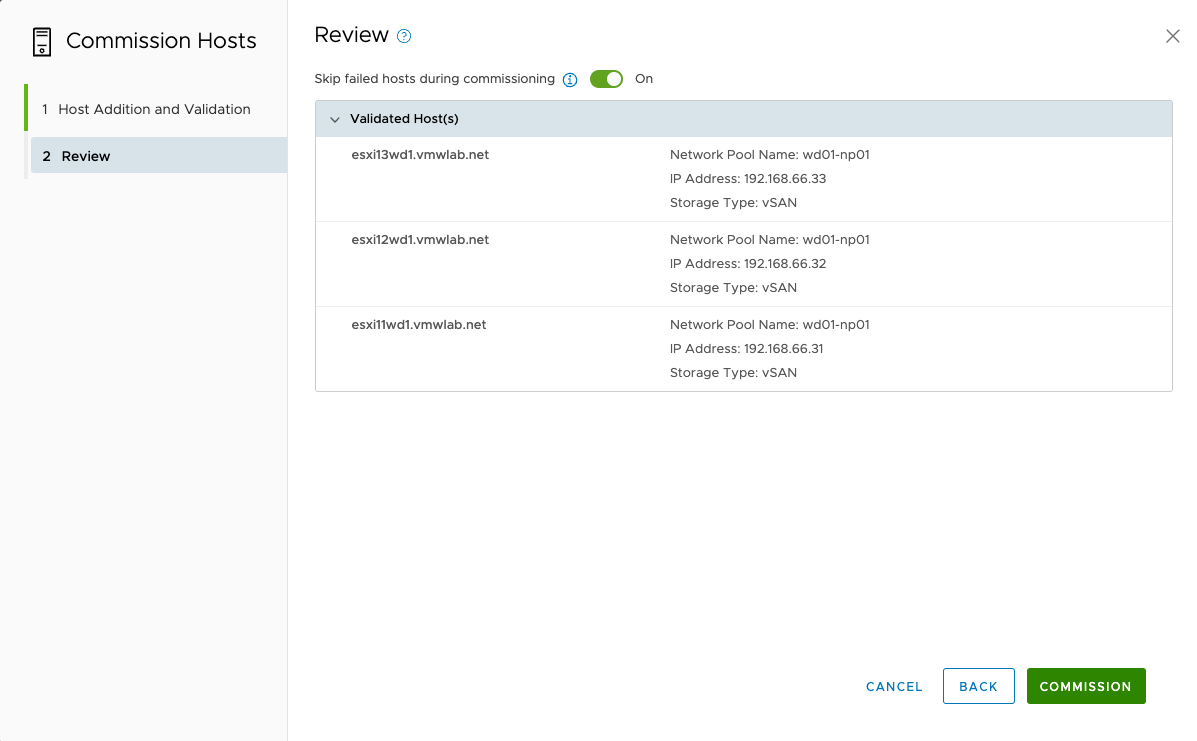
#3 添加ESXi主机并完成校验
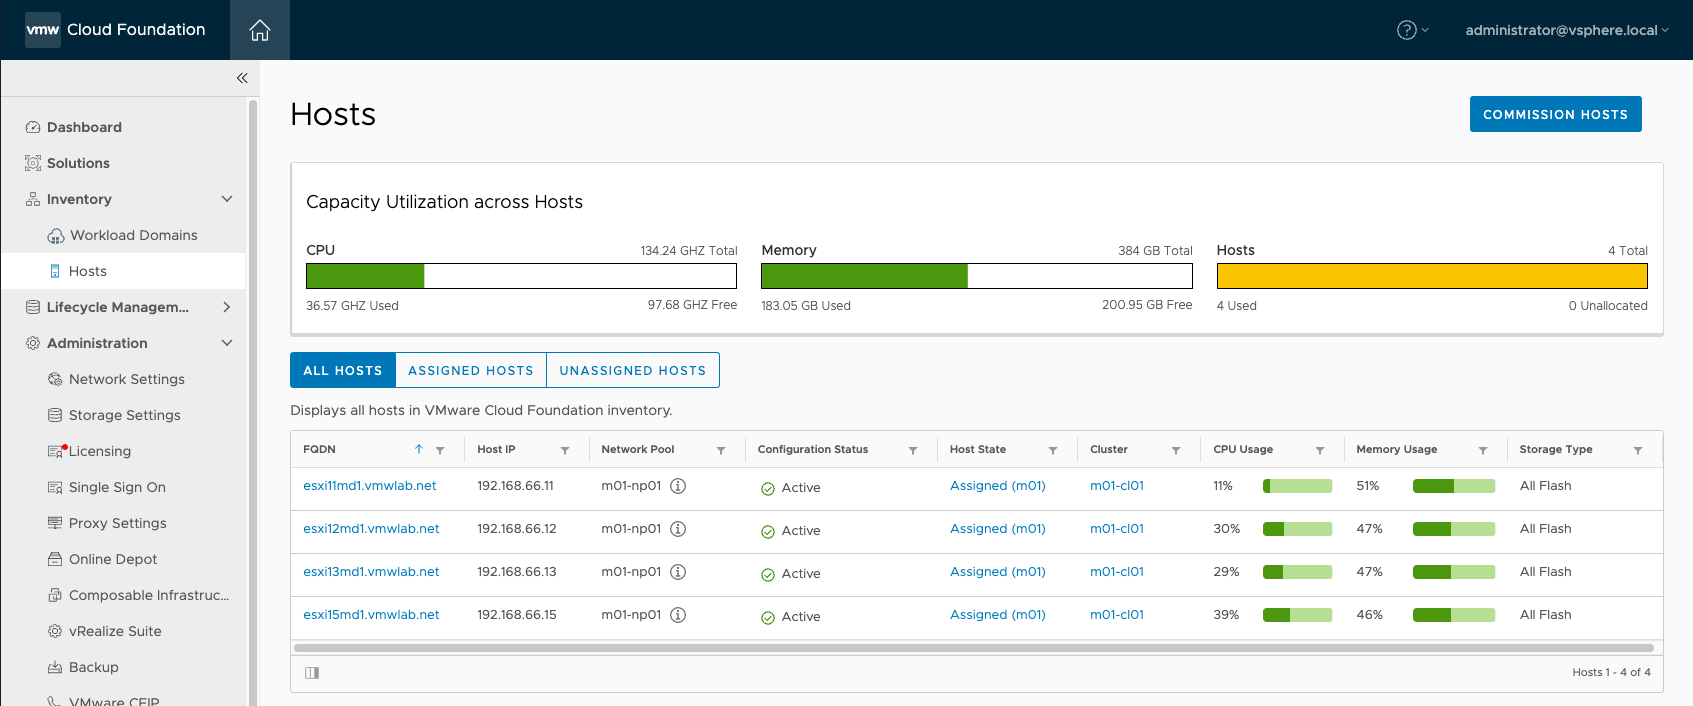
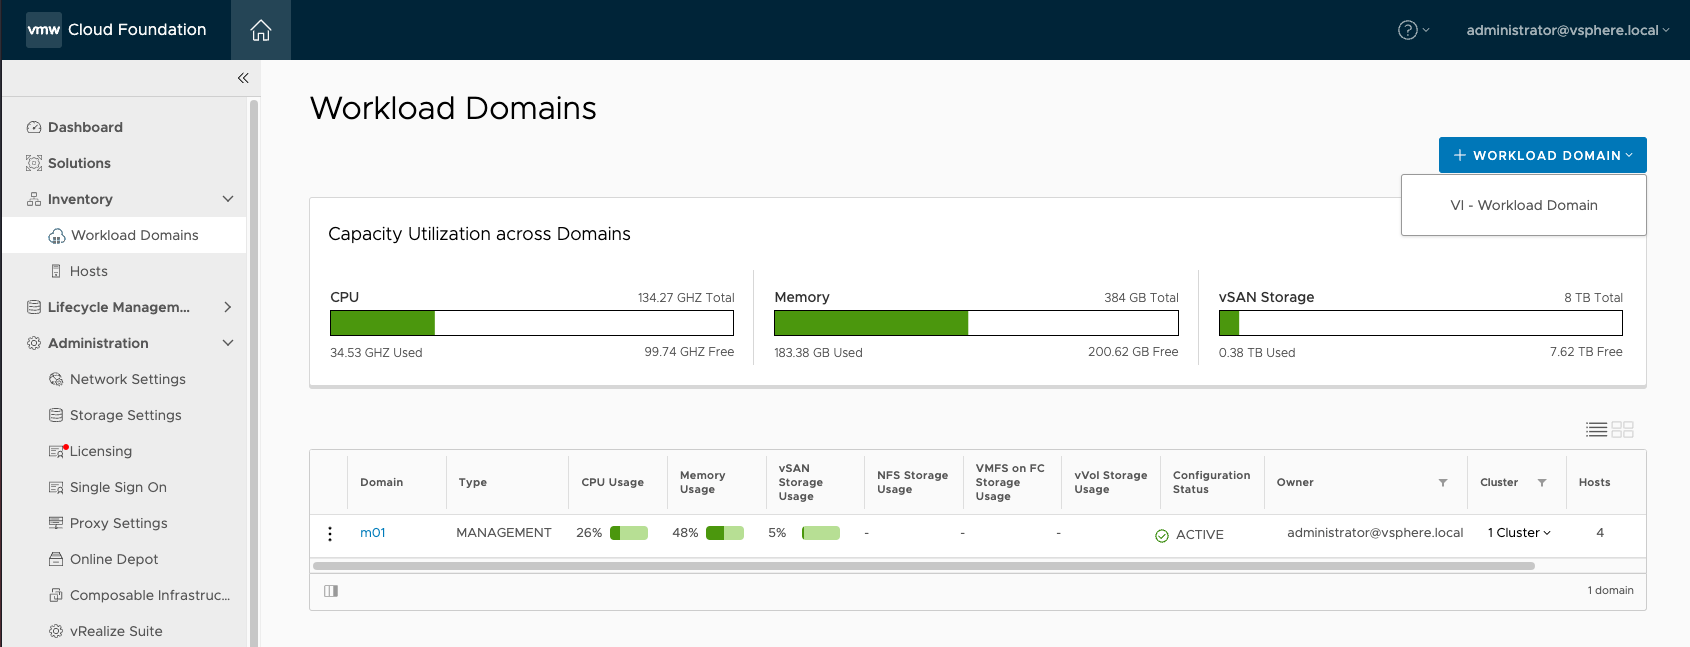
#4 主机投产准备完毕,可看到刚才添加的主机,但未关联任何工作负载域

创建vLCM Baseline+vSAN类型的工作负载域
工作负载域的ESXi主机准备与管理域相同,唯一需要注意的是,如果使用UI部署,缺省只会创建一个VDS,使用两个上联口,所有流量通过这个两个trunk的上联口出站。如果需要使用多个接口或多个VDS做流量隔离,需要通过API来创建。
#1 配置网络池

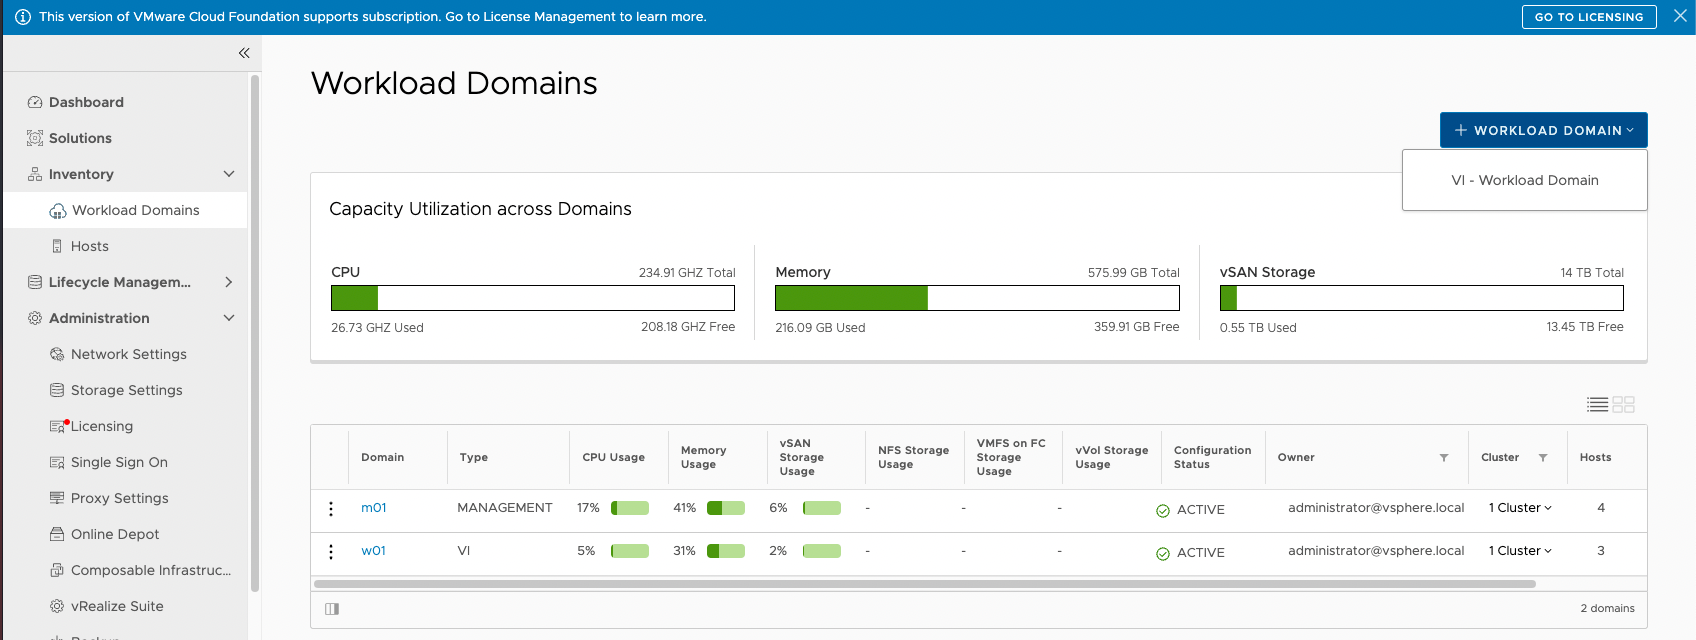
#2 创建工作负载域
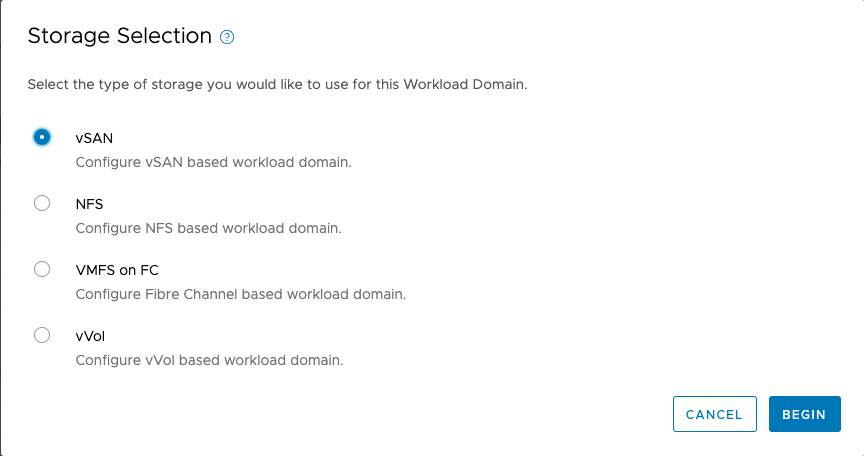
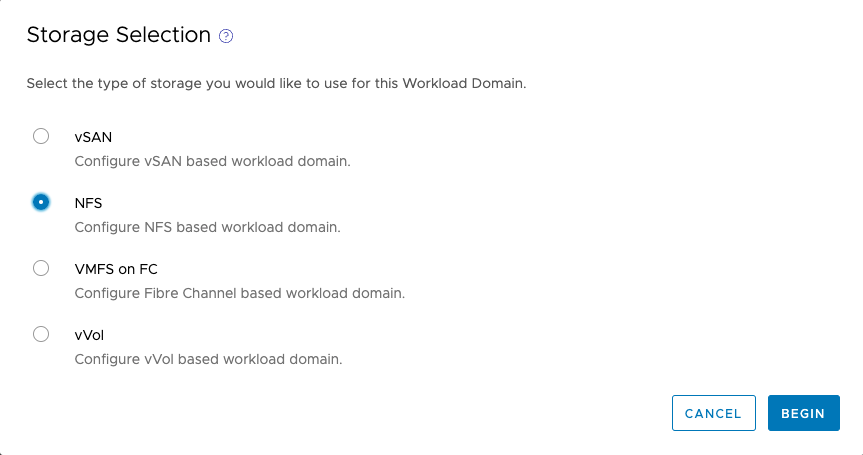
#3 存储类型选择vSAN
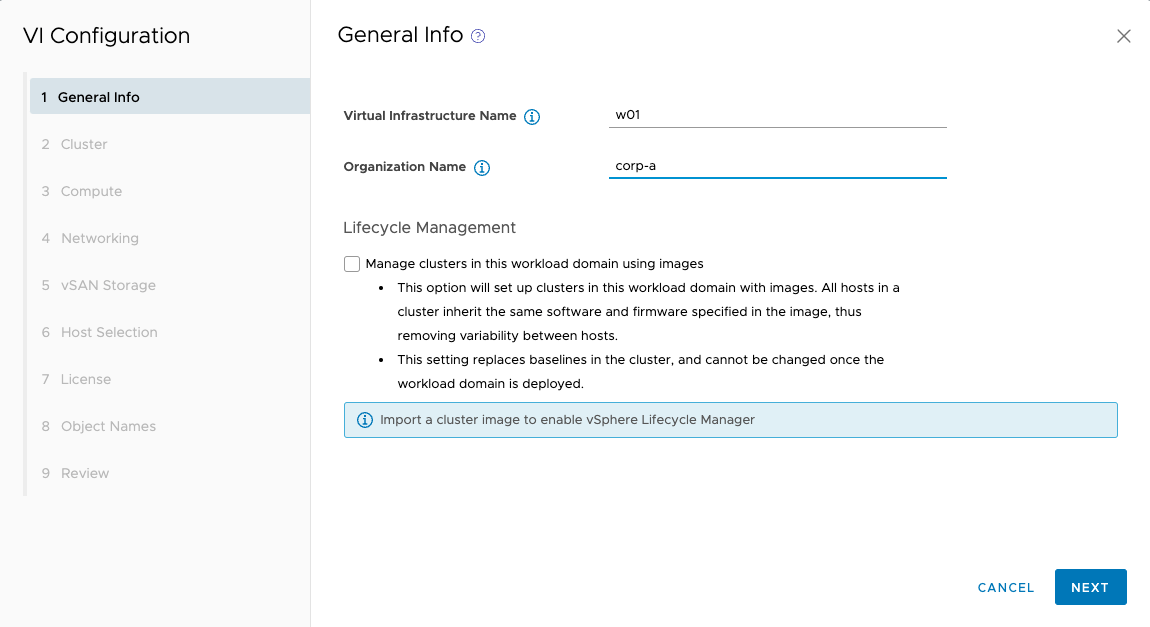
#4 添加工作负载域名称
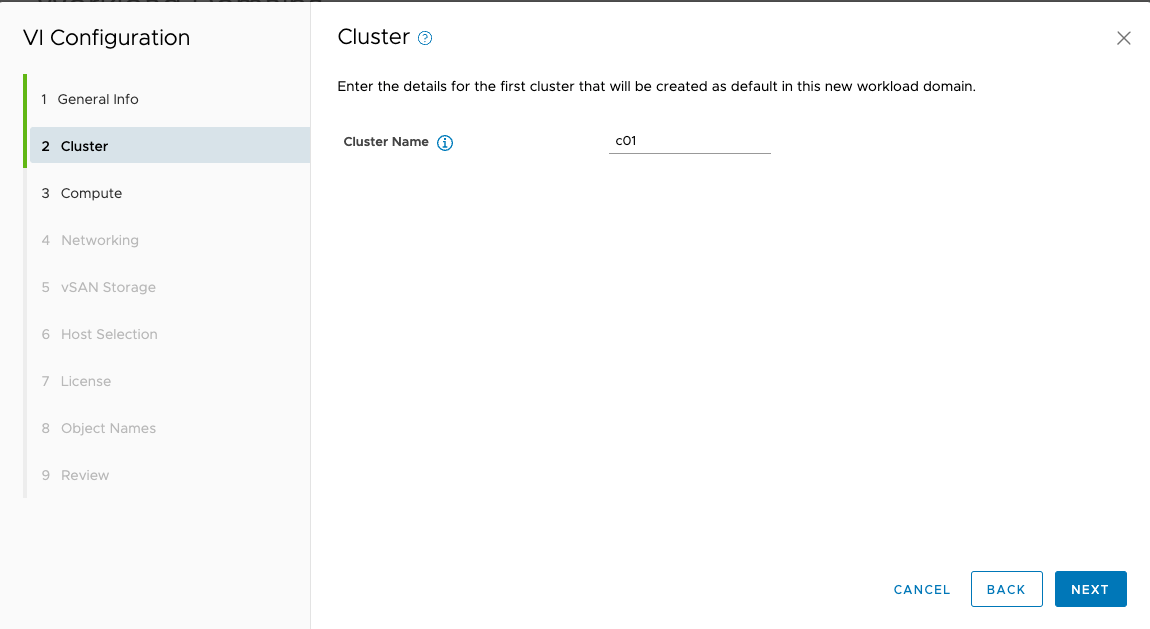
#5 添加工作负载域中集群名称
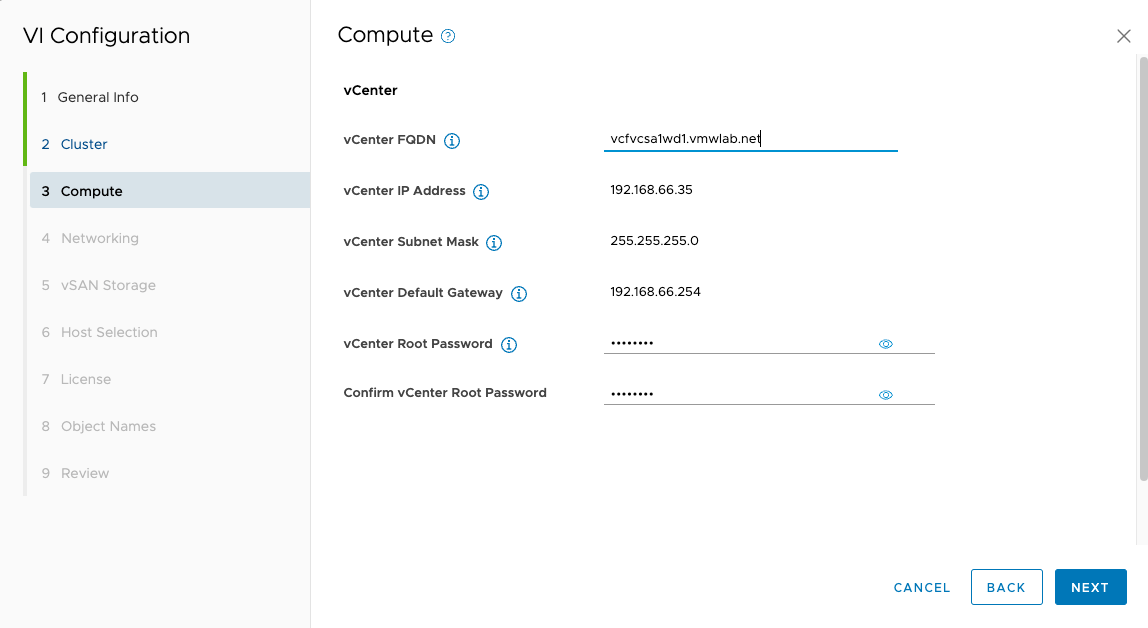
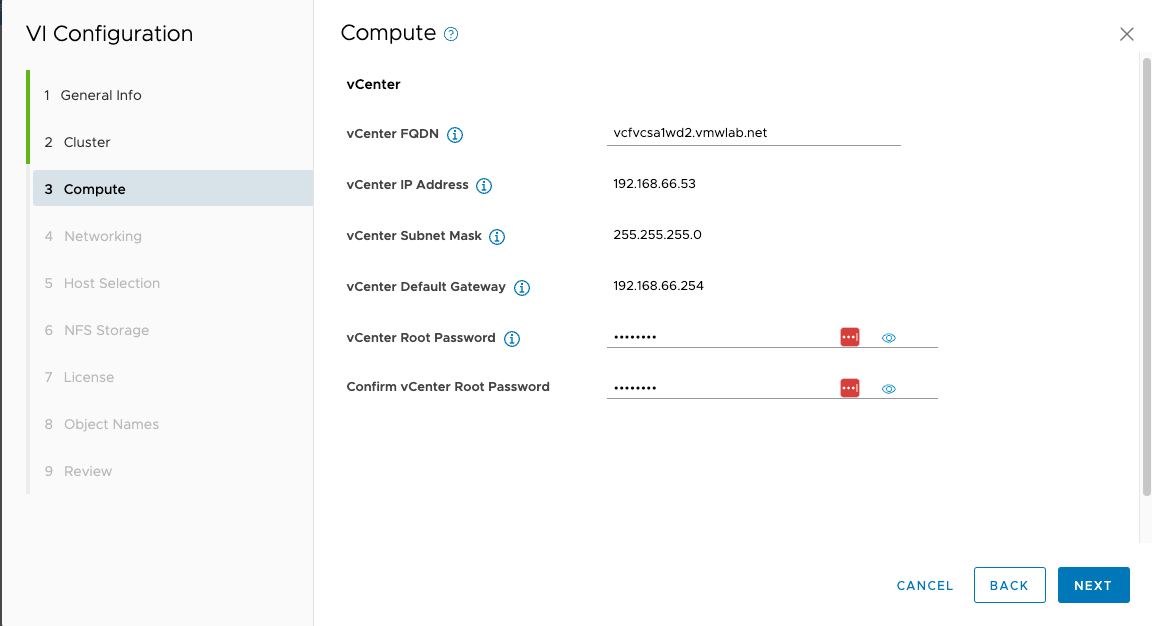
#6 输入工作负载域中VC信息
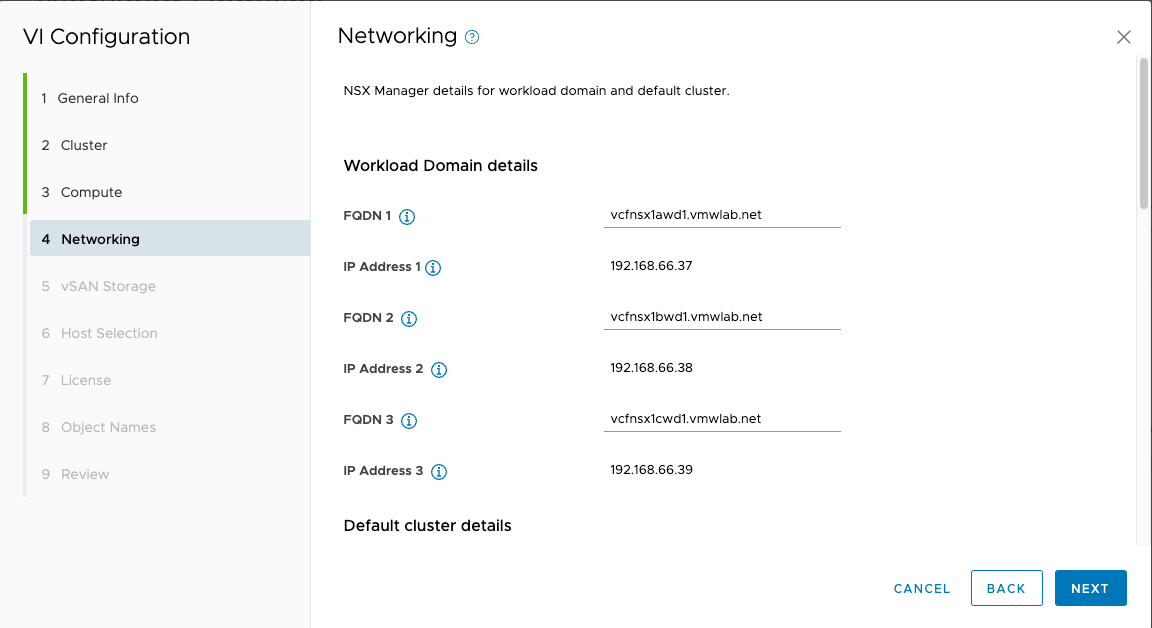
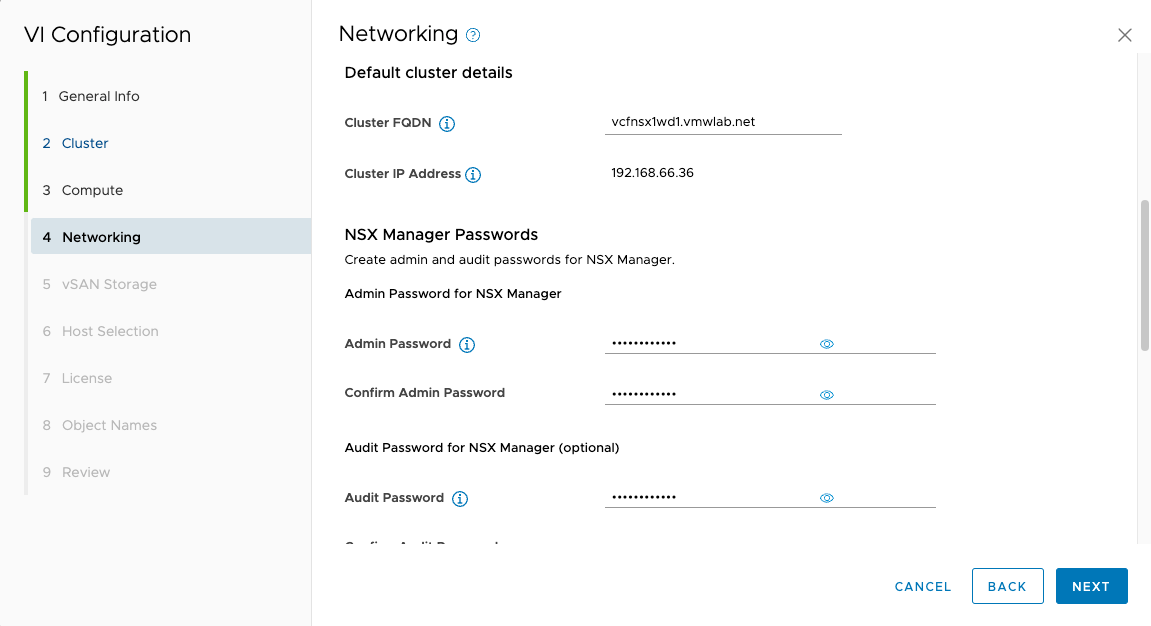
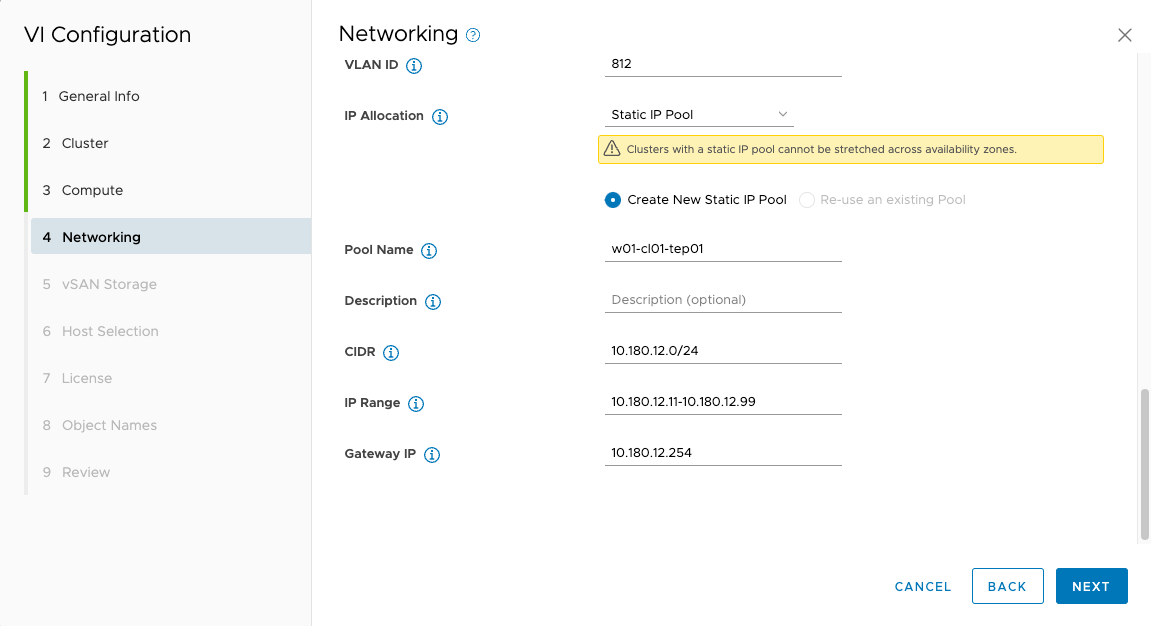
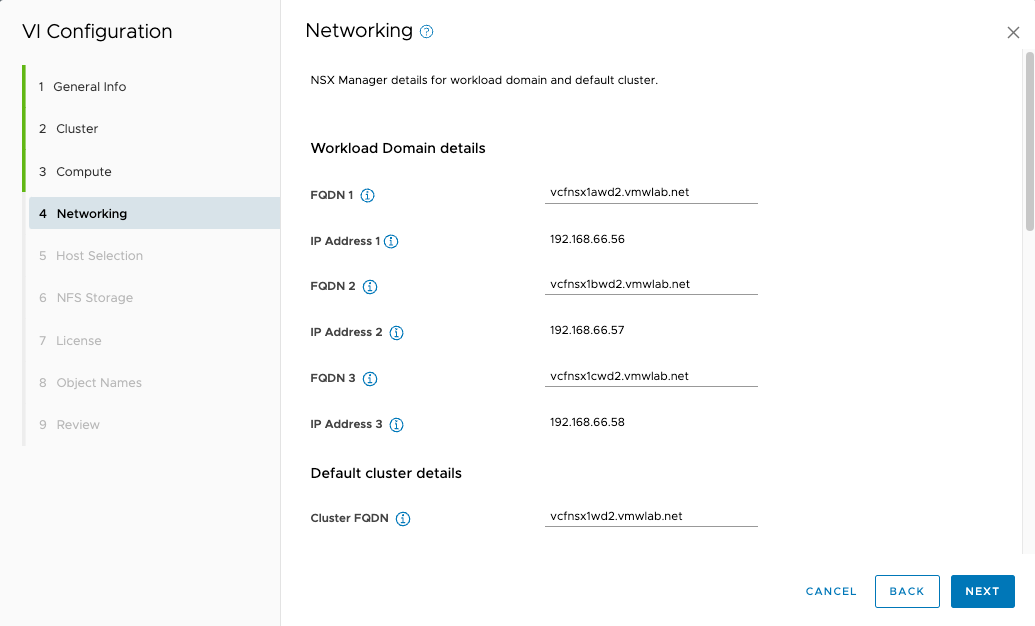
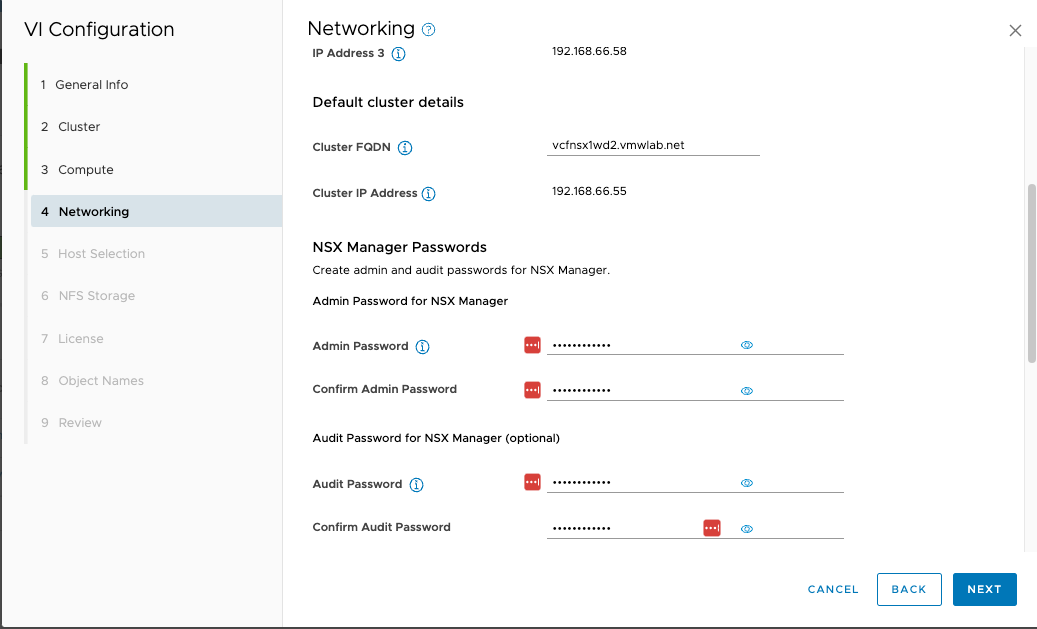
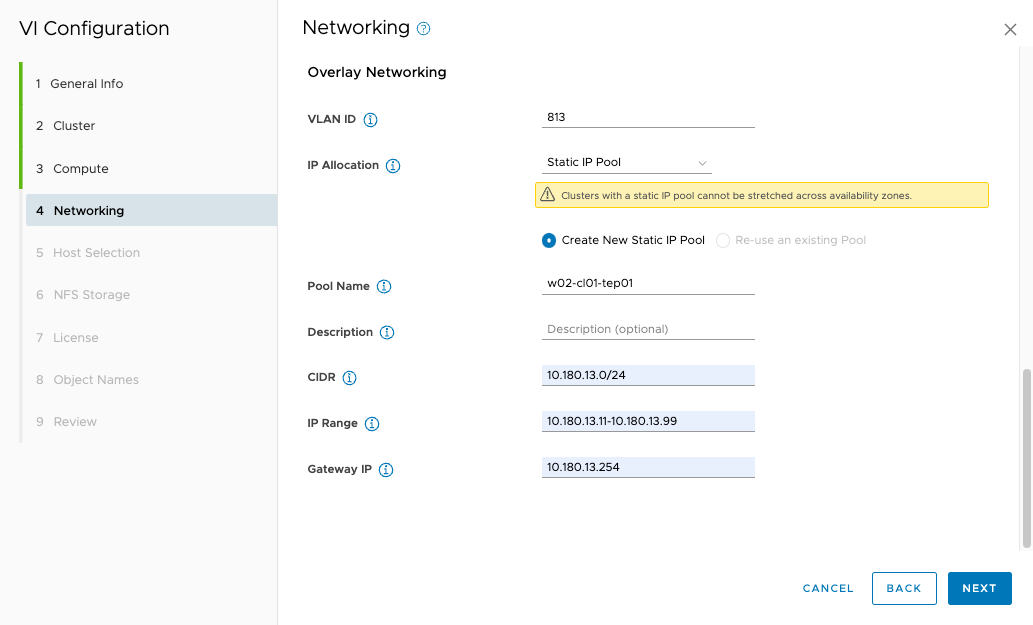
#7 输入工作负载域中NSX信息
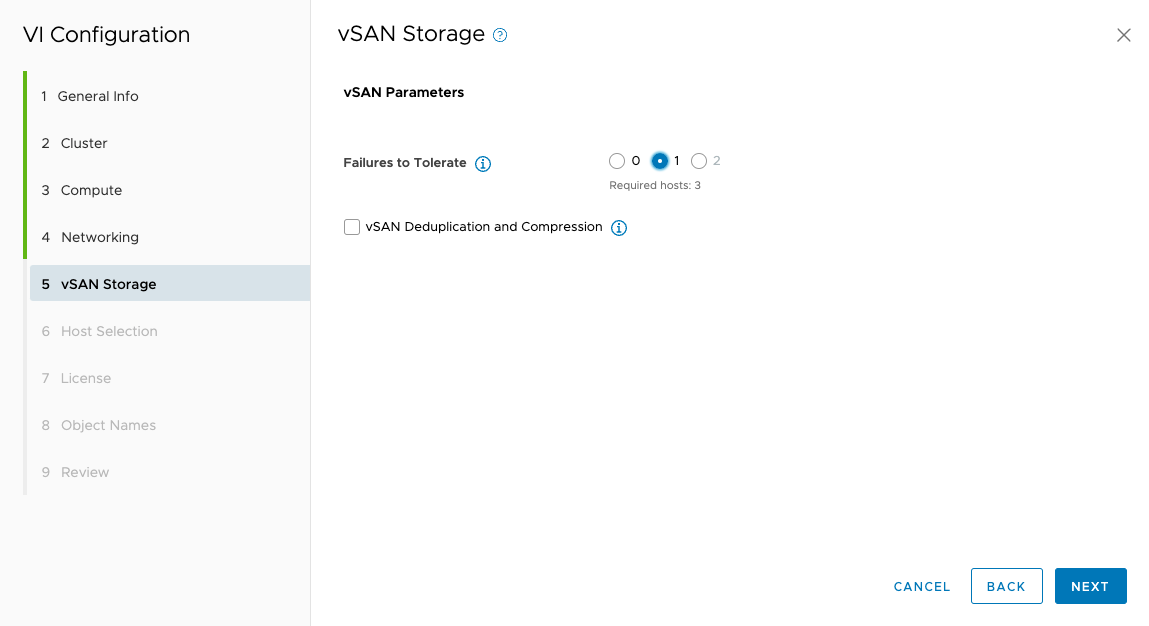
#8 选择vSAN容错参数。
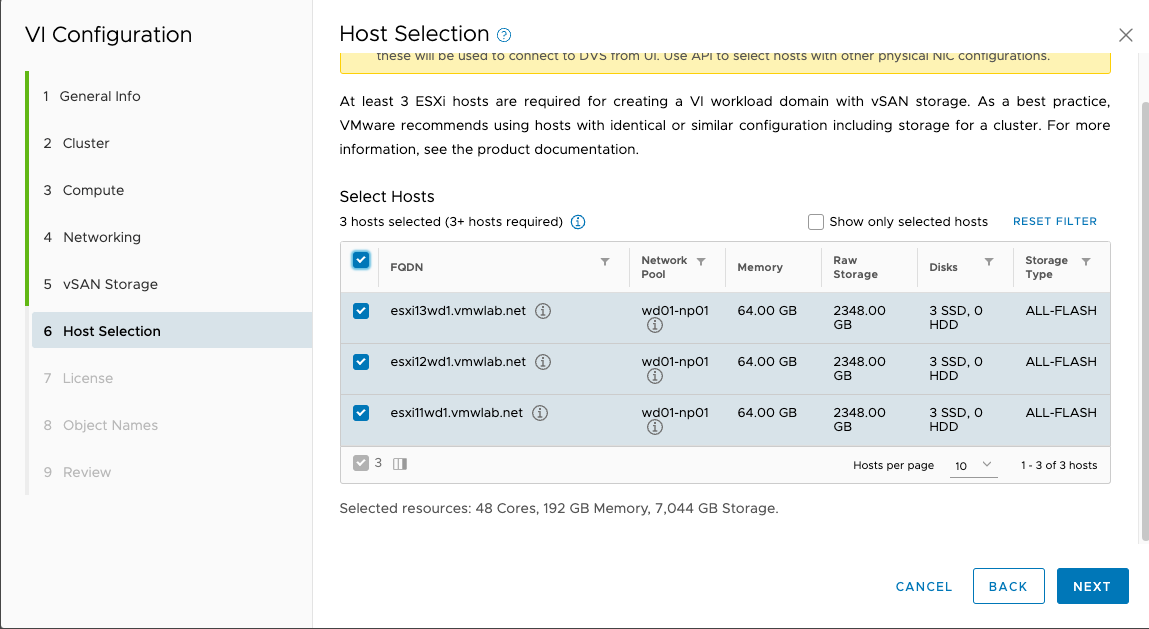
#9 选择加入工作负载域的主机。
#10 选择Licenses,此处截图略。
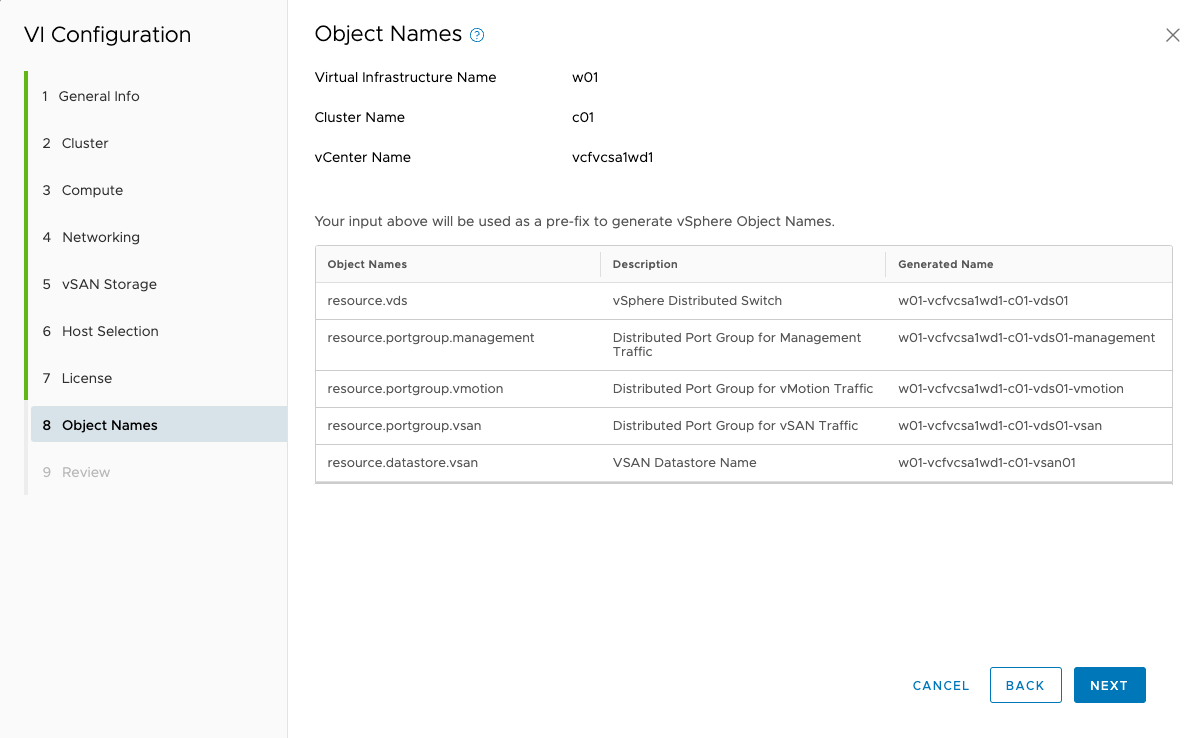
#11 自动生成对象摘要。
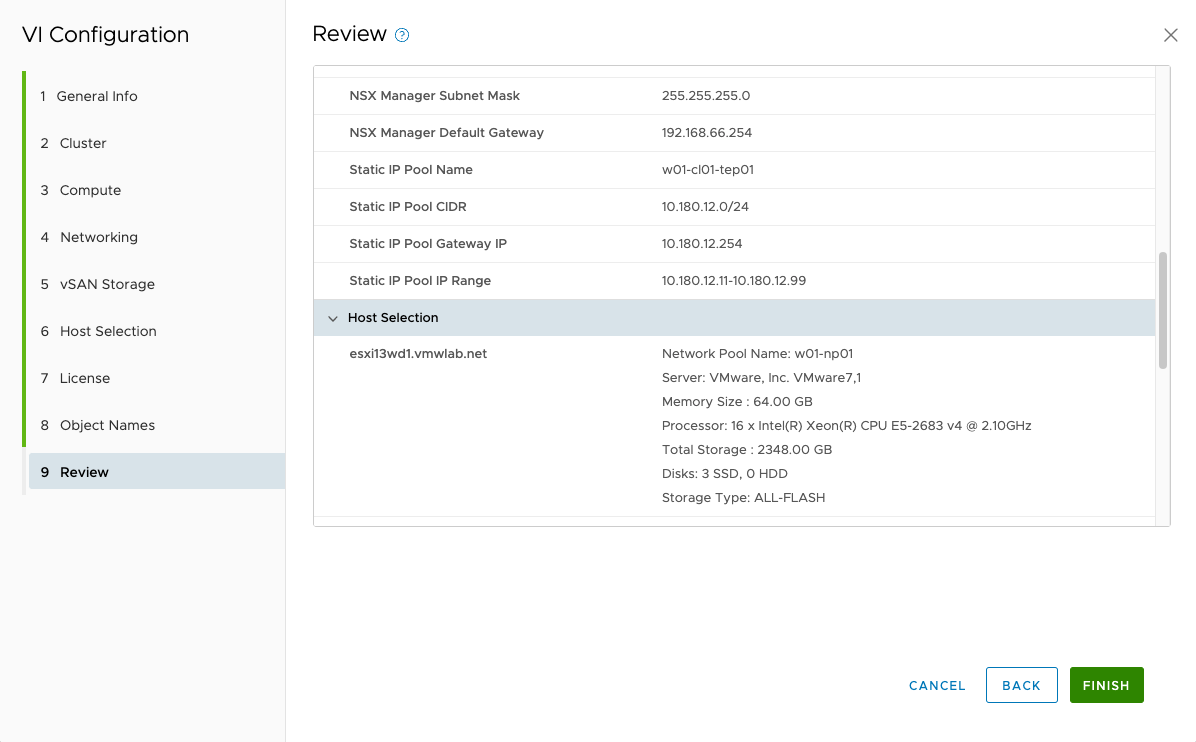
#12 开始部署
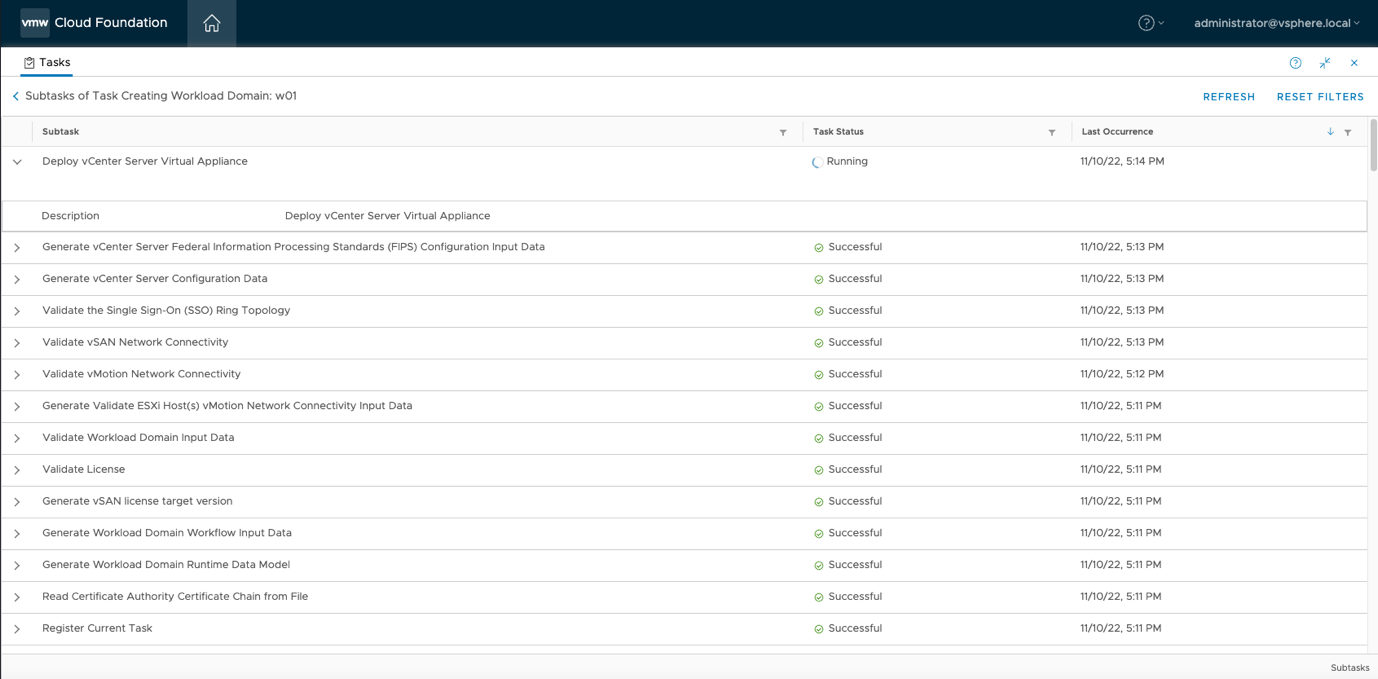
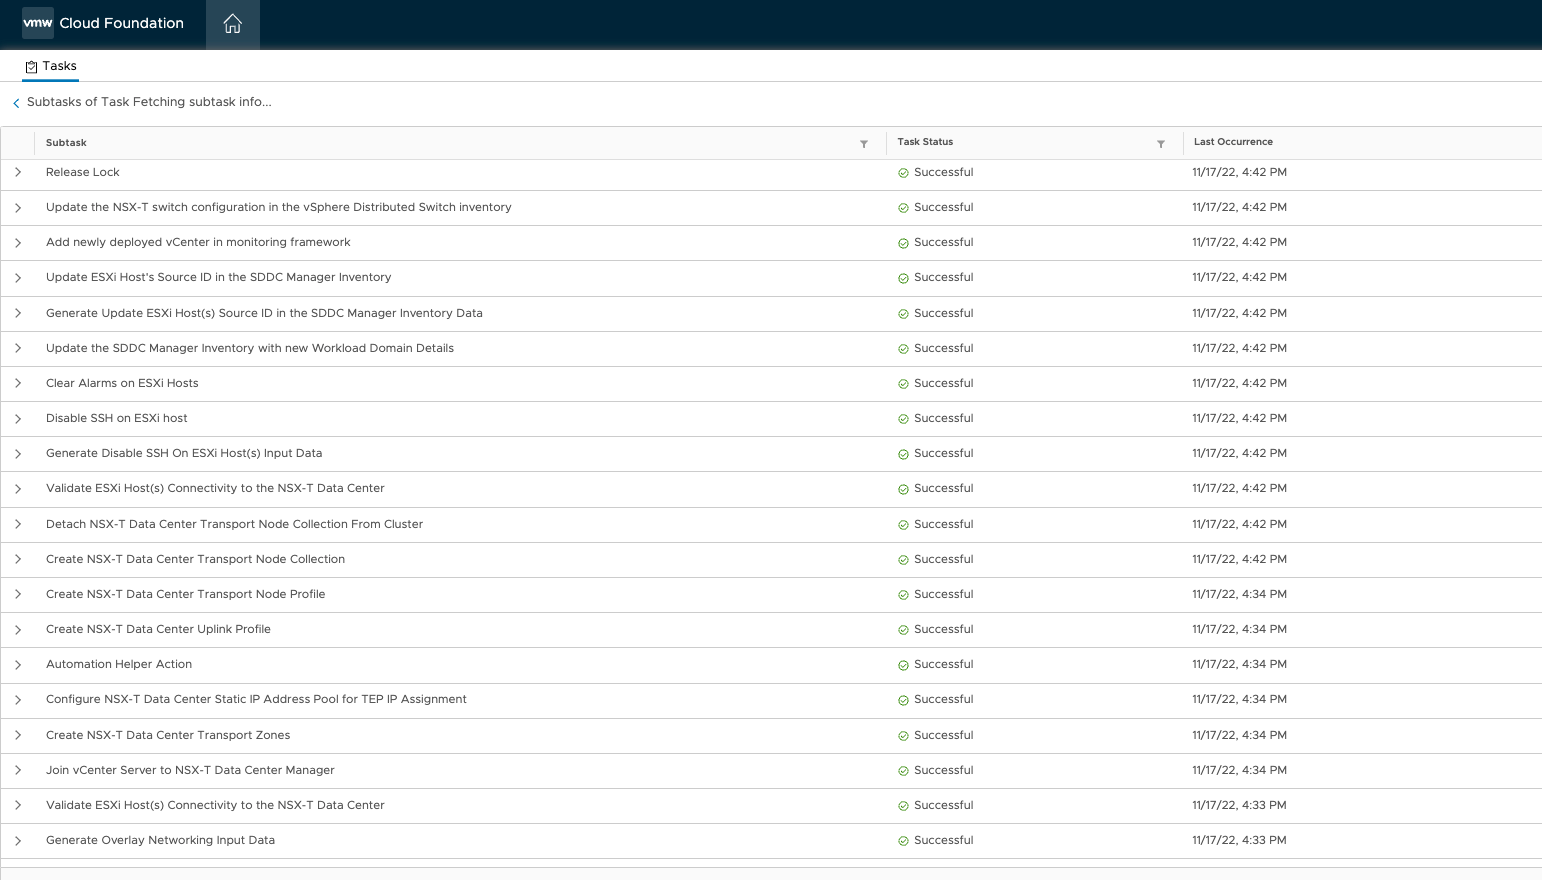
#13 安装过程中可以通过如下日志确认出错环节
| tail -f /var/log/vmware/vcf/domainmanager/domainmanager.log |
#14 开始部署
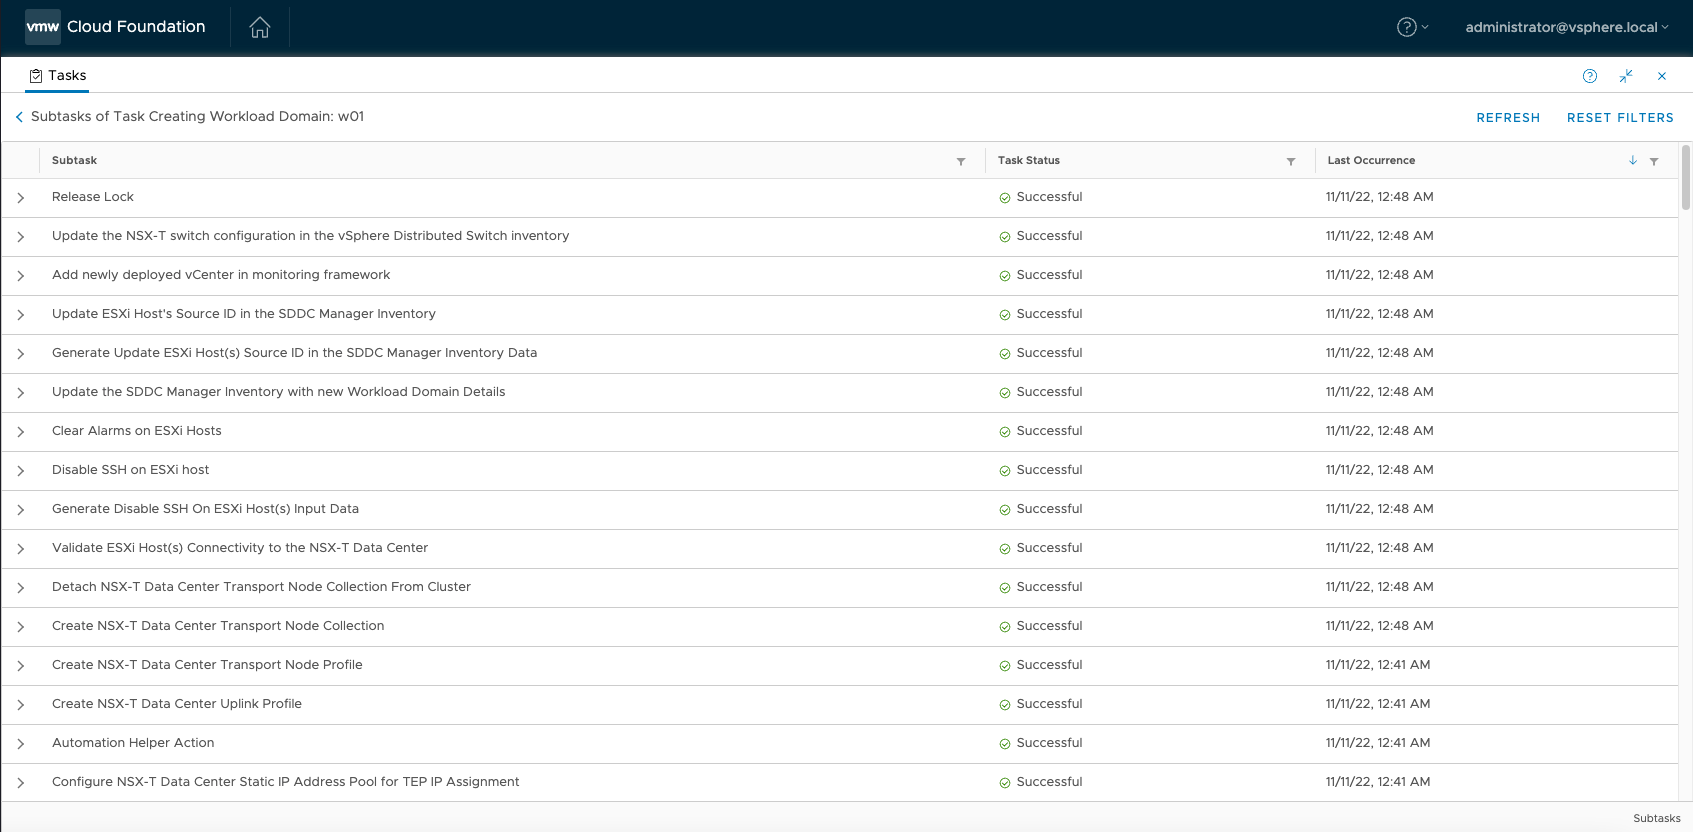
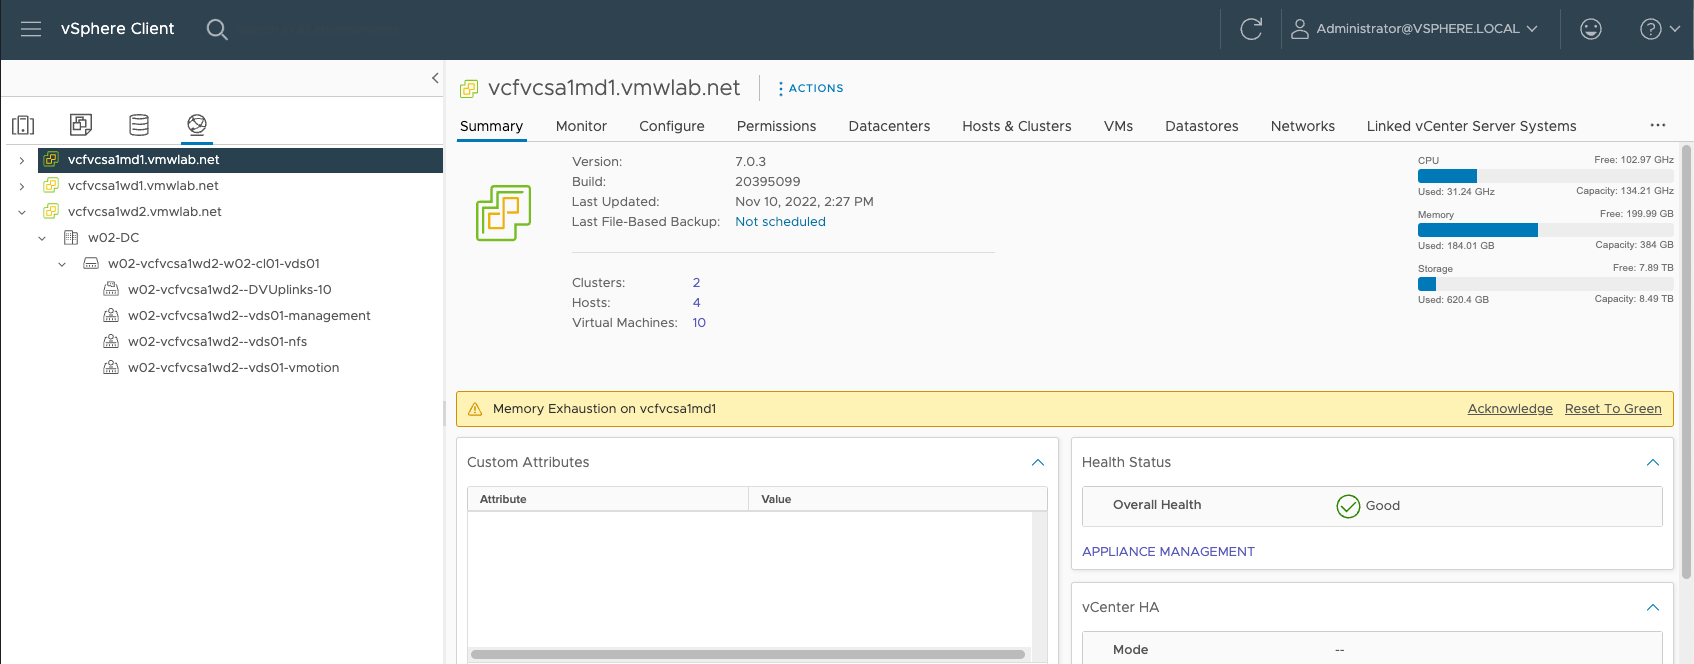
#15部署后登录管理域VC可查看实际部署哪些组件
创建vLCM Image+NFS类型的工作负载域
VCF4.5支持最小2节点的工作负载域,但工作负载域集群更新类型需要调整为vLCM Image,缺省为vLCM Baseline。本小结将演示vLCM Image+ NFS存储类型的2节点工作负载域部署步骤。(注意:主机投产过程不在赘述,请参阅7.1小结)
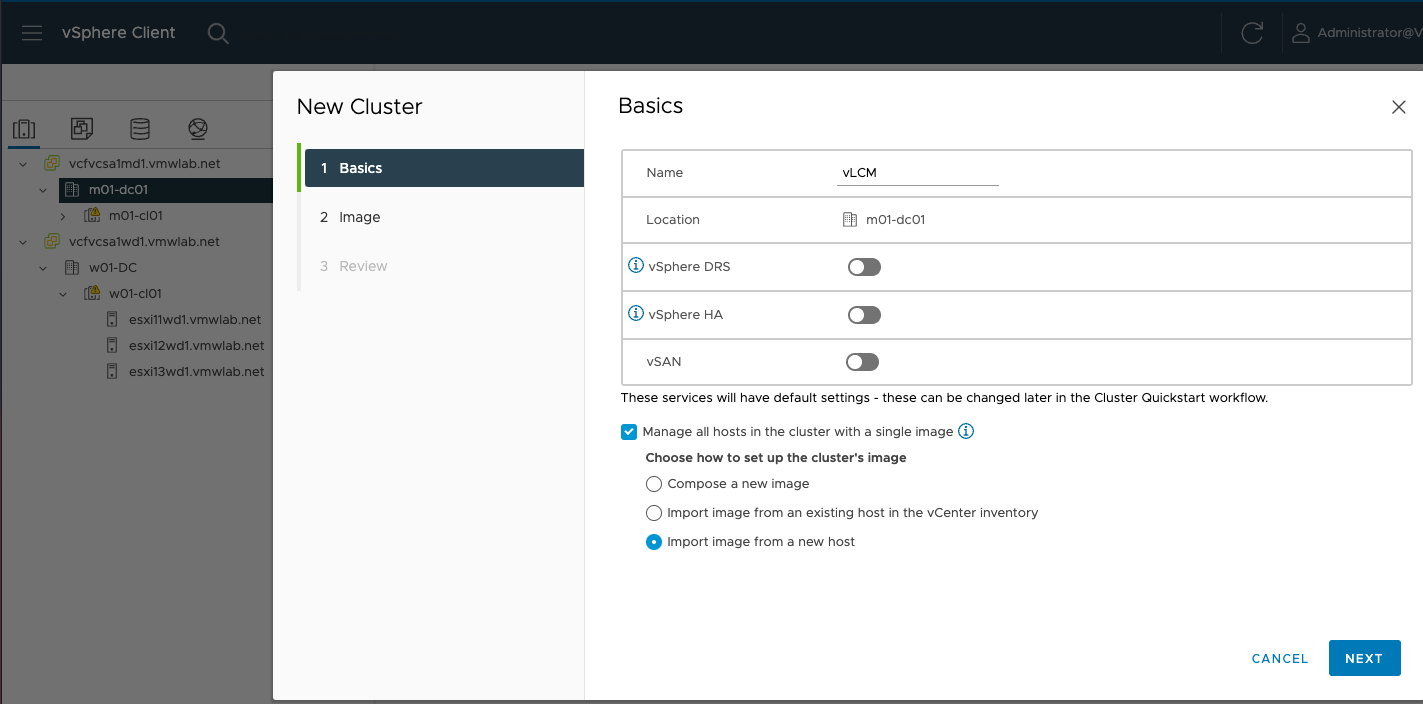
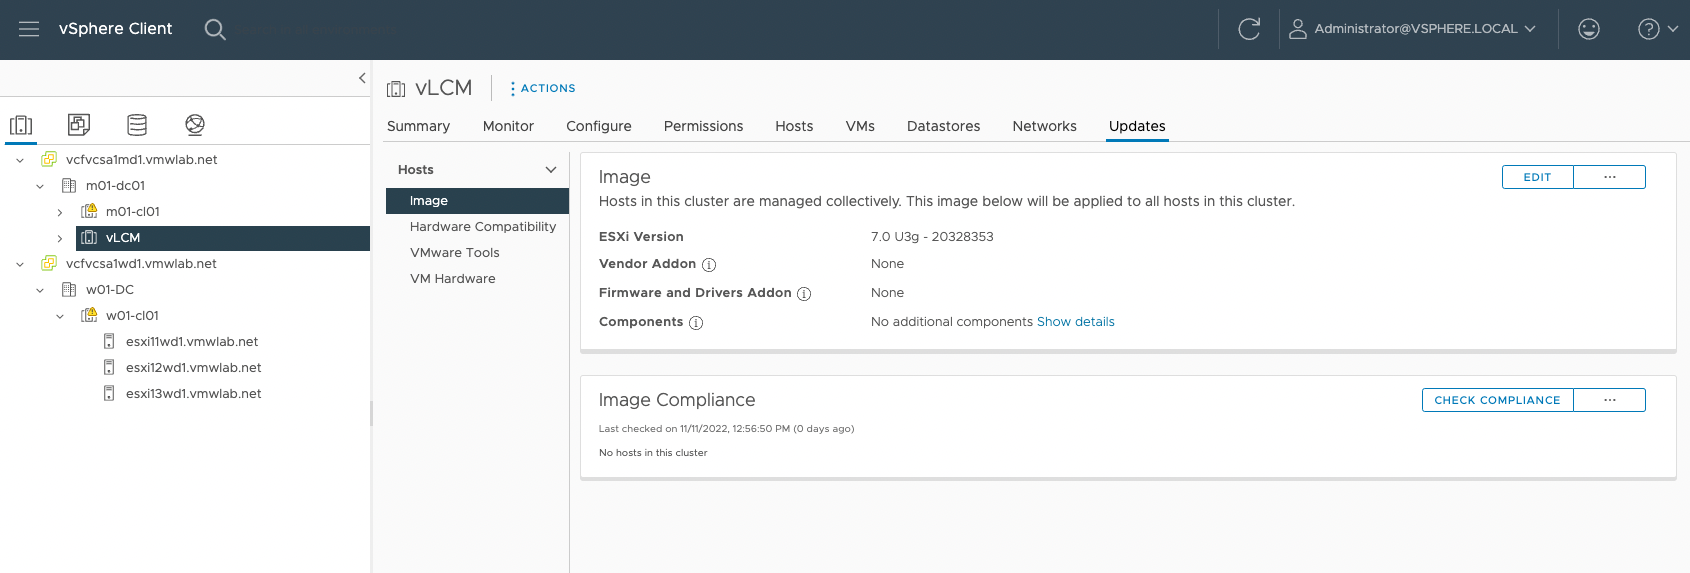
#1 在管理域集群创建一个空集群,并配置Update为vLCM Image.
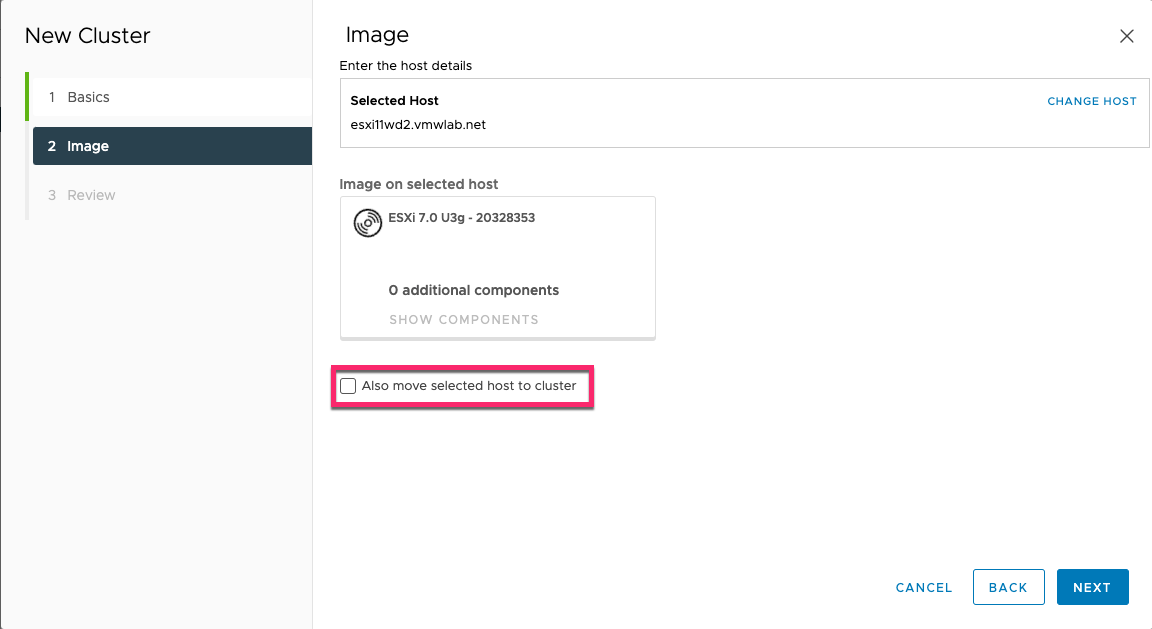
#2不要勾选Also move selected host to cluster.
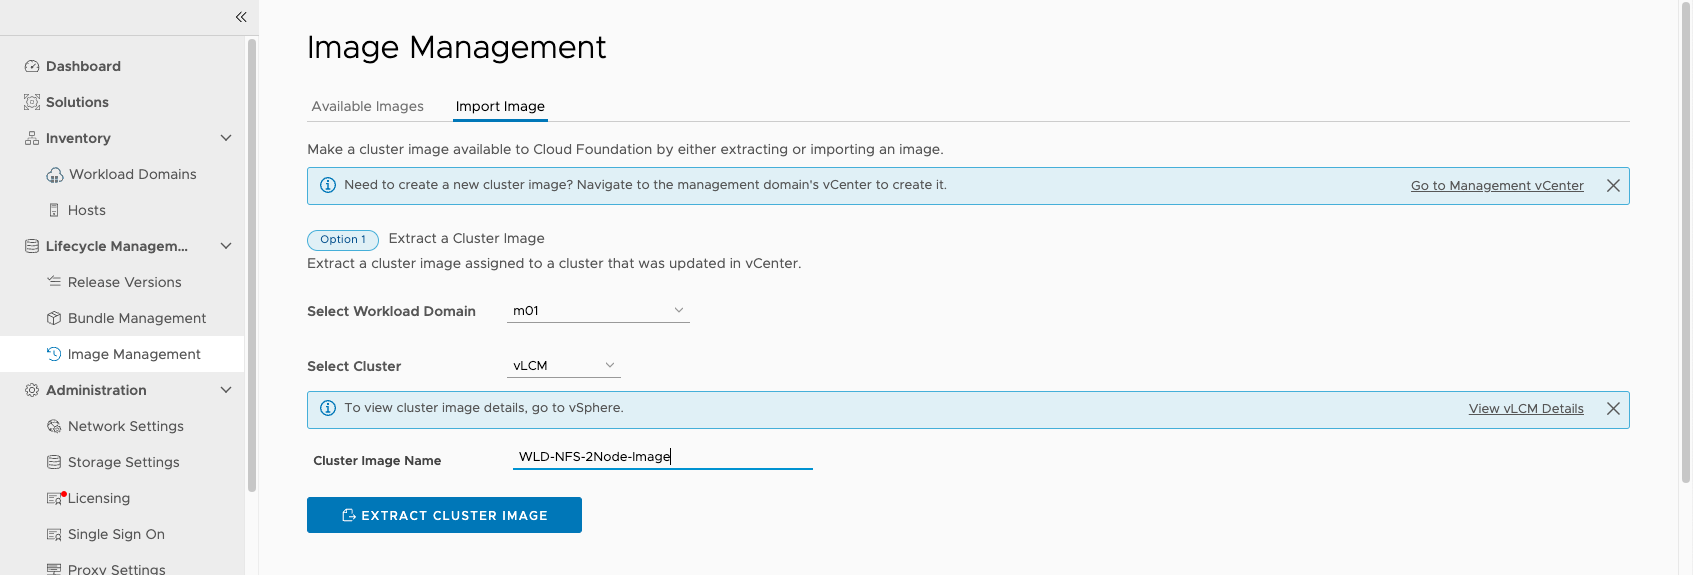
#3在SDDC Manager 导入,集群选择刚才在管理域创建的空集群.
Note:导入完成后即可删除刚才创建的空集群
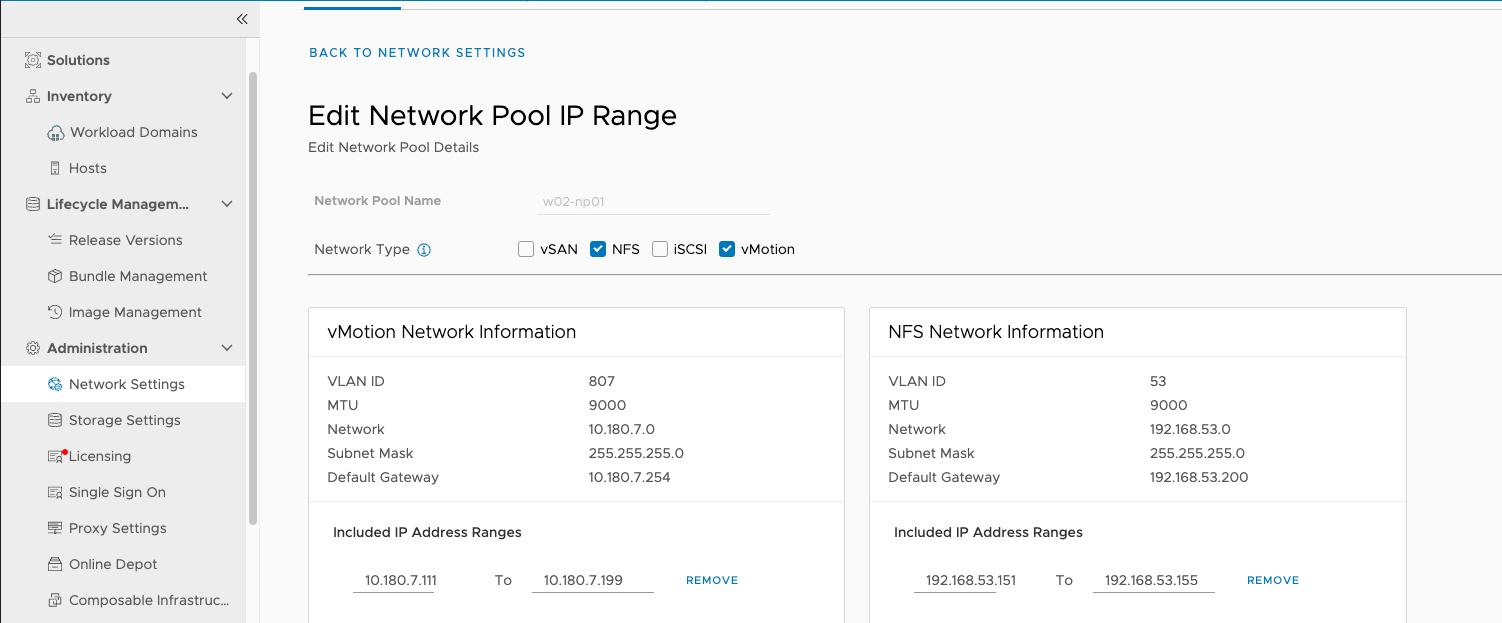
#4 定义网络池,选择vMotion、NFS
#5开始创建工作负载域
#6选择存储类型为NFS
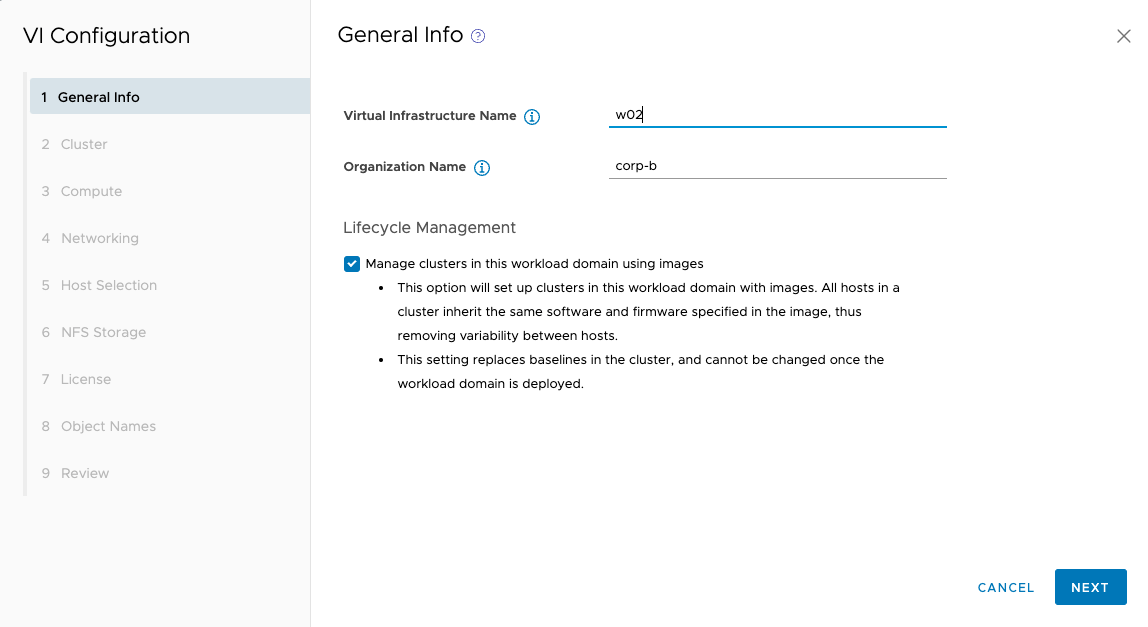
#7配置工作负载域名称,勾选升级选项为vLCM Image
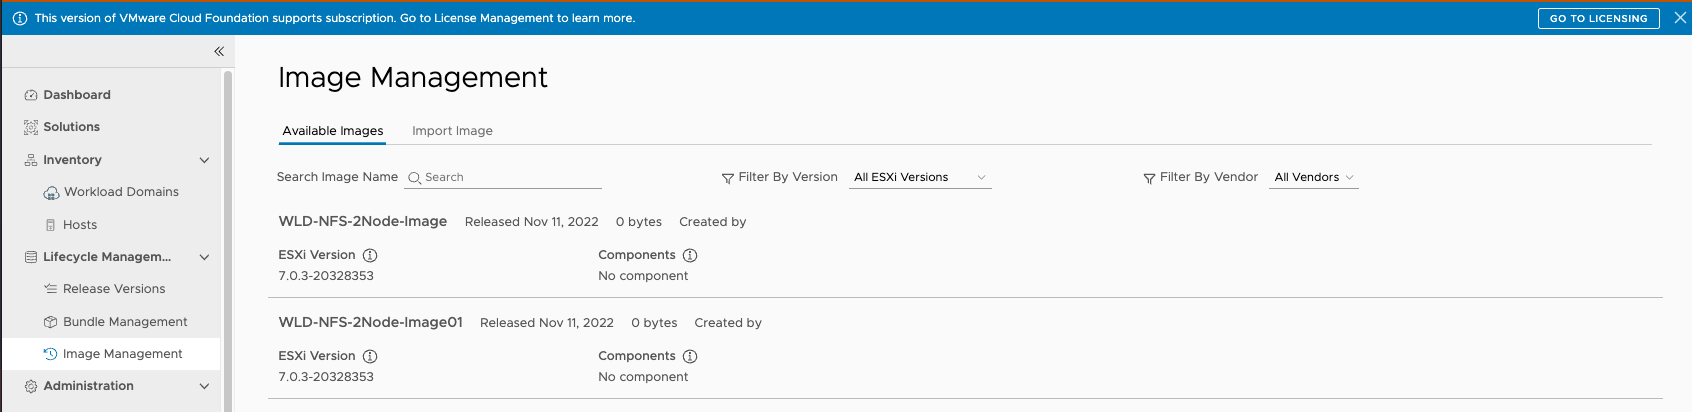
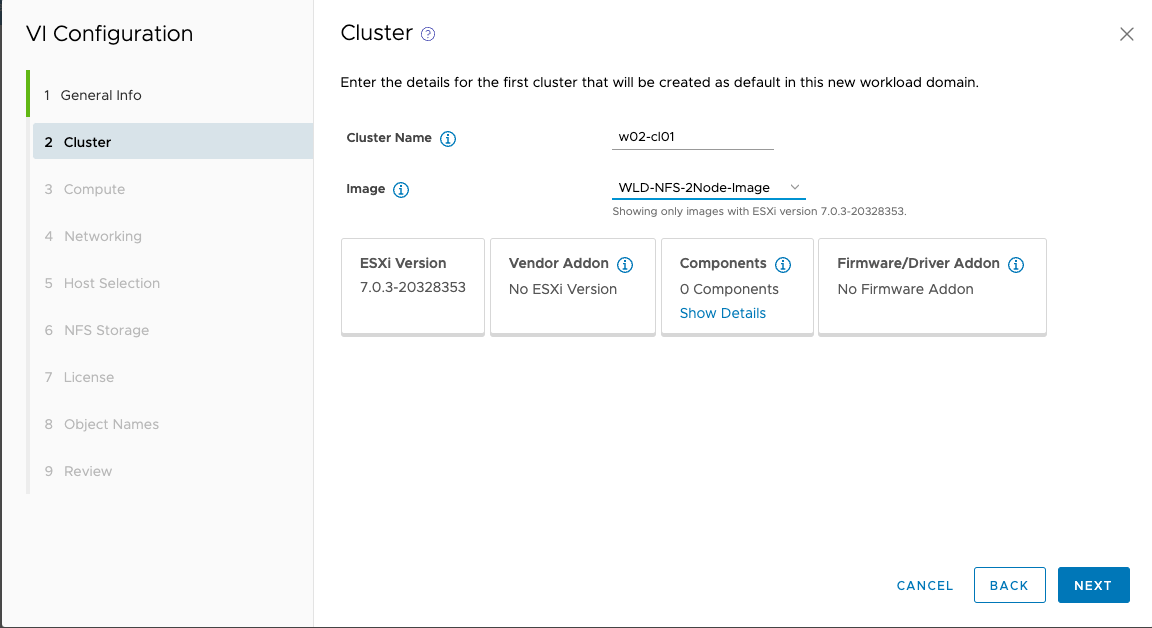
#8选择刚才导入的镜像
#9输入VC信息
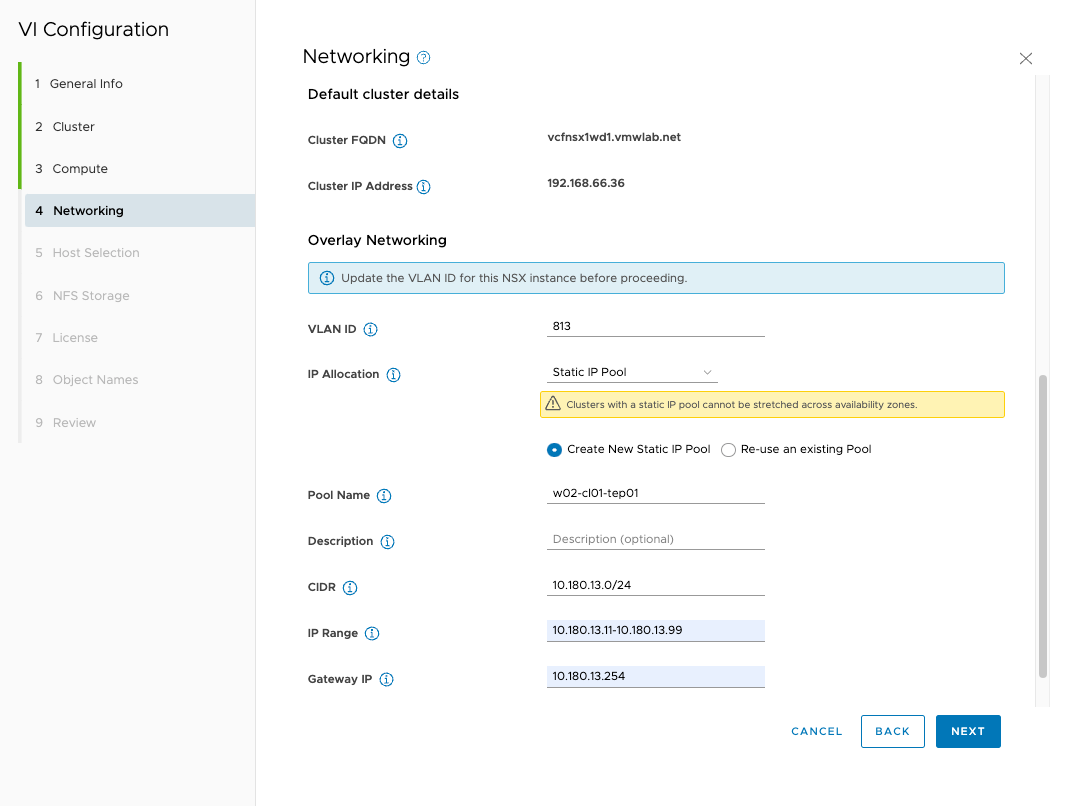
#10输入NSX网络信息
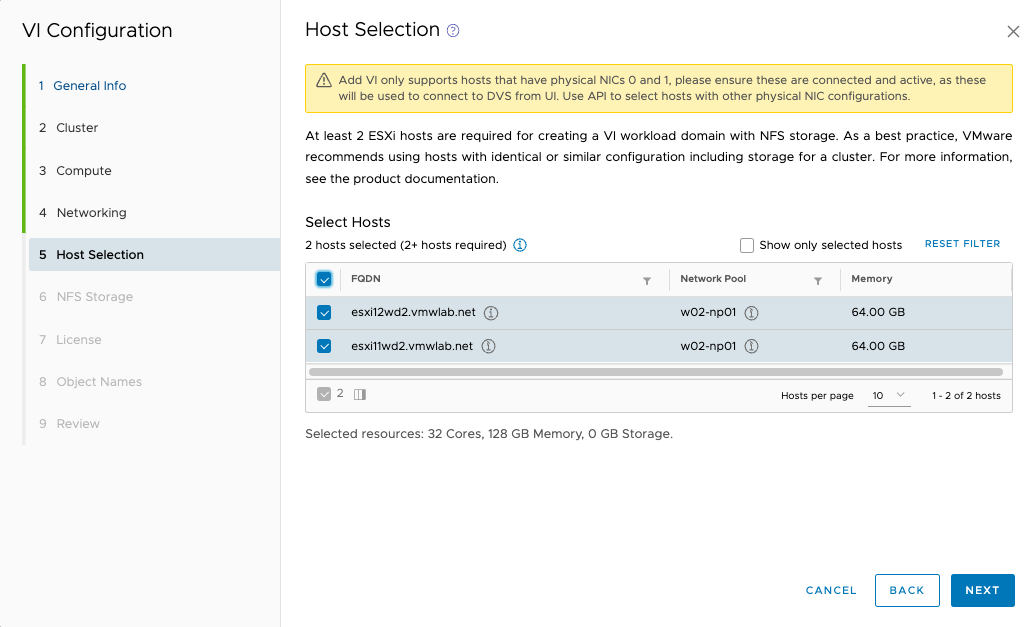
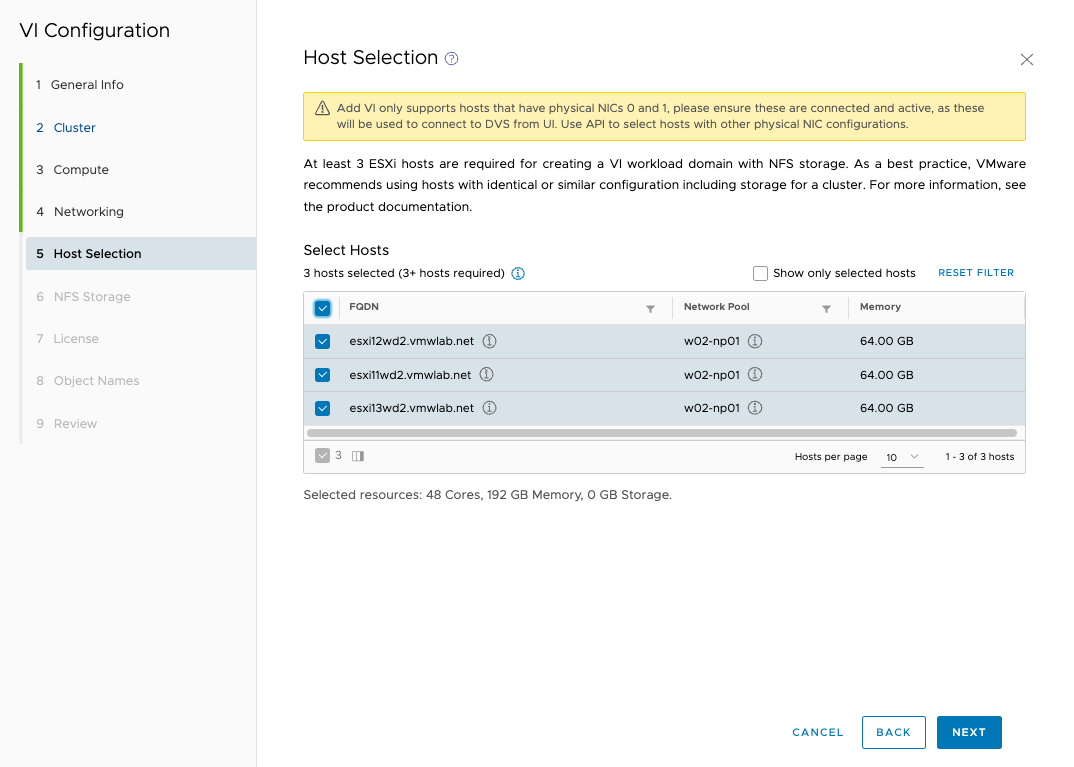
#11选择加入工作负载域的主机
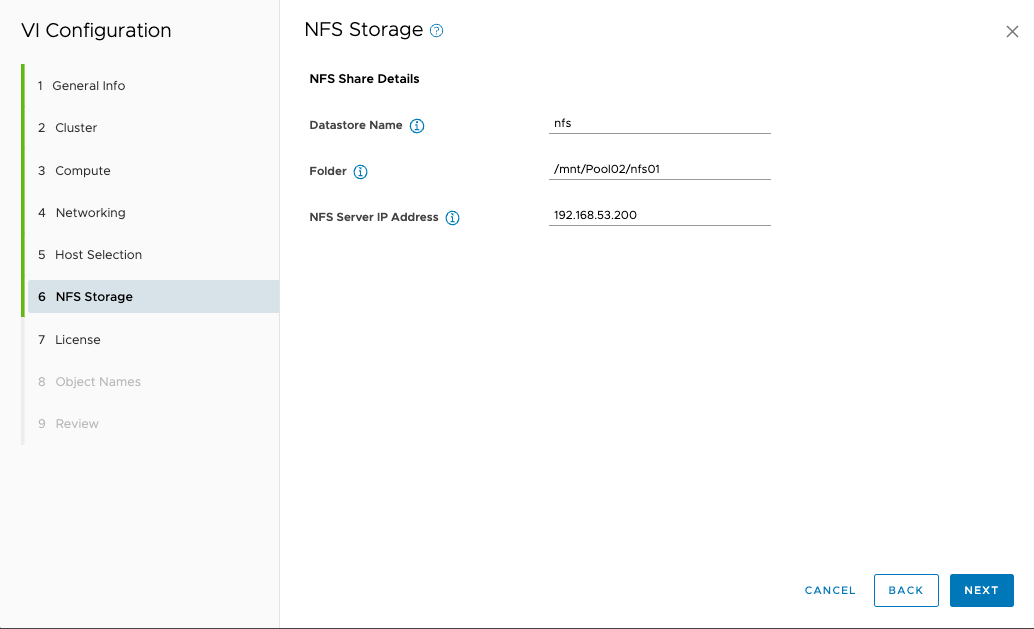
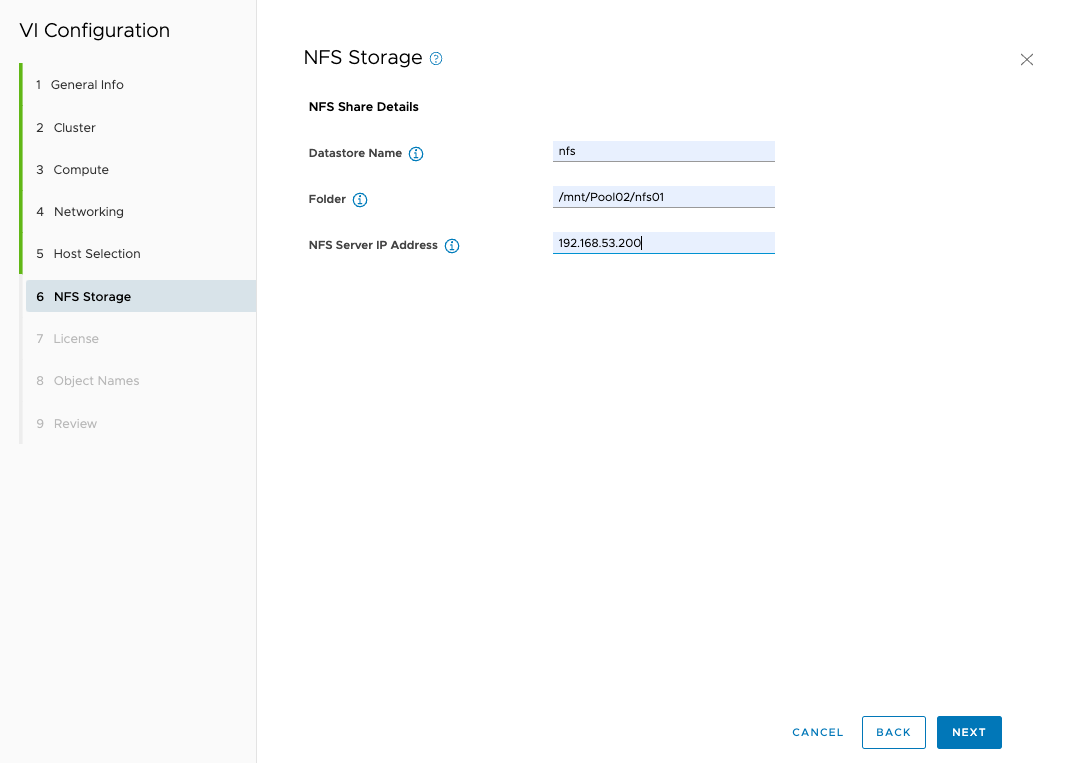
#12输入NFS存储信息
#13 License选择截图略
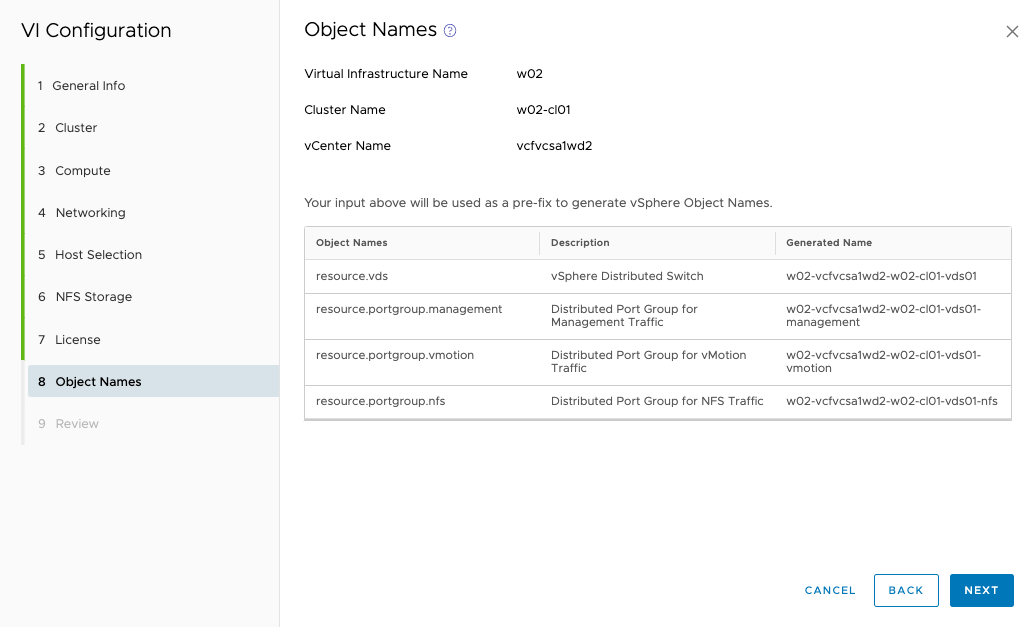
#14 查看自动生成的对象信息
#15 w02工作负载域部署完成
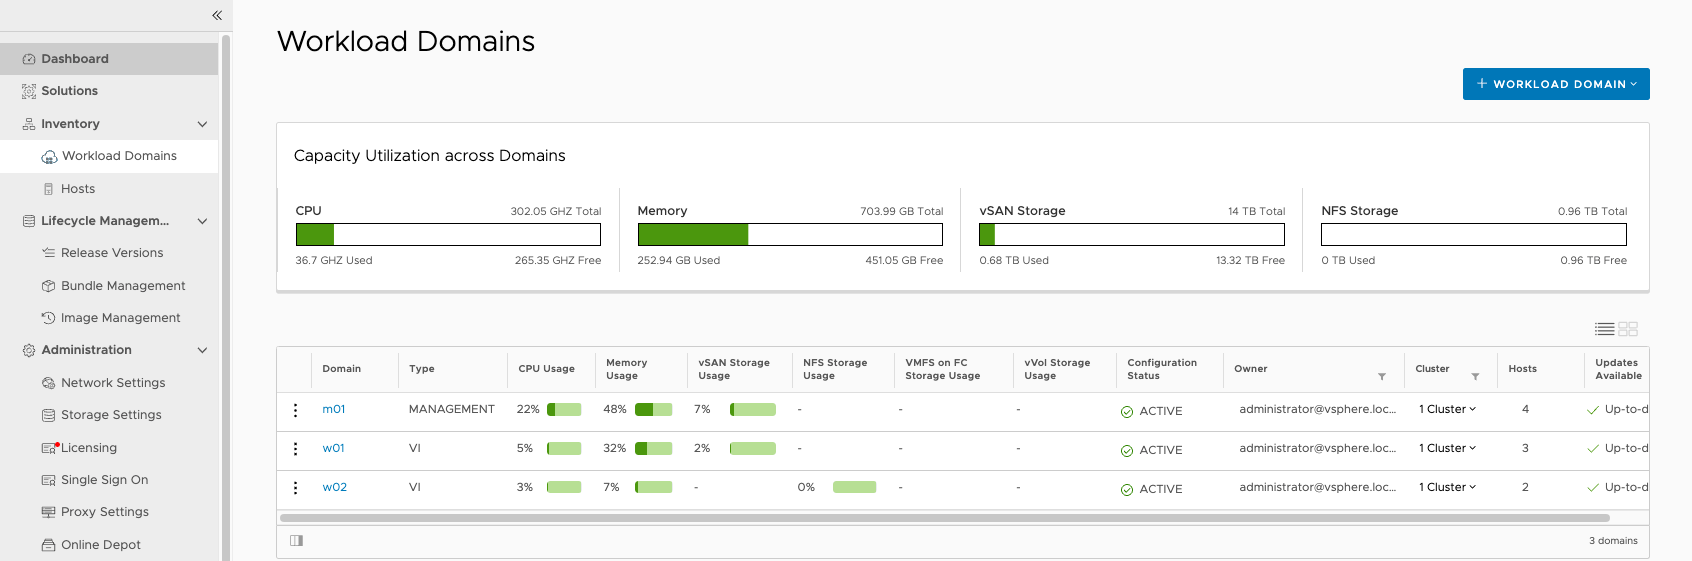
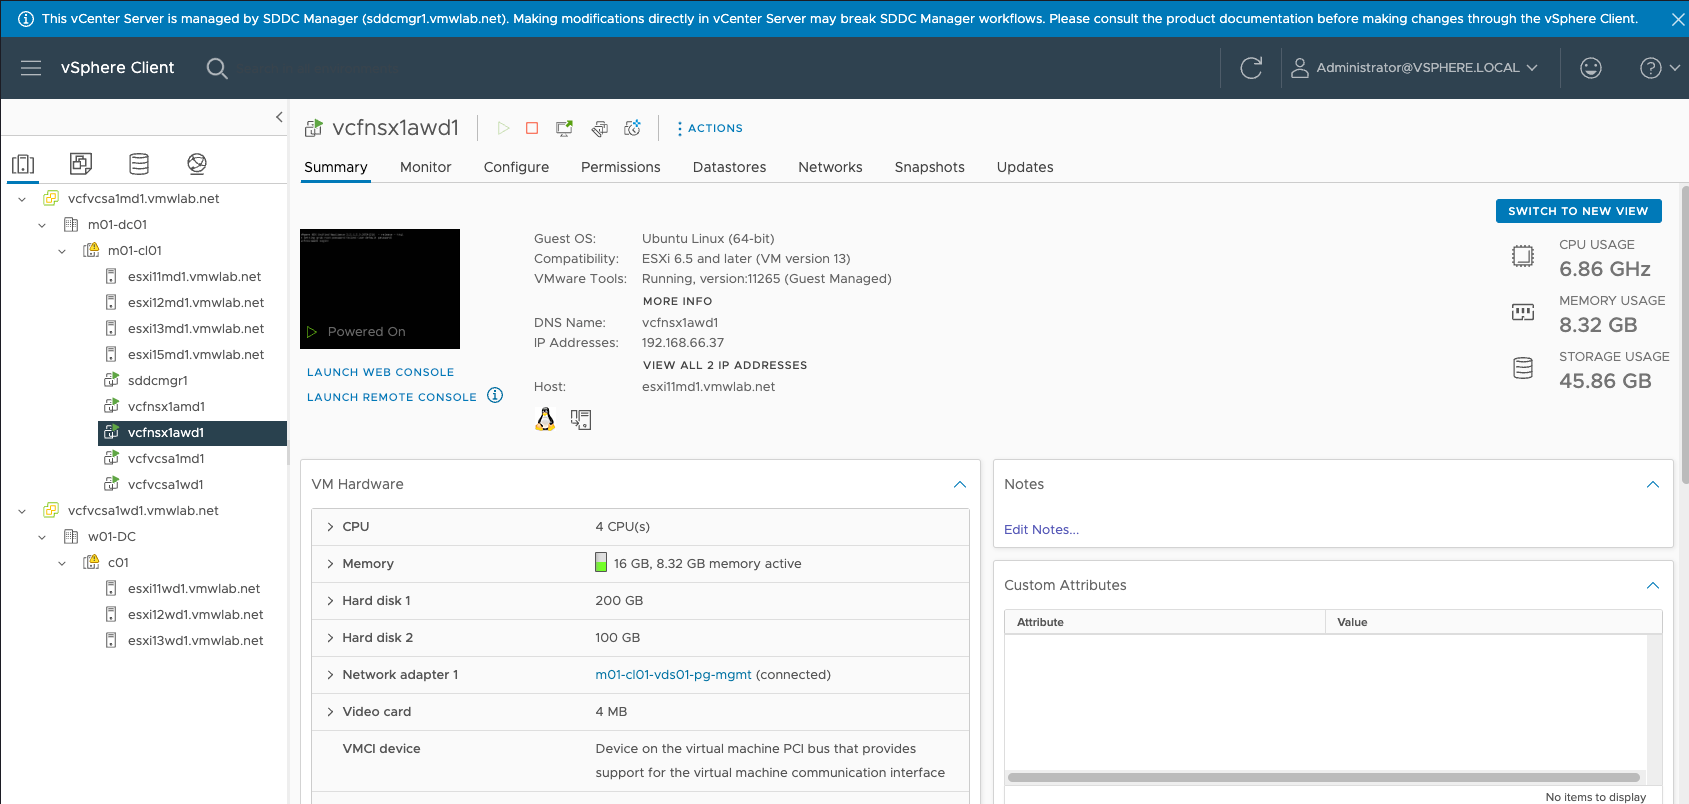
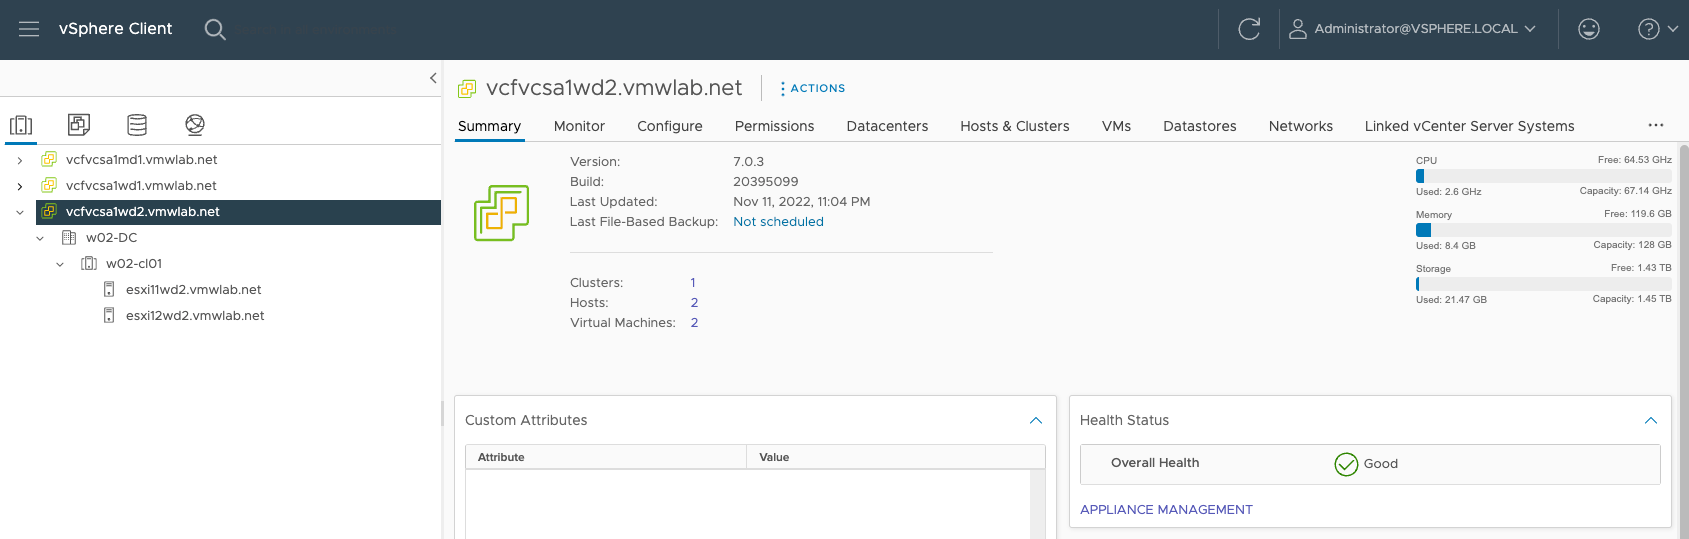
#16 登录VC查看部署情况
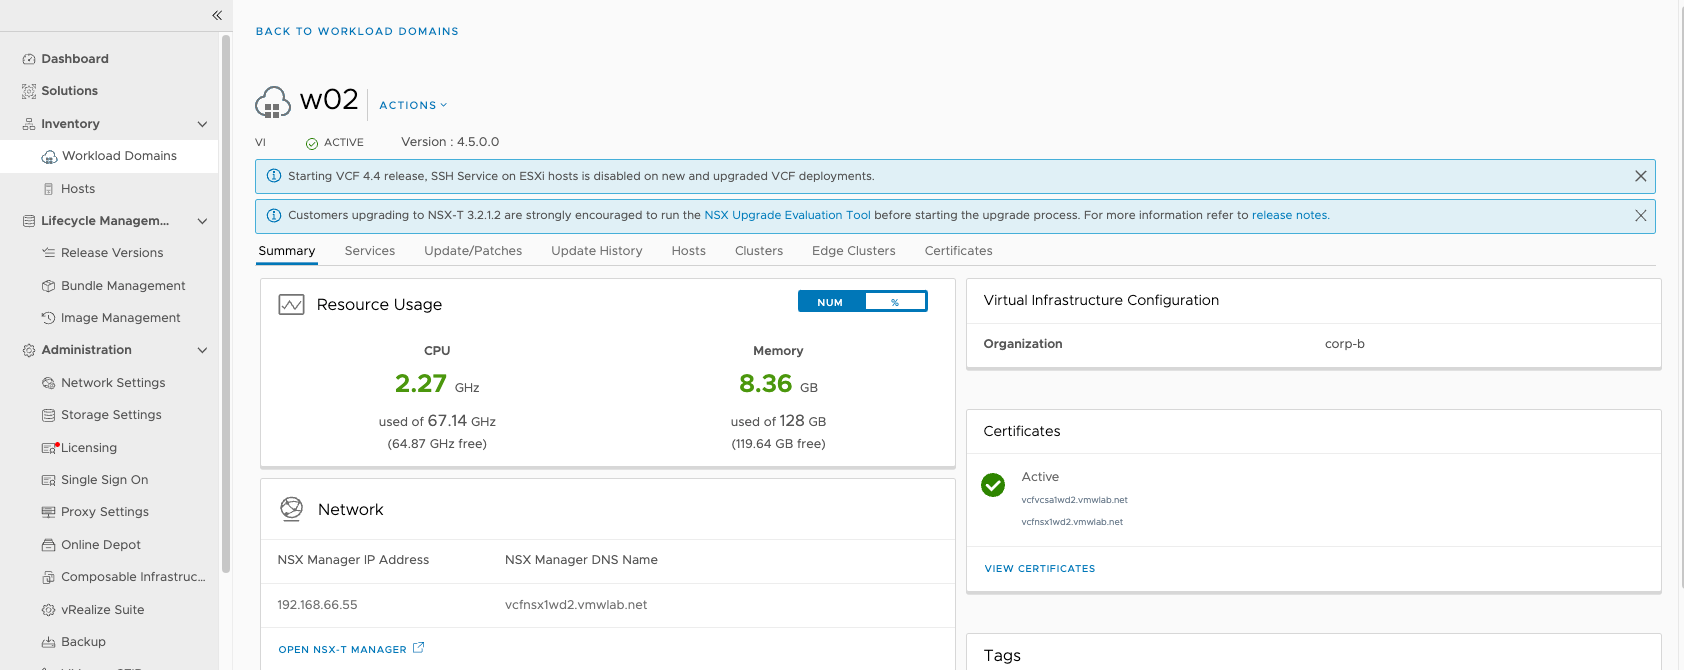
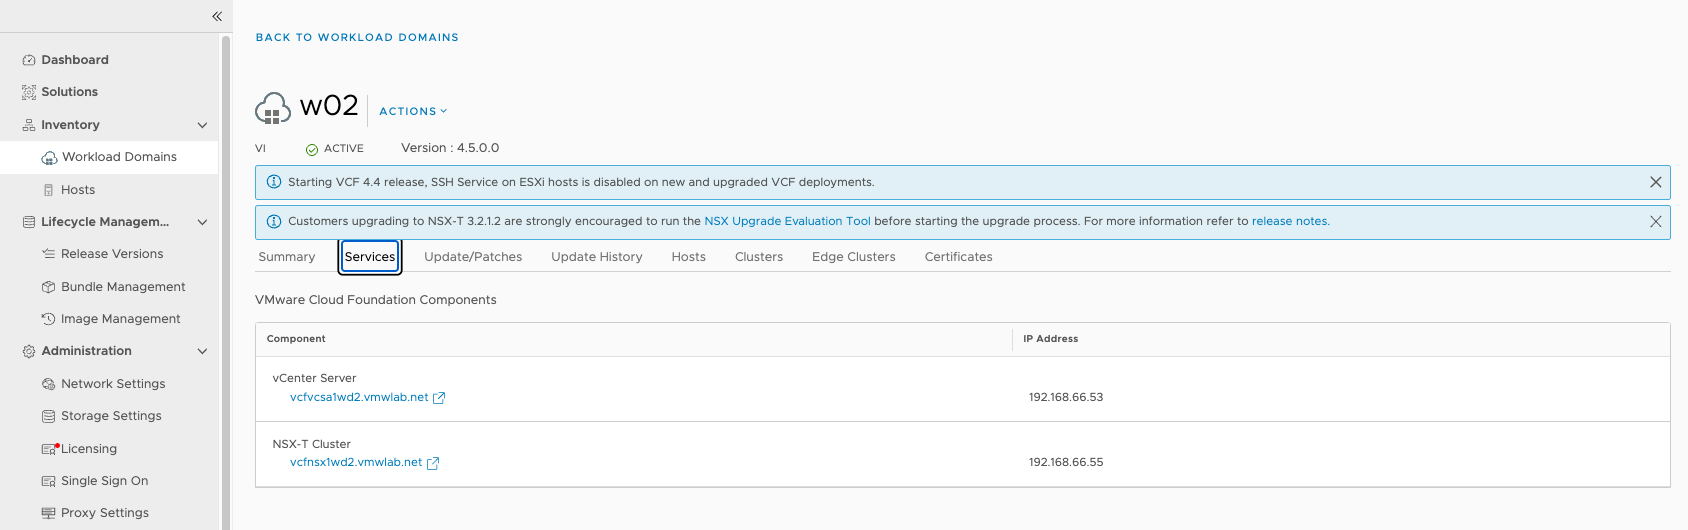
多工作负载域共享NSX
NSX在工作负载域之间共享的其中一个条件是,工作负载域需要有相同的更新策略,本小结创建新的工作负载域w02,但共享w01中的nsx实例
#1创建工作负载域

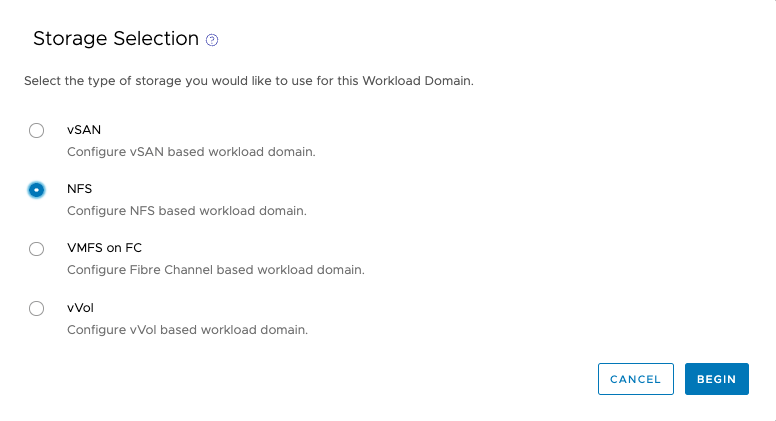
#2选择存储类型
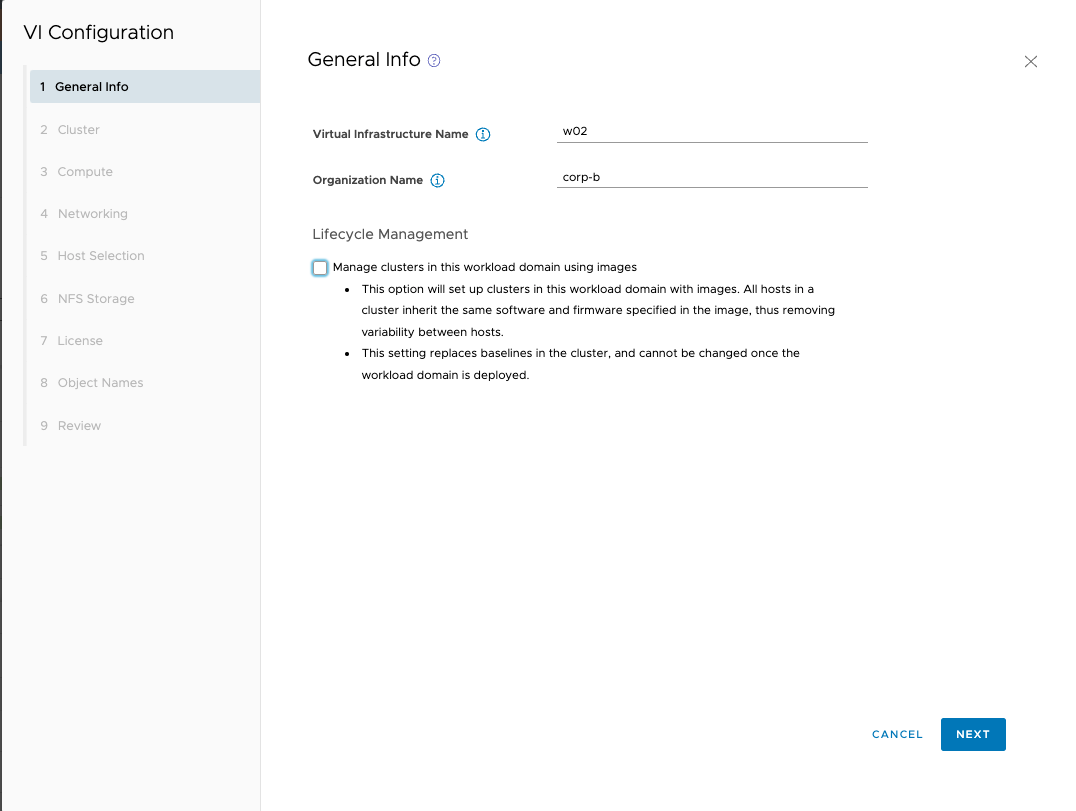
#3 添加工作负载域名称
#4 配置集群名称

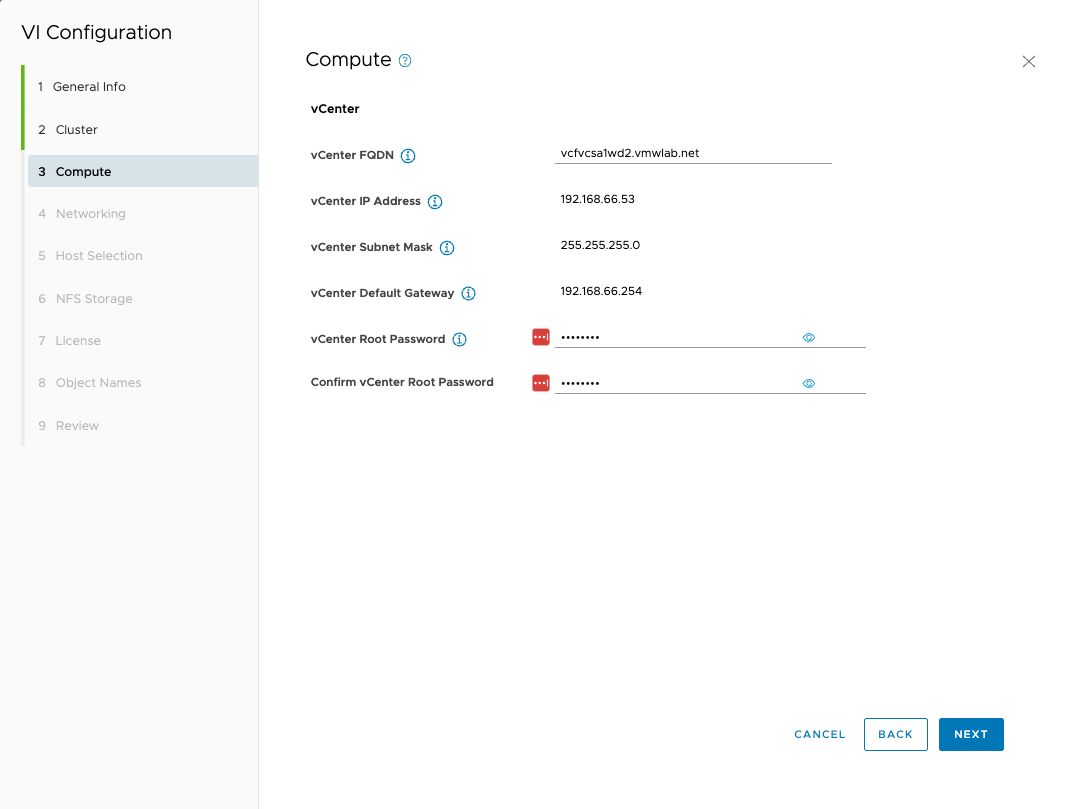
#5 输入VC信息
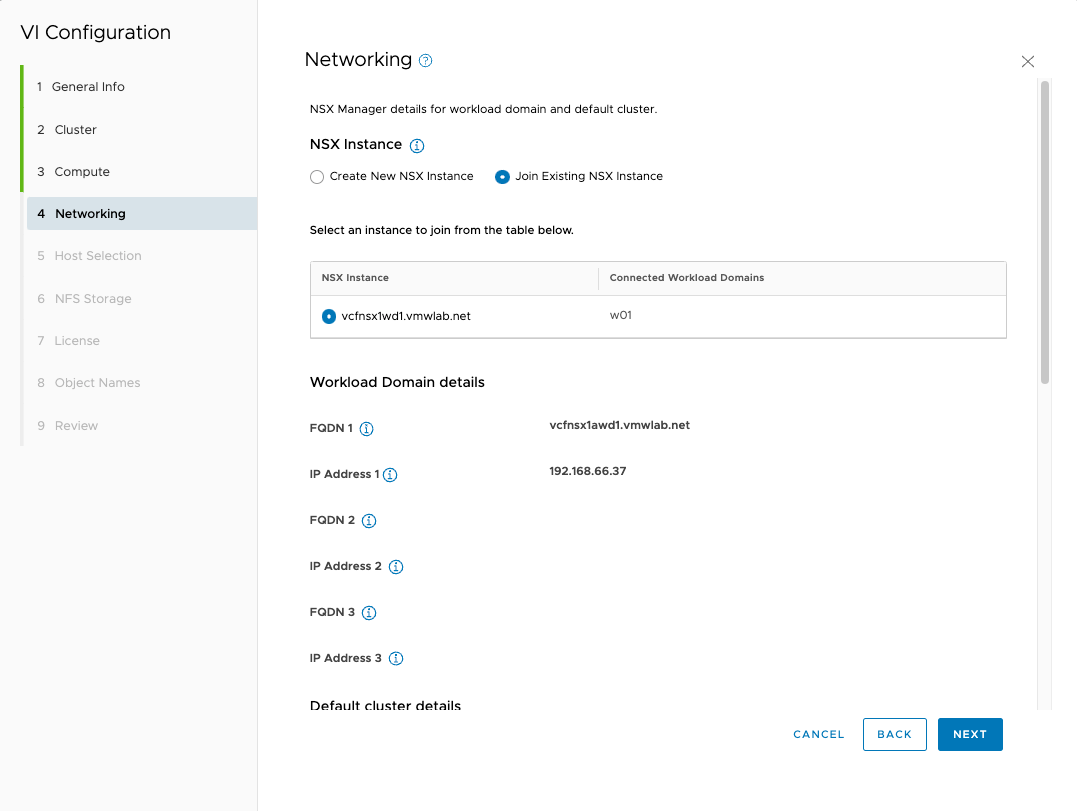
#6 加入现有的NSX实例(此NSX实例为工作负载域w01中的NSX)
#7添加主机到工作负载域
#8 输入NFS存储信息
#9 License 选择,截图略
#10 查看自动生成的对象信息

#11 开始部署

通过API创建工作负载域
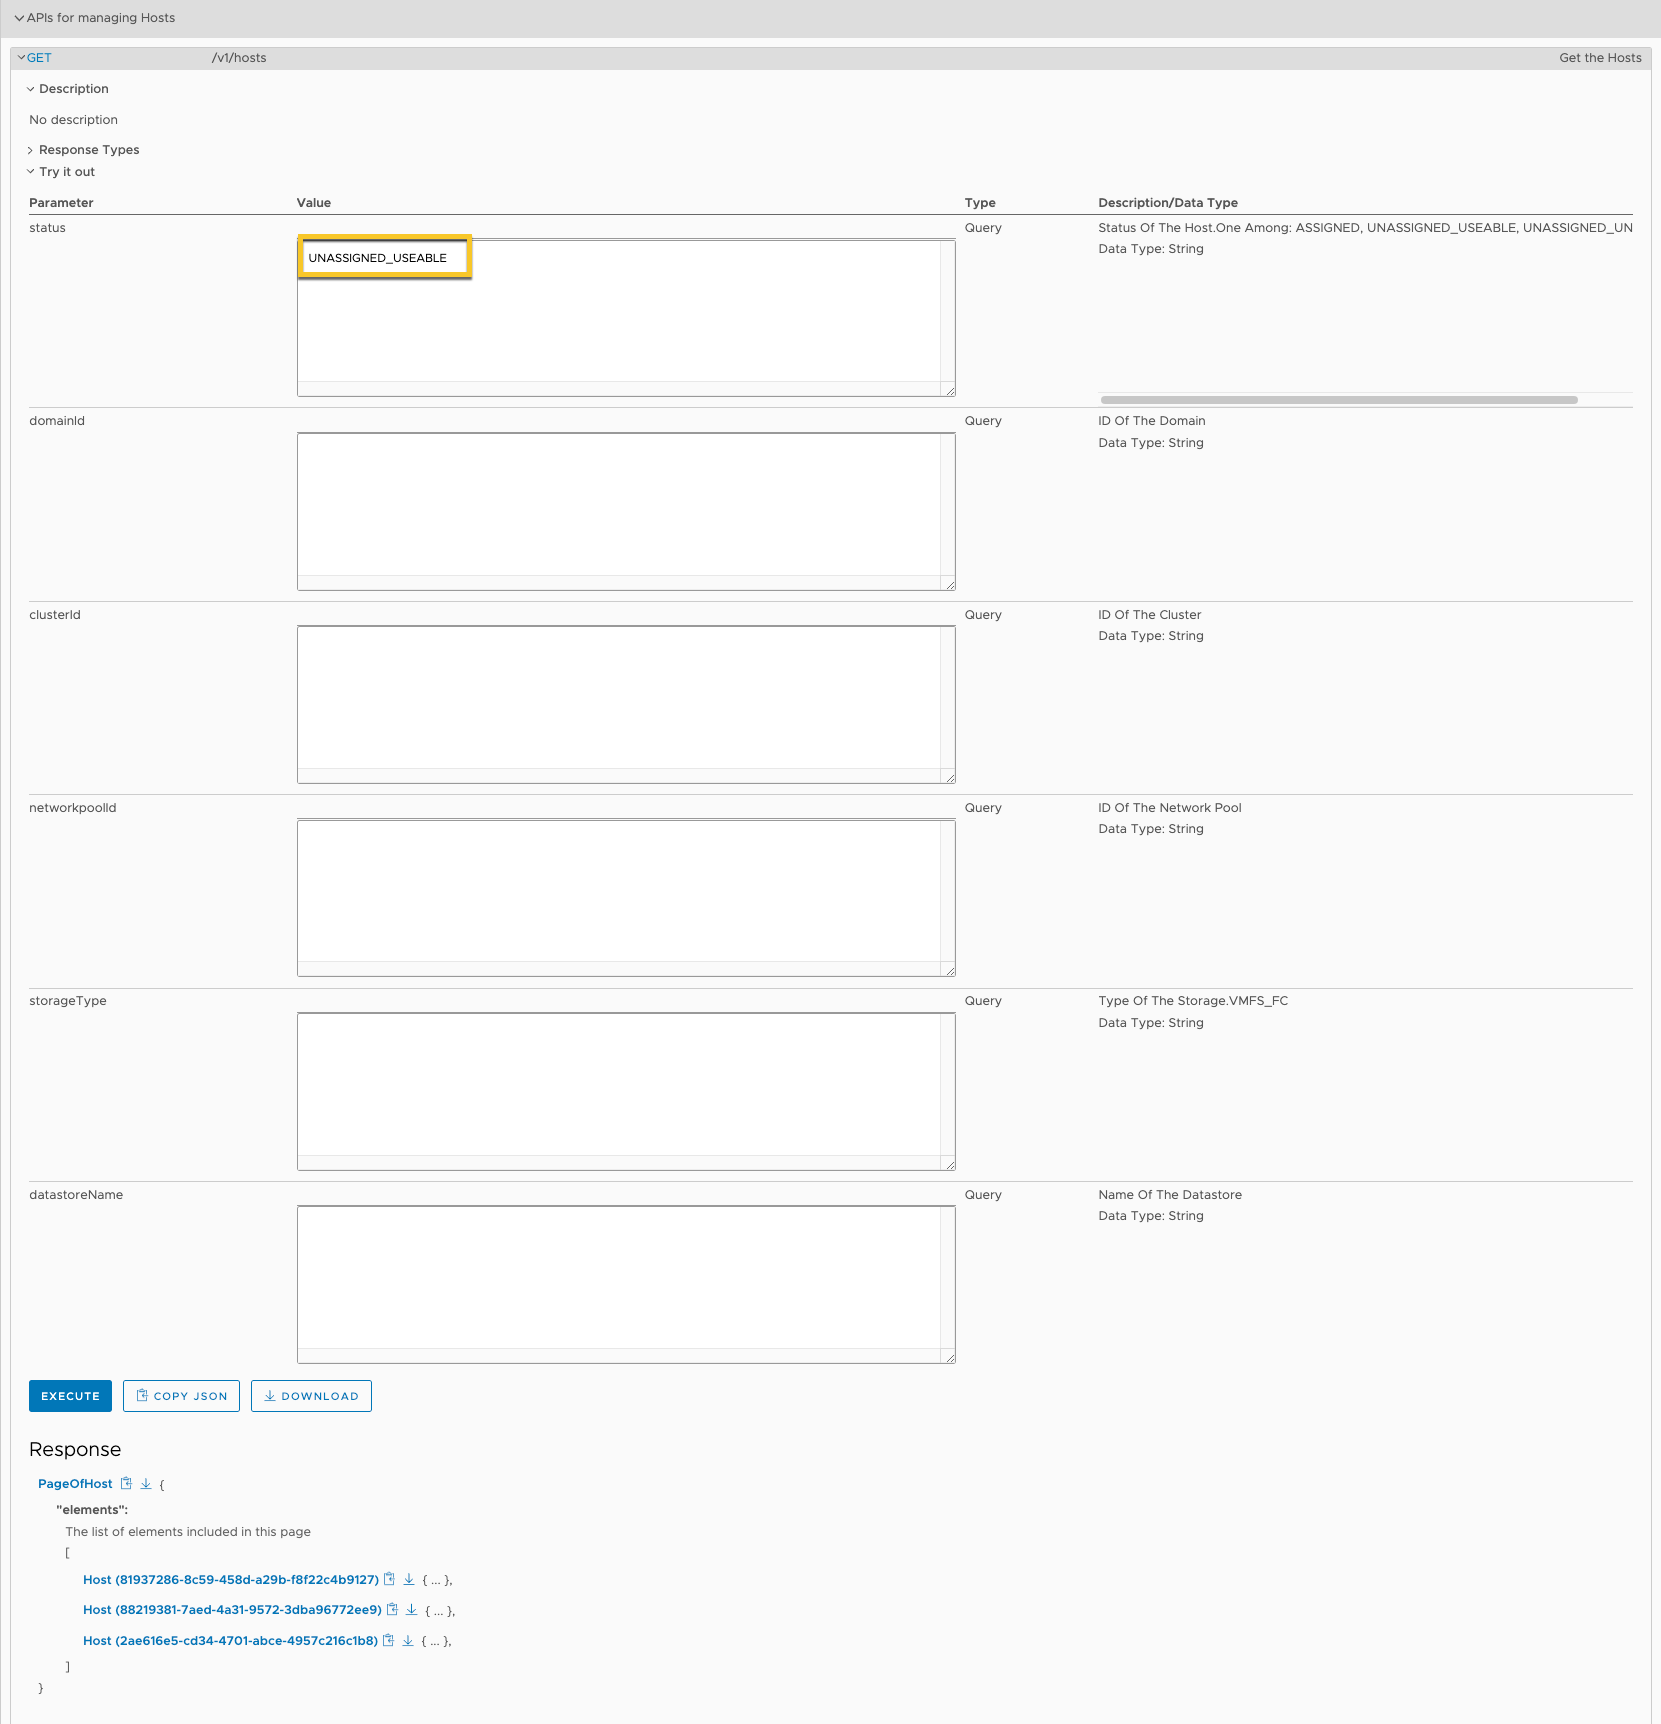
#1 获取未分配ESXi主机ID
#2 编写json文件
| {“domainName” : “w02”,
“orgName:” : “corp-b”, “vcenterSpec” : { “name” : “vcfvcsa1wd2”, “networkDetailsSpec” : { “ipAddress” : “192.168.66.53”, “dnsName” : “vcfvcsa1wd2.vmwlab.net”, “gateway” : “192.168.66.254”, “subnetMask” : “255.255.255.0” }, “rootPassword” : “Lab@2022”, “datacenterName” : “w02-DC”, “vmSize” : “tiny” }, “computeSpec” : { “clusterSpecs” : [ { “name” : “w02-cl01”, “hostSpecs” : [ { “id” : “81937286-8c59-458d-a29b-f8f22c4b9127”, “licenseKey”: “EJOTL-99G85-88VU1-0YNAP-38NN2”, “username” : “root”, “hostNetworkSpec” : { “vmNics” : [ { “id” : “vmnic0”, “vdsName” : “w02-vcfvds01” }, { “id” : “vmnic1”, “vdsName” : “w02-vcfvds01” } ] } }, { “id” : “88219381-7aed-4a31-9572-3dba96772ee9”, “licenseKey”: “EJOTL-99G85-88VU1-0YNAP-38NN2”, “username” : “root”, “hostNetworkSpec” : { “vmNics” : [ { “id” : “vmnic0”, “vdsName” : “w02-vcfvds01” }, { “id” : “vmnic1”, “vdsName” : “w02-vcfvds01” } ] } }, { “id” : “2ae616e5-cd34-4701-abce-4957c216c1b8”, “licenseKey”: “EJOTL-99G85-88VU1-0YNAP-38NN2”, “username” : “root”, “hostNetworkSpec” : { “vmNics” : [ { “id” : “vmnic0”, “vdsName” : “w02-vcfvds01” }, { “id” : “vmnic1”, “vdsName” : “w02-vcfvds01” } ] } } ], “datastoreSpec” : { “nfsDatastoreSpecs” : [{ “nasVolume” : { “serverName” : [“192.168.53.200”], “path” : “/mnt/Pool02/nfs01”, “readOnly”: false }, “datastoreName” : “w02-cl01-ds-nfs01” }] }, “networkSpec” : { “vdsSpecs” : [ { “name” : “w02-vcfvds01”, “portGroupSpecs” : [ { “name” : “w02-vcfvds01-management”, “transportType” : “MANAGEMENT” }, { “name” : “w02-vcfvds01-vmotion”, “transportType” : “VMOTION” }, { “name” : “w02-vcfvds01-nfs”, “transportType” : “NFS” } ], “isUsedByNsxt” : true } ], “nsxClusterSpec” : { “nsxTClusterSpec” : { “geneveVlanId” : 813, “ipAddressPoolSpec” : { “name” : “w02-cl01-tep01”, “subnets” : [ { “ipAddressPoolRanges” : [ { “start” : “10.180.13.11”, “end” : “10.180.13.99” } ], “cidr” : “10.180.13.0/24”, “gateway” : “10.180.13.254” } ] } } } } } ] }, “nsxTSpec” : { “nsxManagerSpecs” : [ { “name” : “vcfnsx1awd1”, “networkDetailsSpec” : { “ipAddress” : “192.168.66.37”, “dnsName” : “vcfnsx1awd1.vmwlab.net”, “gateway” : “192.168.66.254”, “subnetMask” : “255.255.255.0” } } ], “vip” : “192.168.66.36”, “vipFqdn” : “vcfnsx1wd1.vmwlab.net” } } |
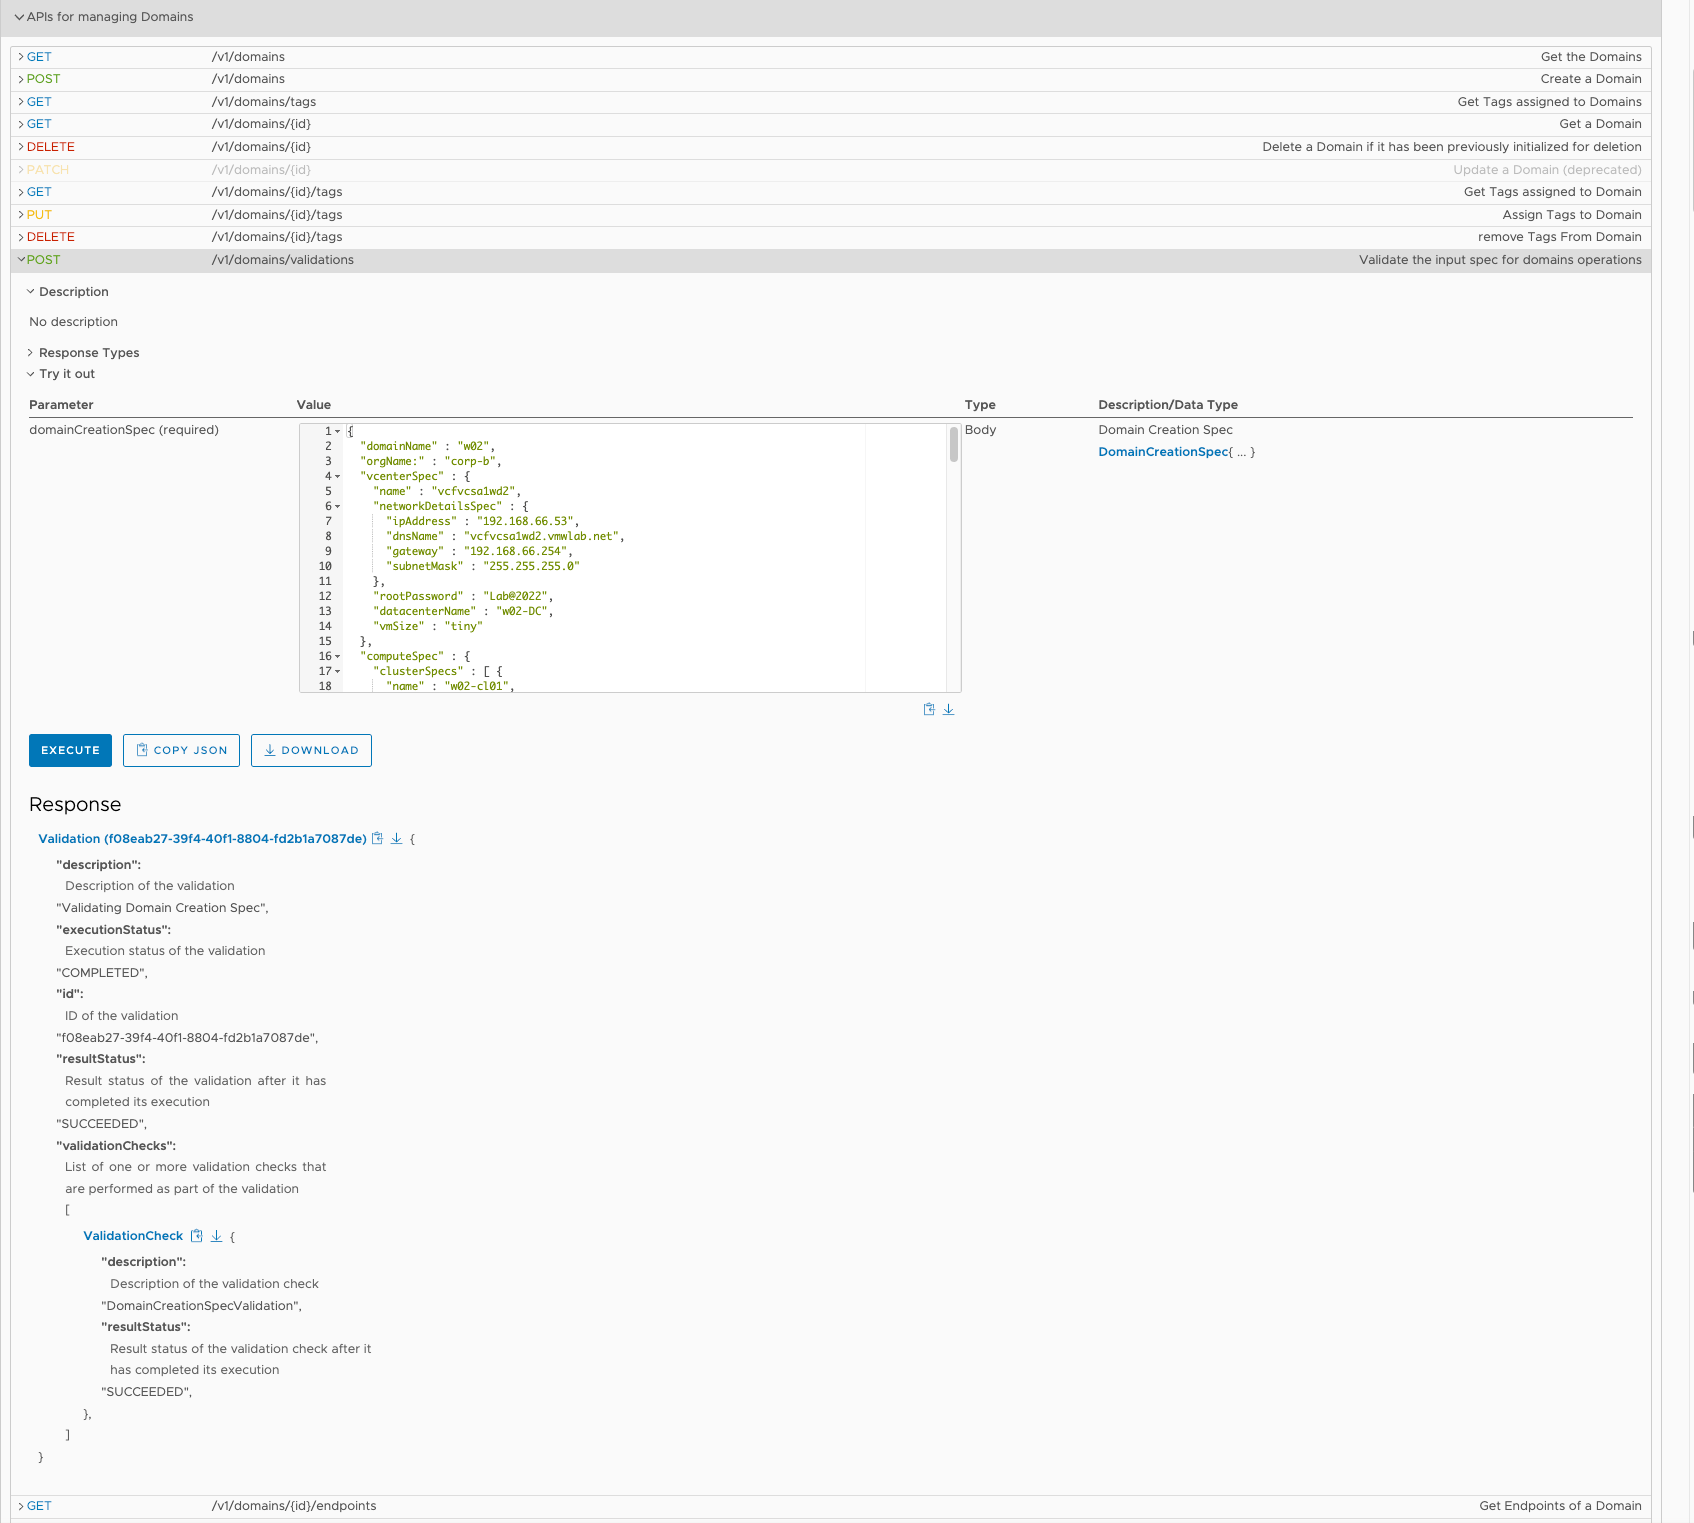
#3 验证json文件相关参数
#4 执行安装
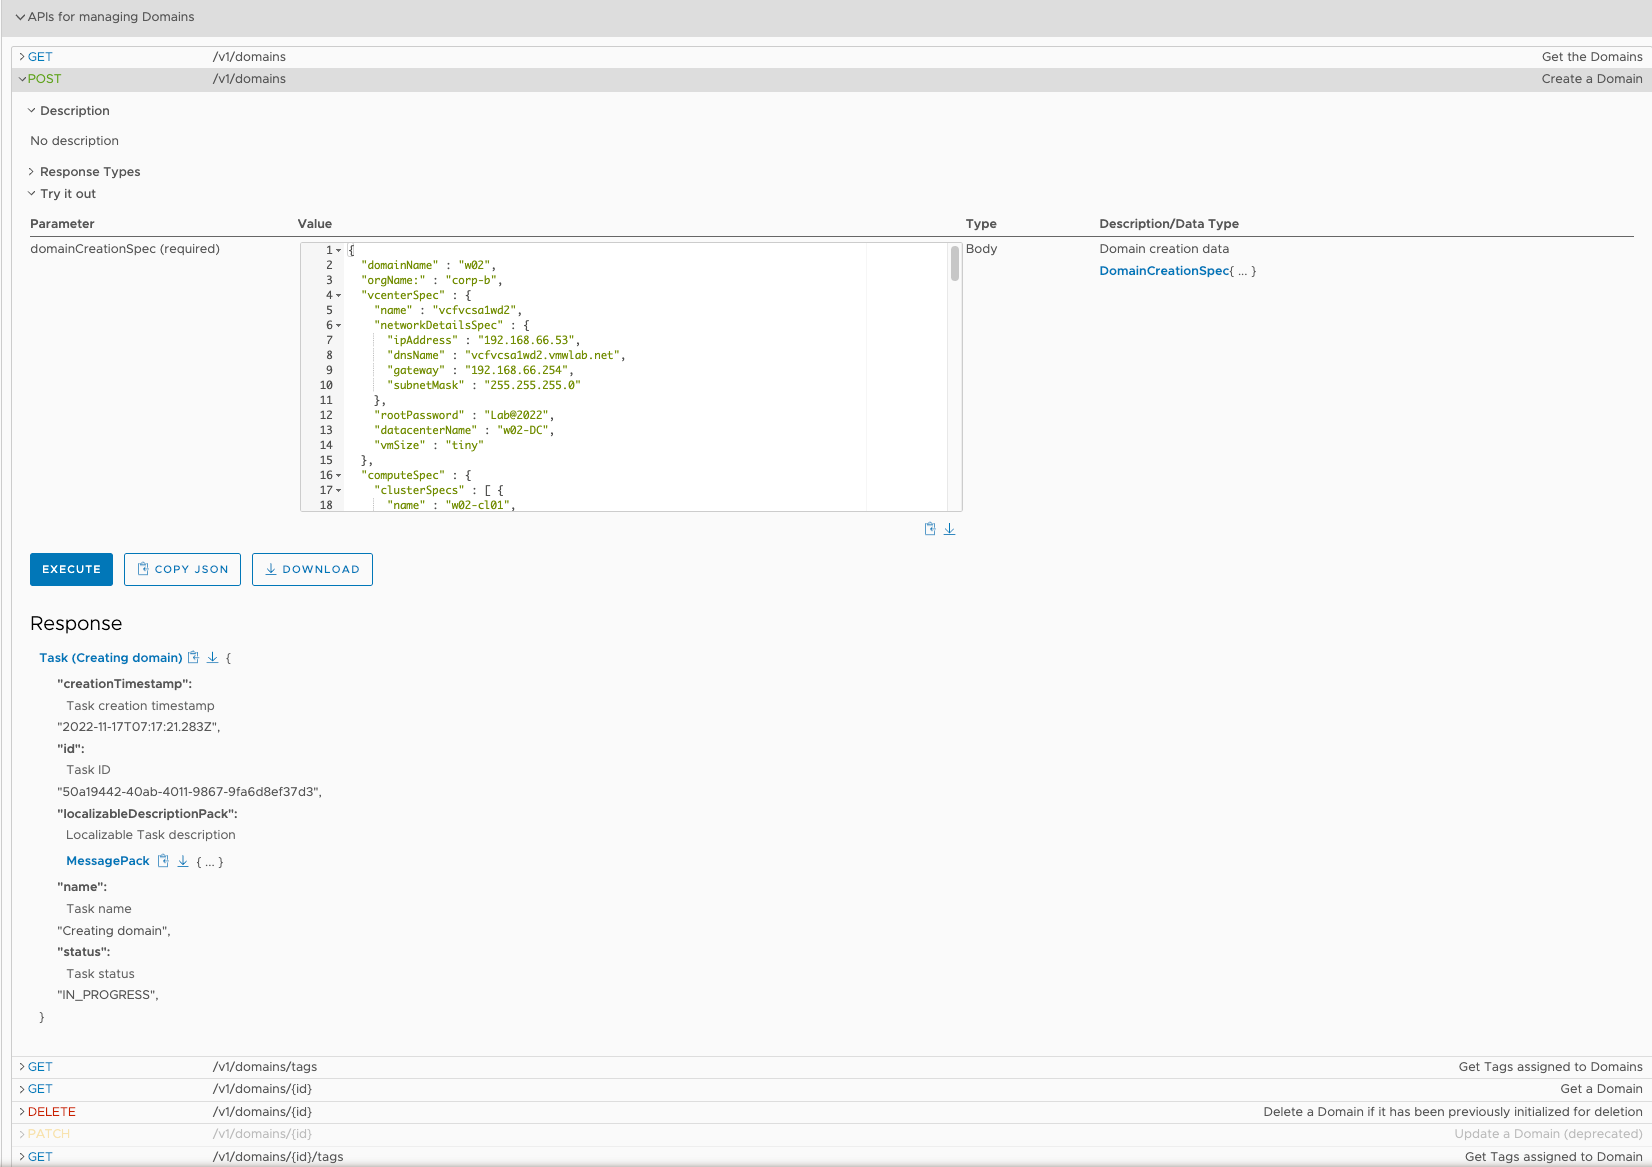
#5 部署完成