Antrea与NSX-T集成工作可以在OCP与Antrea集成部署环节由Antrea Operator统一部署,也可以在OCP&Antrea安装完成后,再由Operator分步部署。
本章节采用分步部署,在分步部署下,介绍两种配置方式。建议使用方式2,用Operator来完成与NSX-T集成安装。
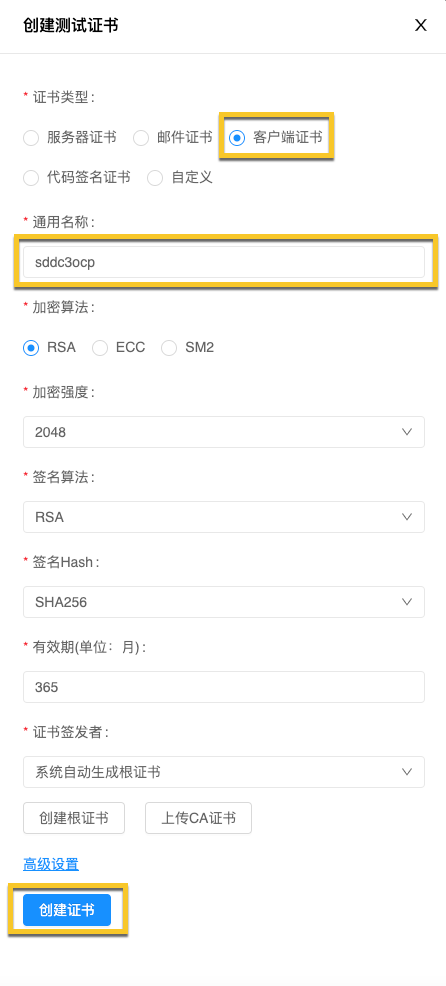
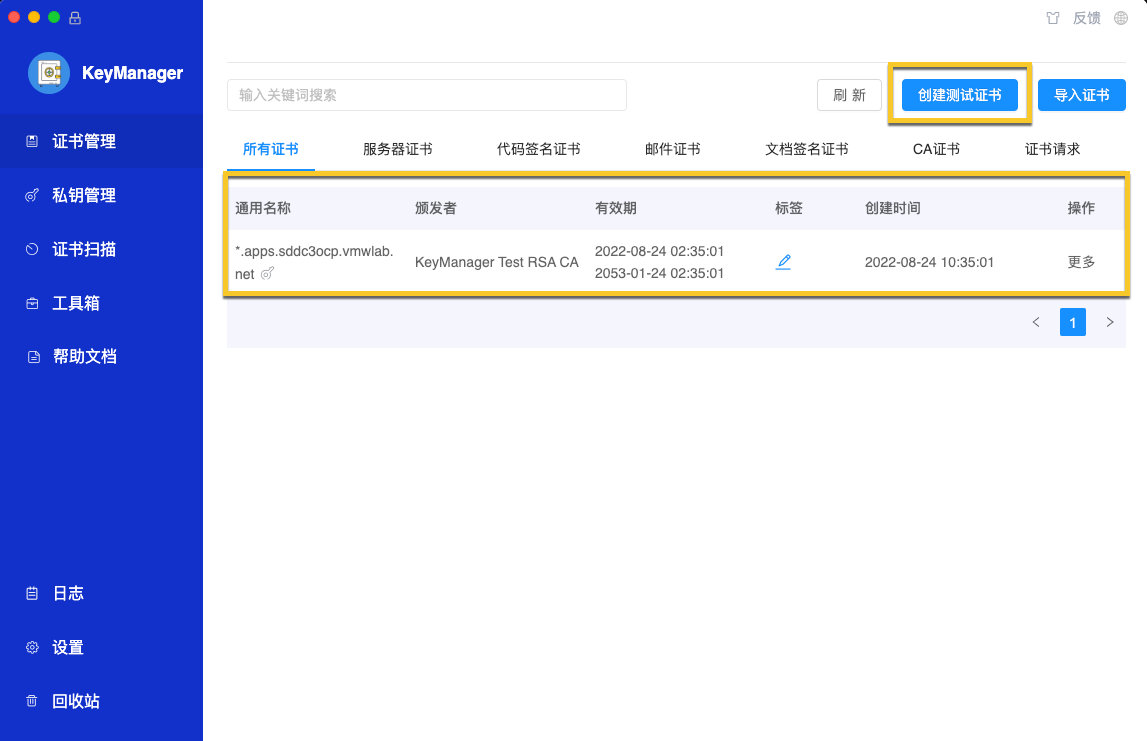
创建集成所需证书
# 同过KeyManger生成测试证书

# 导出证书
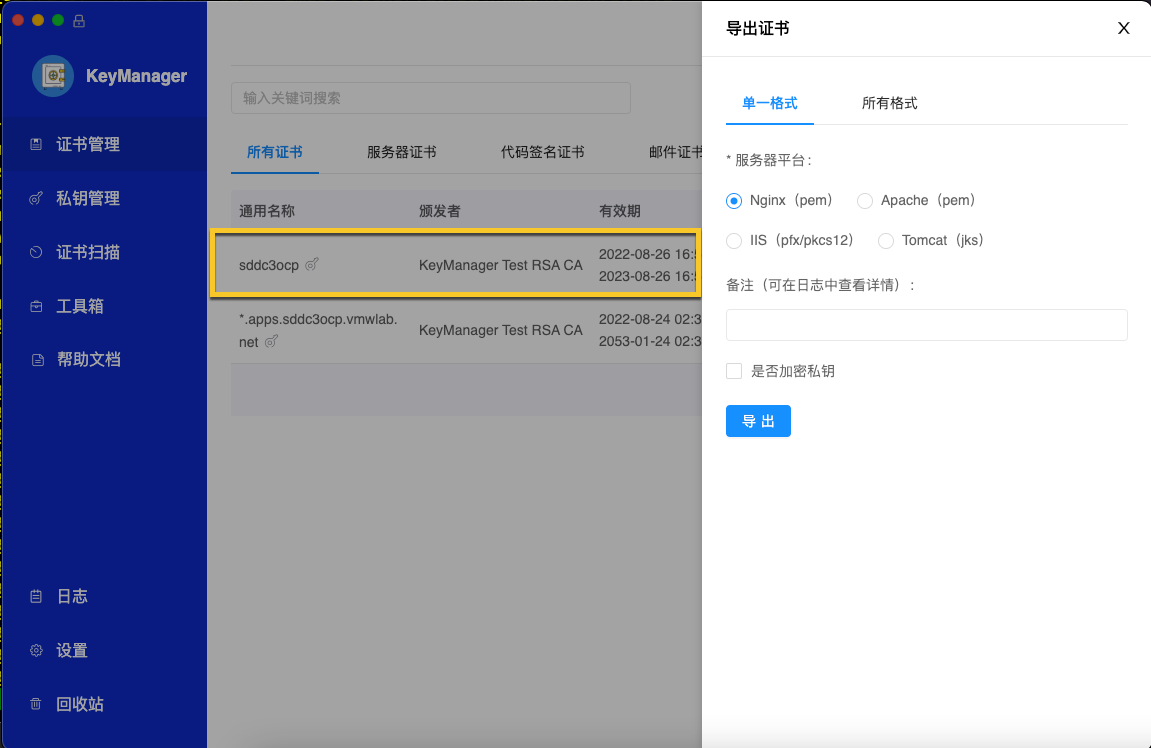
#导出证书后解压

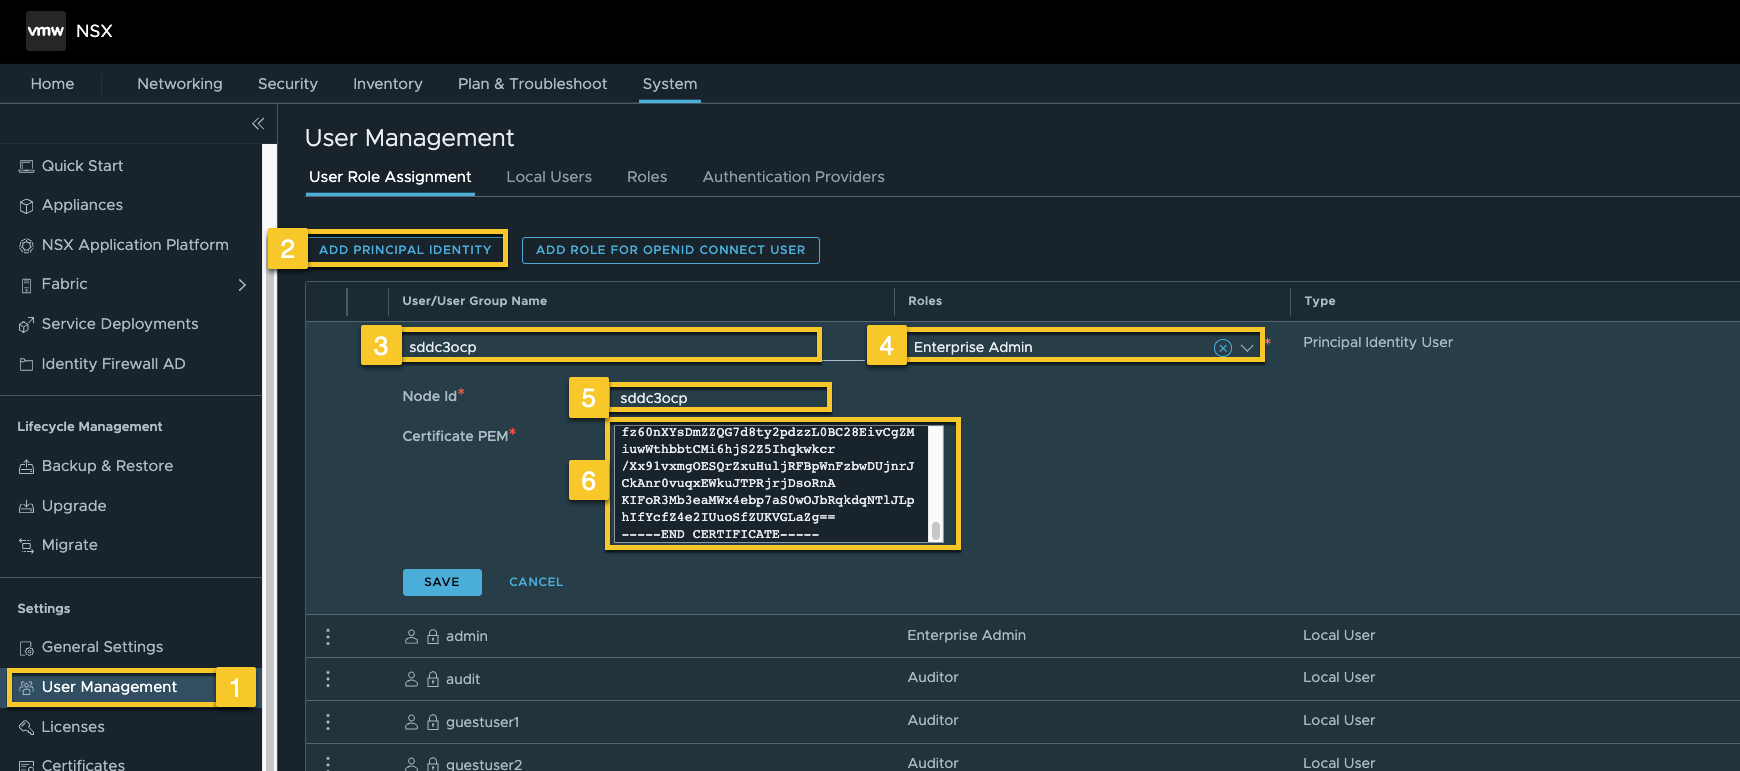
在NSX-T导入签名证书
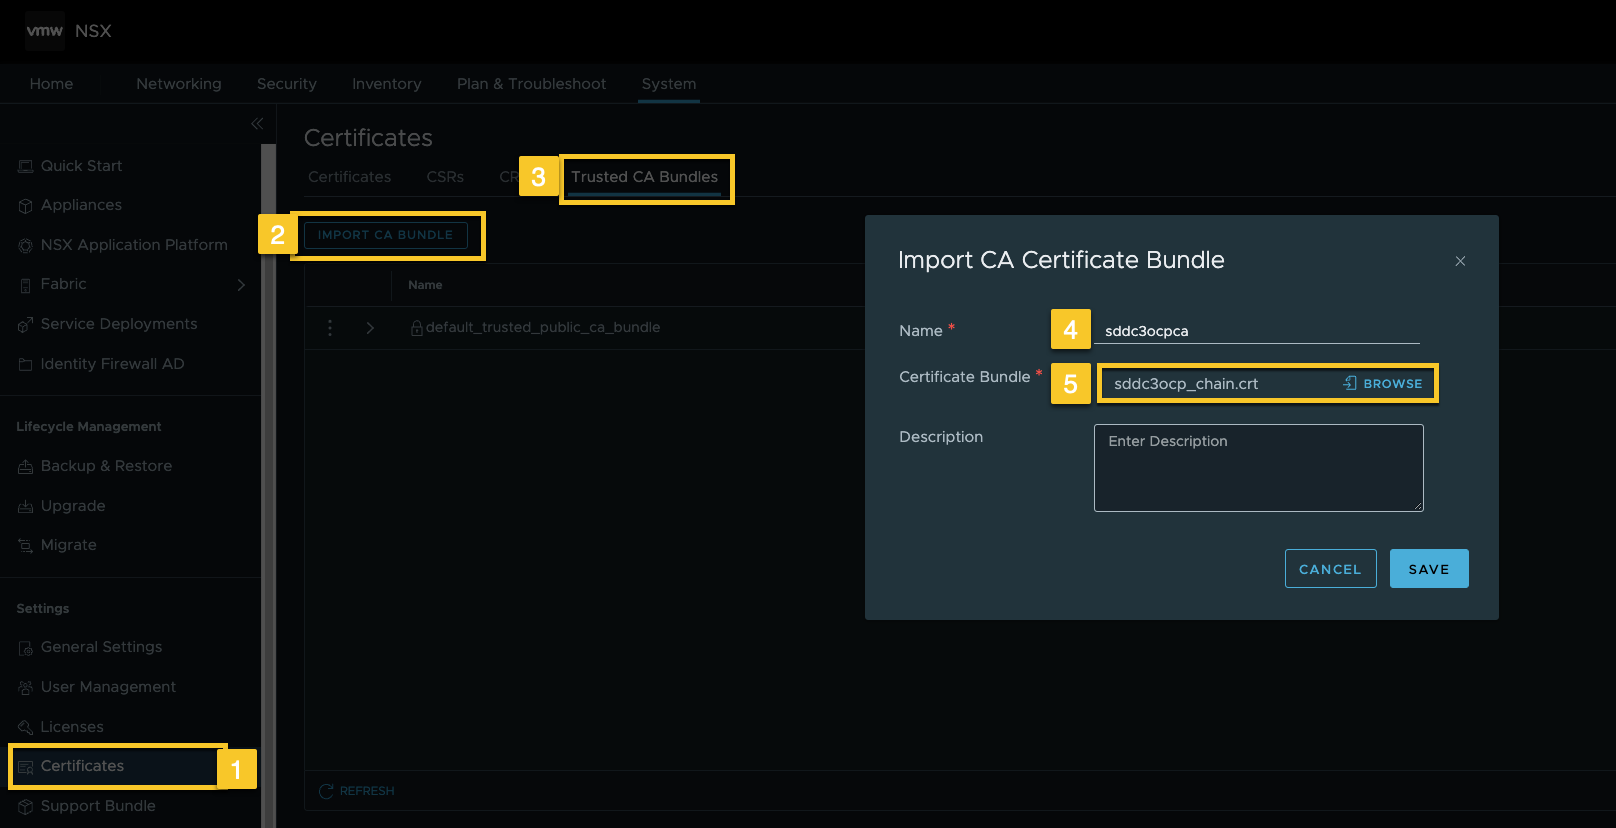
# 第6步中证书内容可以打开sddc3ocp_chain.crt文件获取
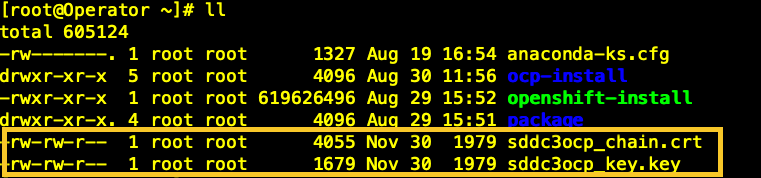
# 上传刚才生成的文件至Operator VM
# 转译编码至Base64
| [root@Operator ~]# cat sddc3ocp_chain.crt | base64 -w 0 |
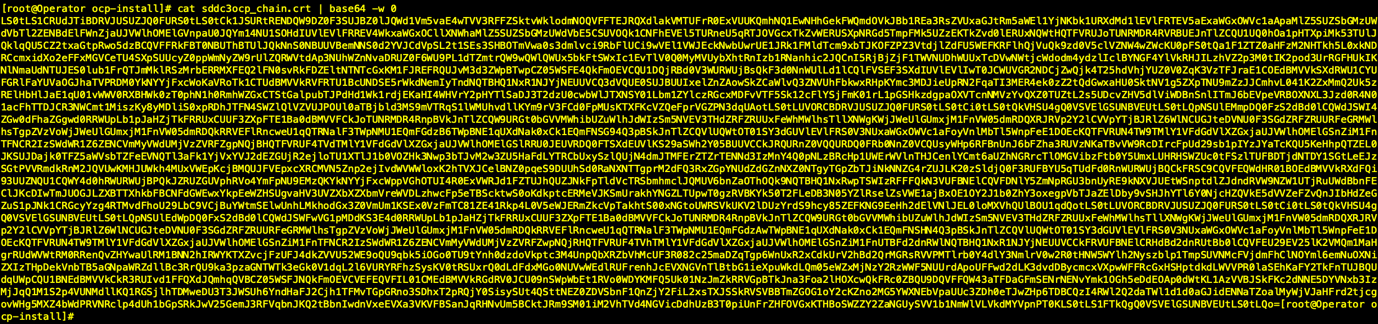 |
| [root@Operator ~]# cat sddc3ocp_key.key | base64 -w 0 |
 |
常规方法集成安装(方式1)
# 上传antrea-interworking-0.7.0.zip文件并解压
| [root@Operator ~]# unzip antrea-interworking-0.7.0.zip |
| [root@Operator ~]# cd antrea-interworking-0.7.0 |
| [root@Operator antrea-interworking-0.7.0]# ll |
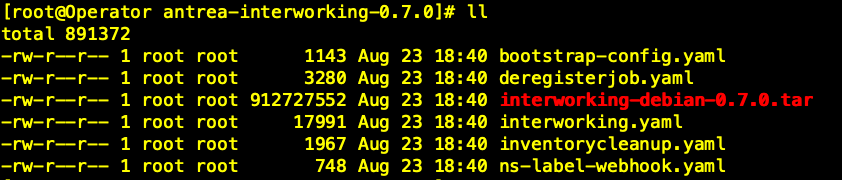 |
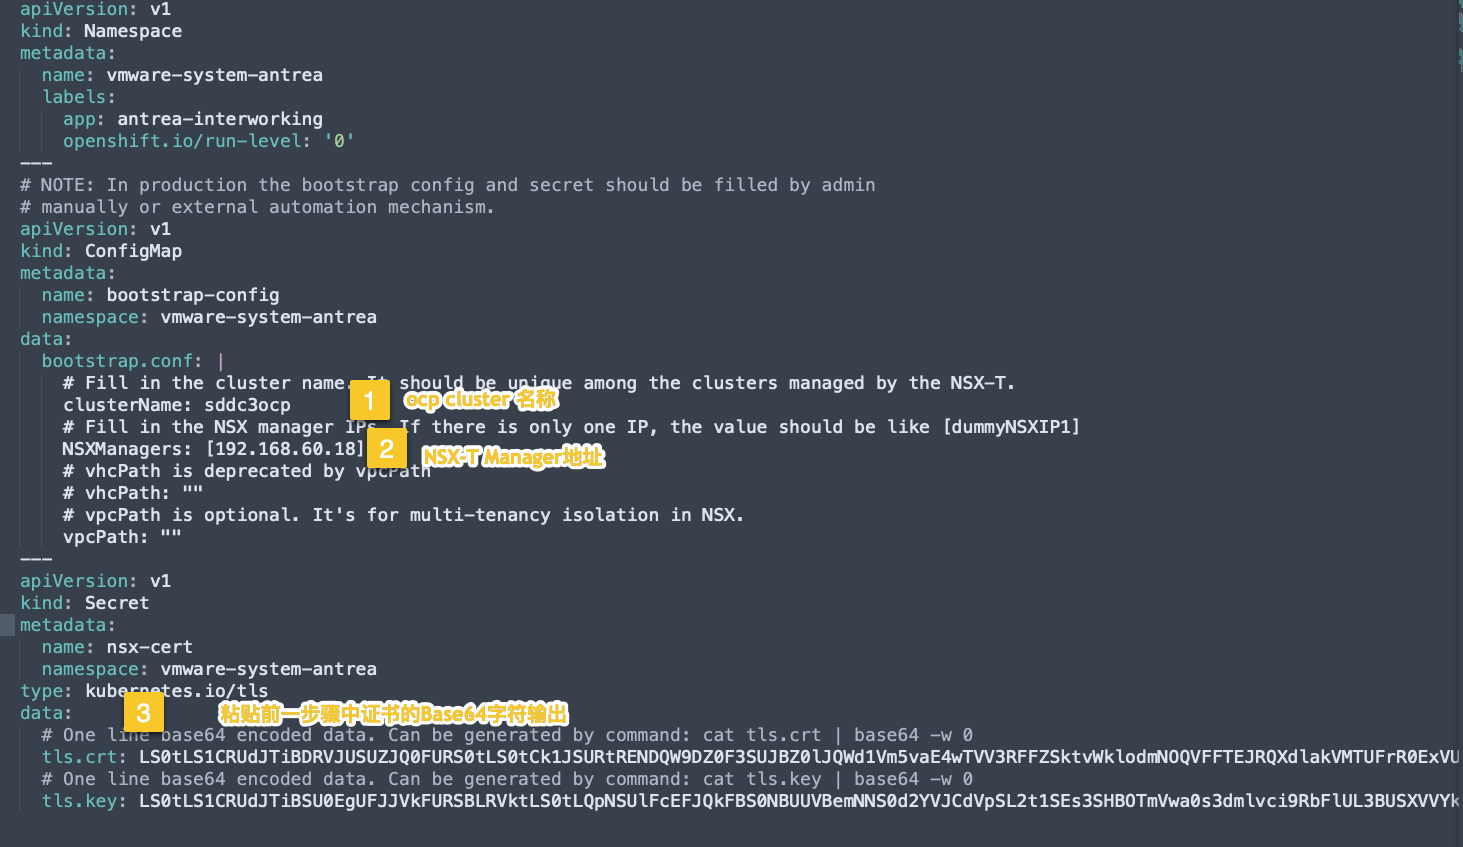
# 修改bootstrap-config.yaml
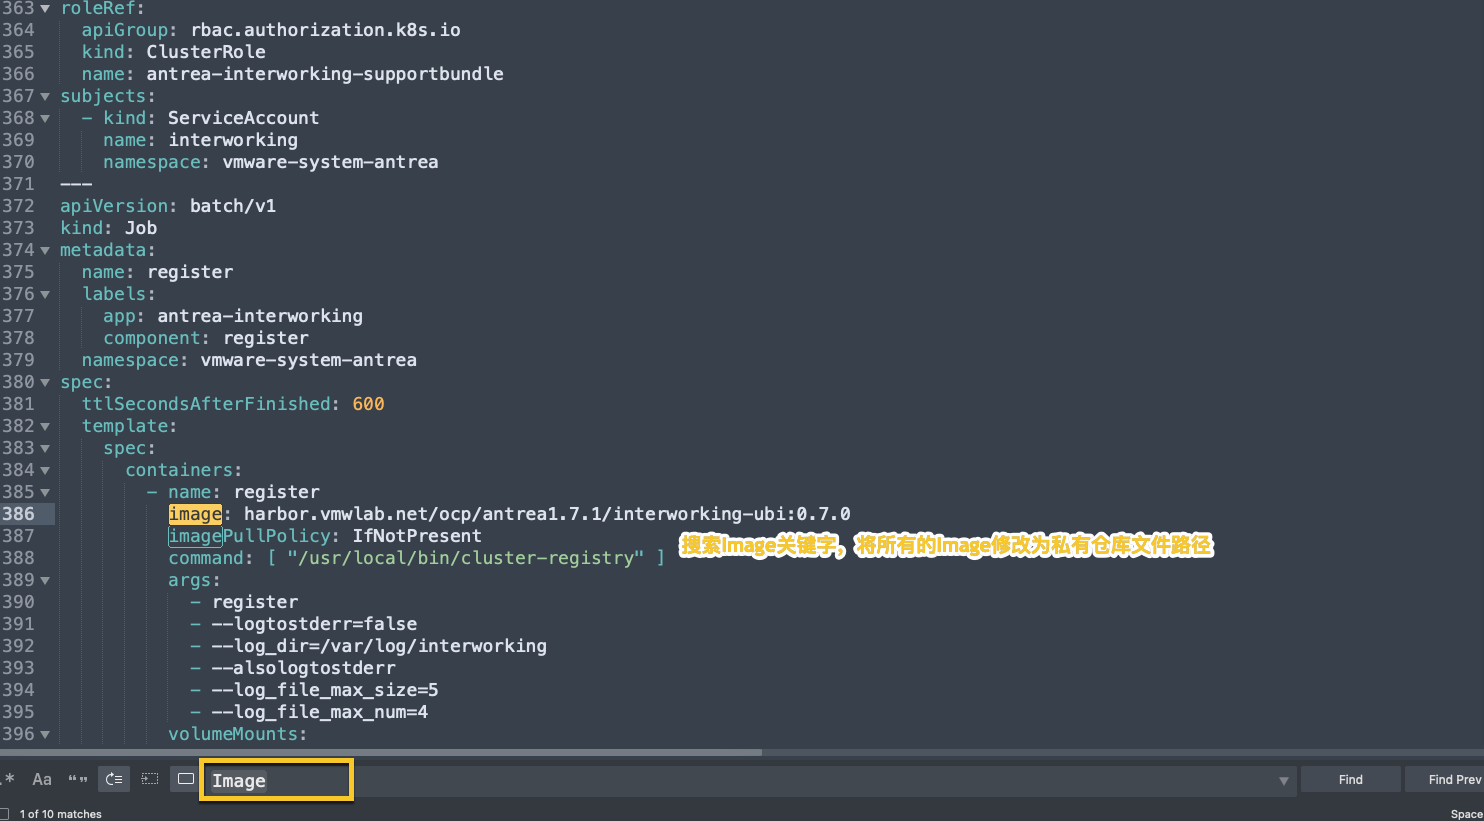
# 修改interworking.yaml
# 开始Antrea Interworking的集成安装
| [root@Operator ~]# kubectl apply -f bootstrap-config.yaml -f interworking.yaml |
| [root@Operator ~]# kubectl get pods -o wide -n vmware-system-antrea |
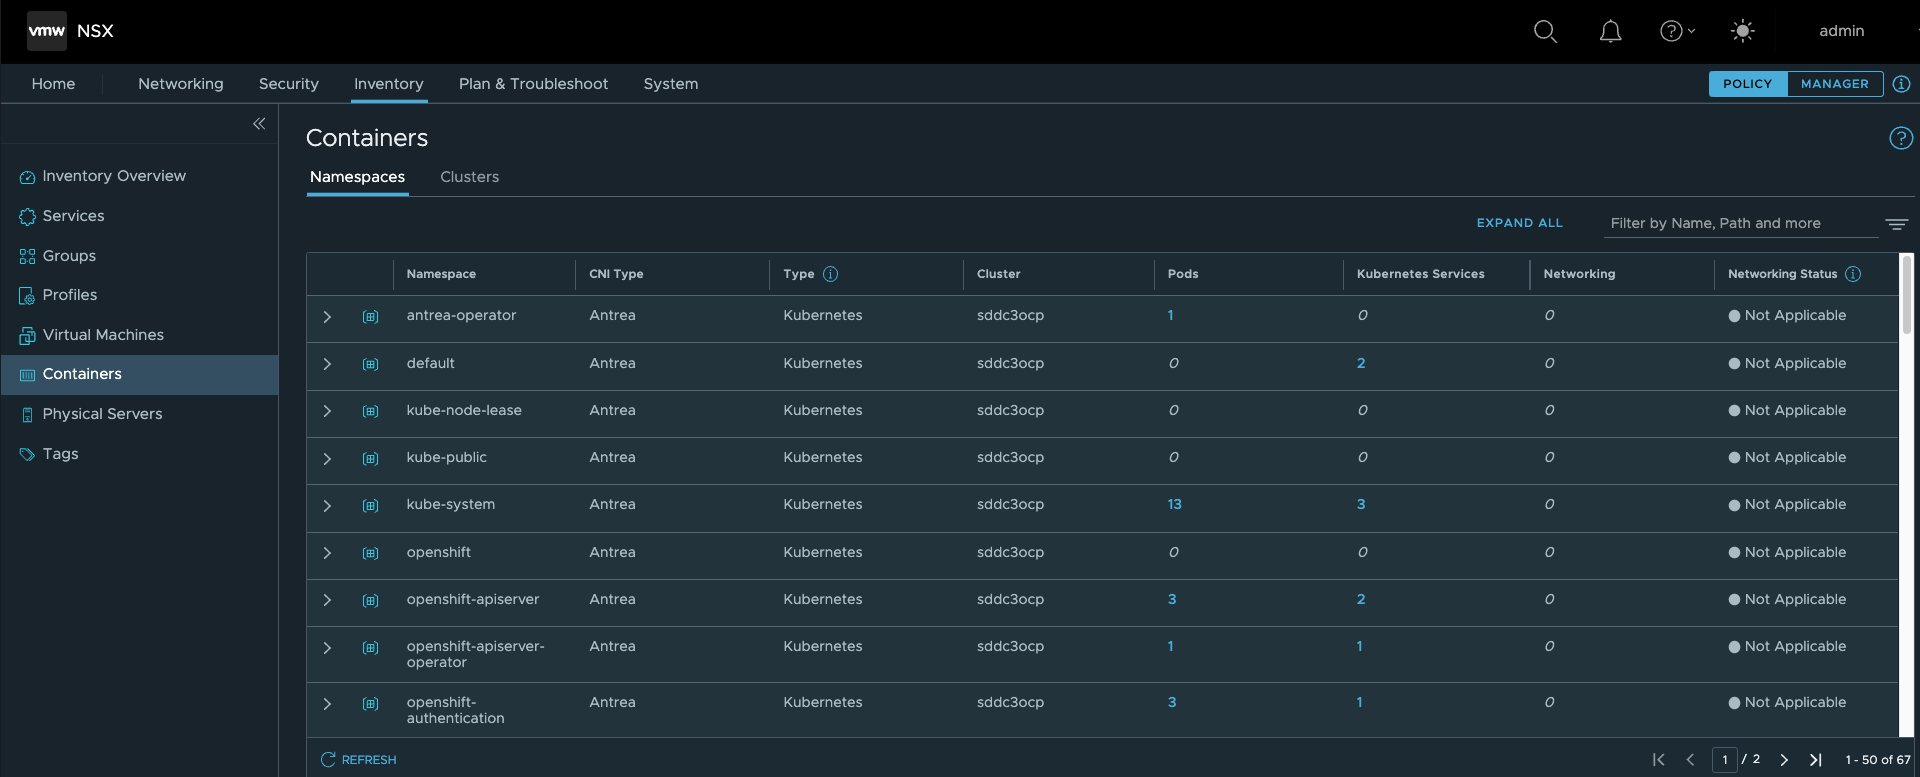
# 检查状态
| [root@Operator ~]# kubectl get pods -o wide -n vmware-system-antrea |
 |
 |
通过Operator集成安装(方式2)
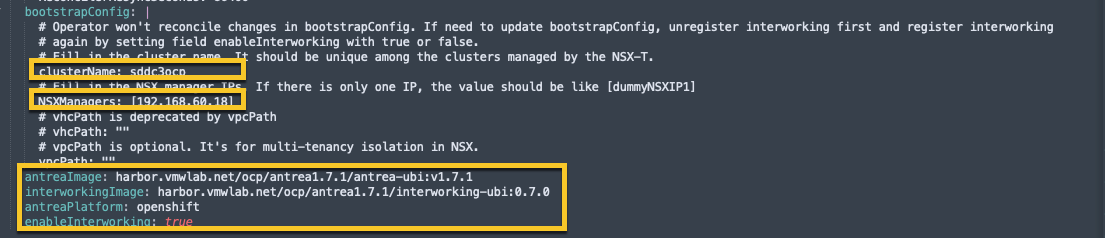
# 再次修改8.4小节 yaml文件
| [root@Operator ~]# cd deploy/openshift/[root@Operator openshift]# vi operator.antrea.vmware.com_v1_antreainstall_cr.yaml |
 |
# 确认Operator运行正常
| [root@Operator ~]# oc get pods -n antrea-operator |
 |
# 修改nsx-cert.yaml, 在文件内添加转译编码至Base64的证书内容
| [root@Operator openshift]# vi nsx-cert.yaml |
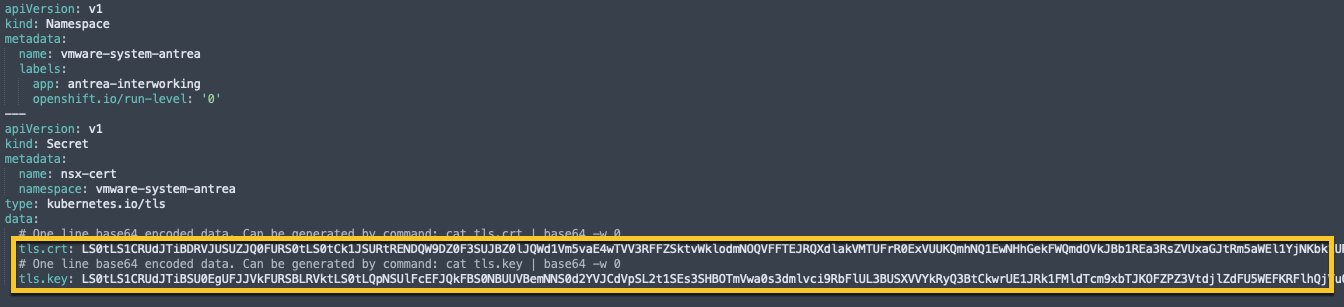 |
# 通过OC命令安装
| [root@Operator ~]# oc apply -f operator.antrea.vmware.com_v1_antreainstall_cr.yaml[root@Operator ~]# oc apply -f nsx-cert.yaml |
# 检查状态
| [root@Operator ~]# oc get pods -n vmware-system-antrea |
 |
 |
AKO 安装部署
本文不涉及NSX ALB(Avi)安装以及初始化步骤,假设NSX ALB已具备如下预置条件:
| 1.与VCenter Cloud集成(或NSX-T Cloud集成)本文以vCenter集成为例 |
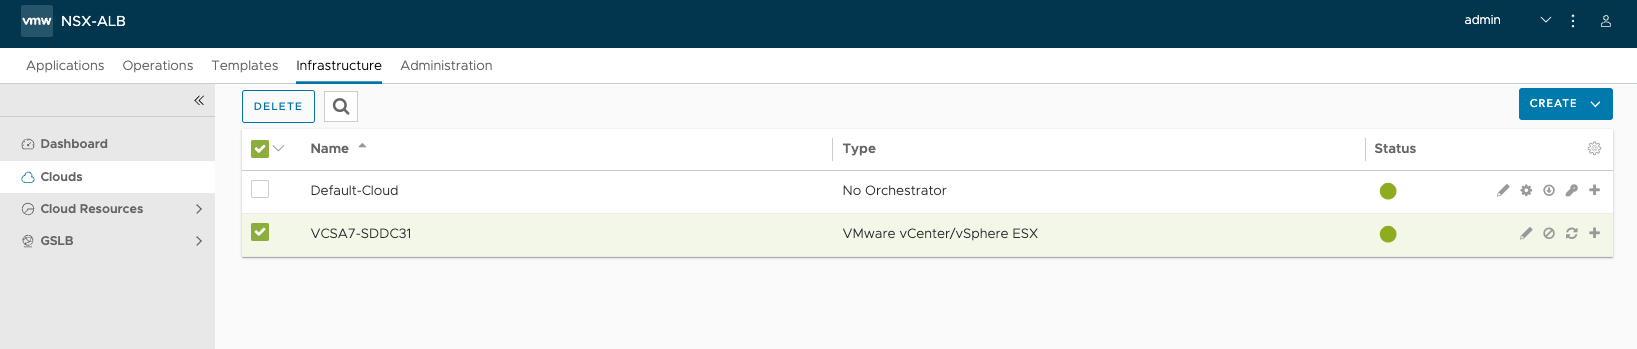 |
| 2.SEG已配置,在测试场景建议调整最大VS以及最大SE数量 |
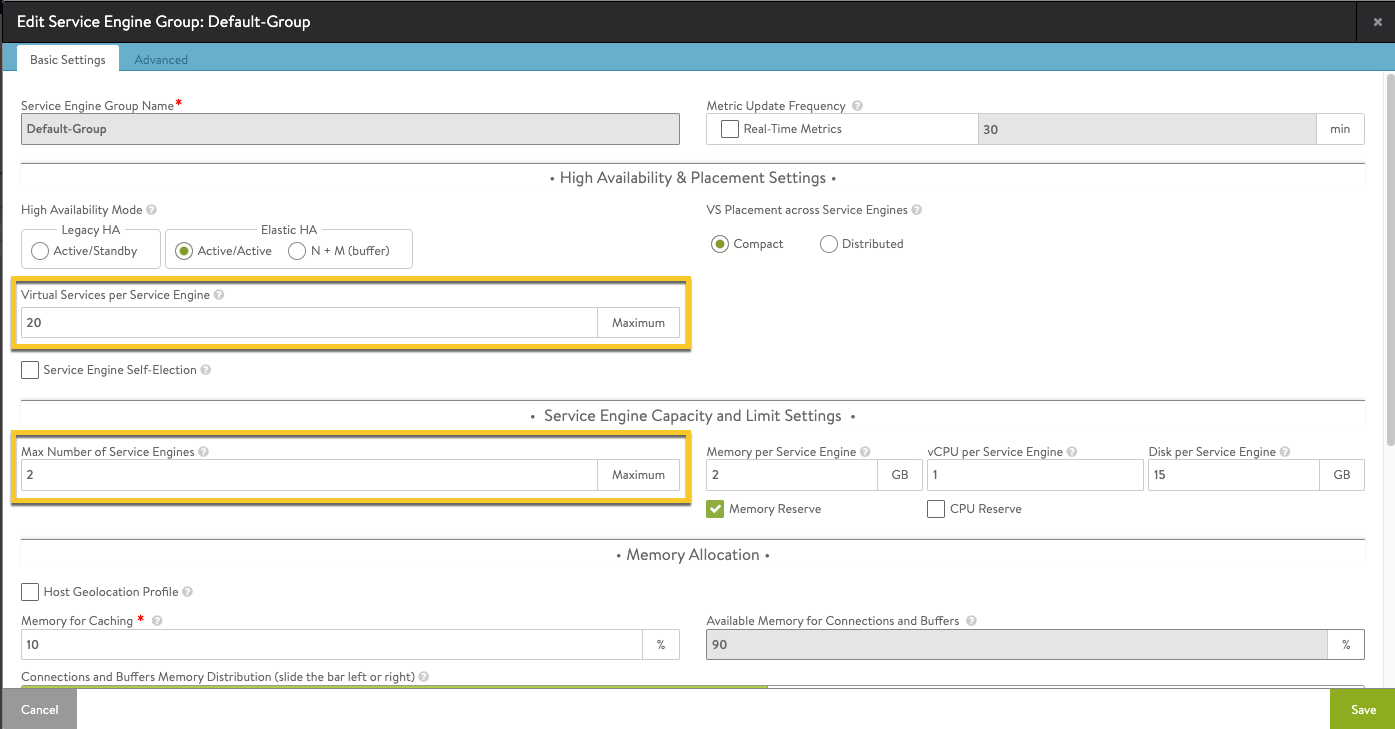 |
NSX ALB(Avi)基础配置
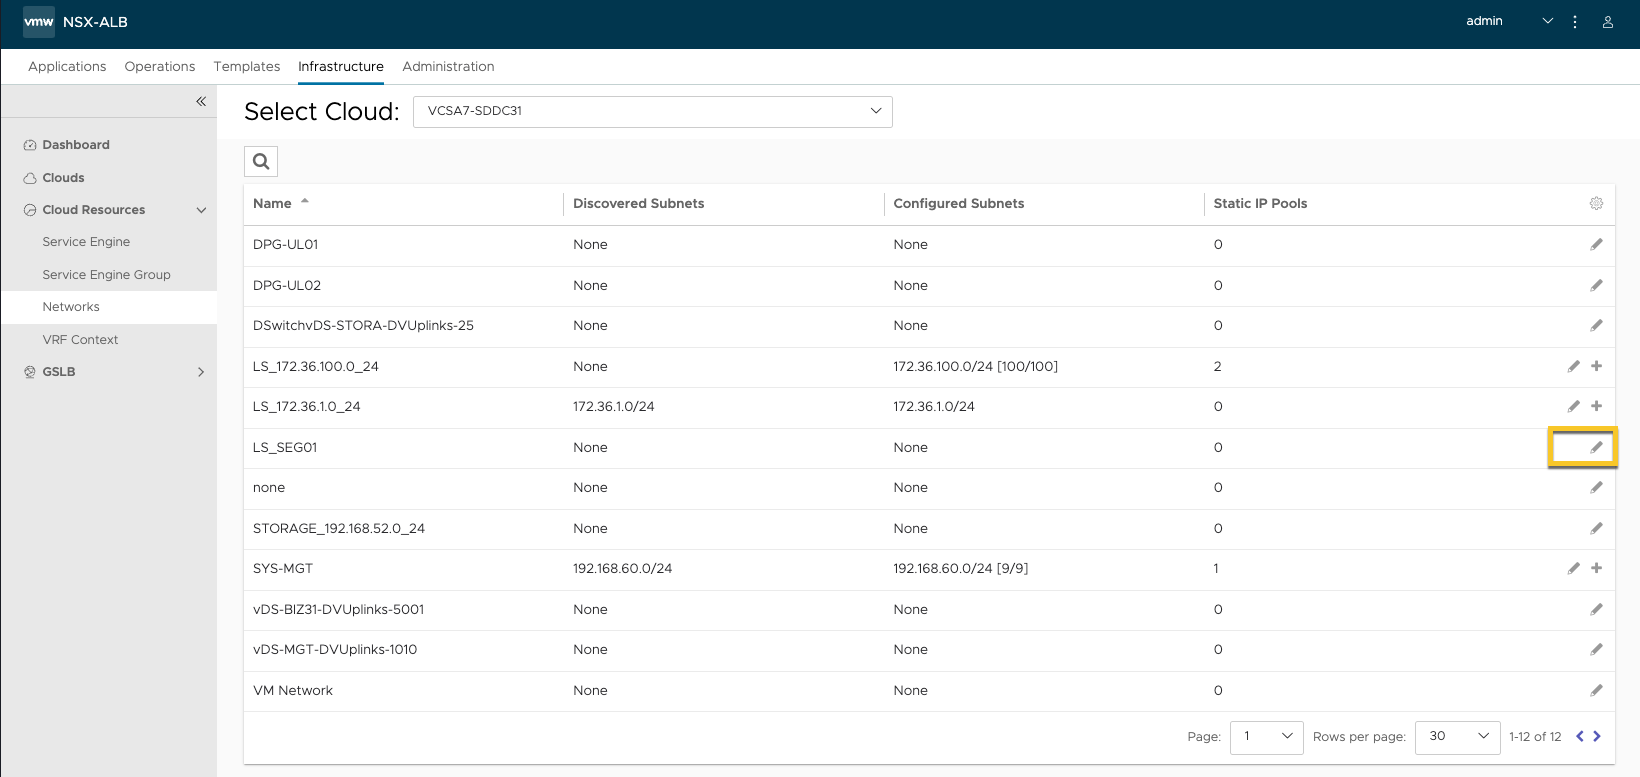
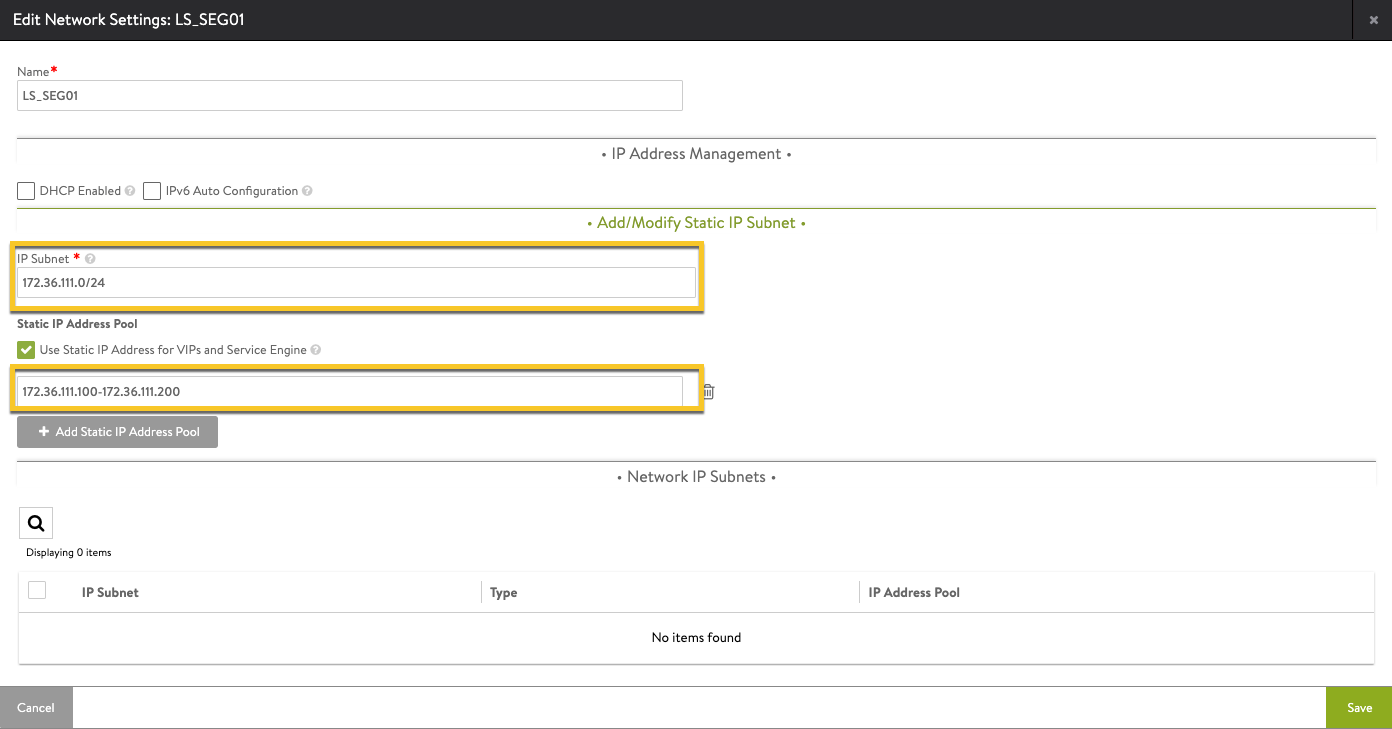
# 配置子网,指定VIP及SE IP地址
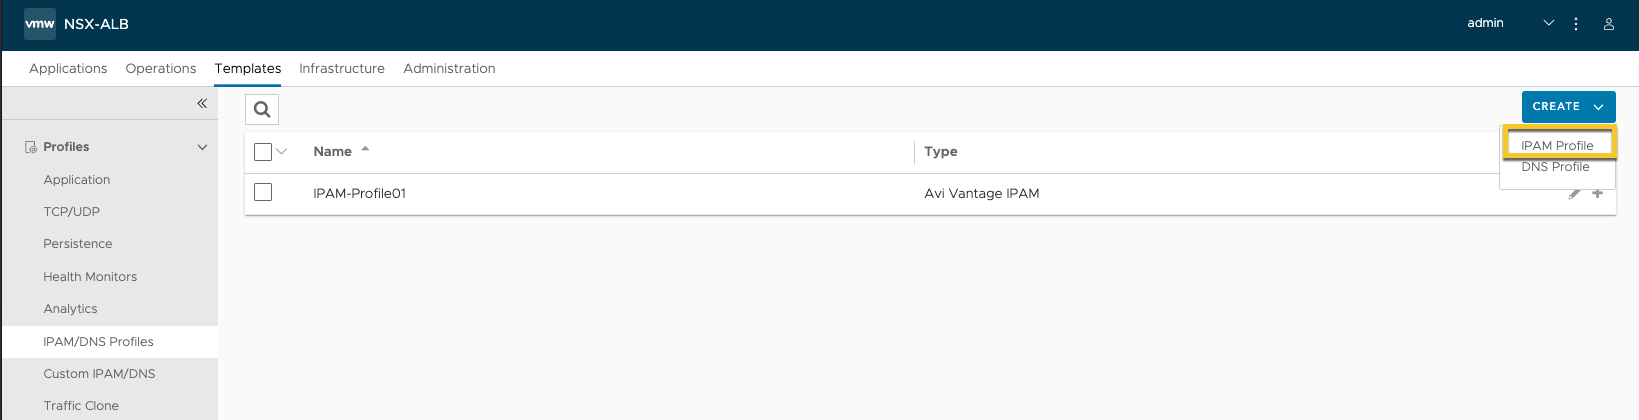
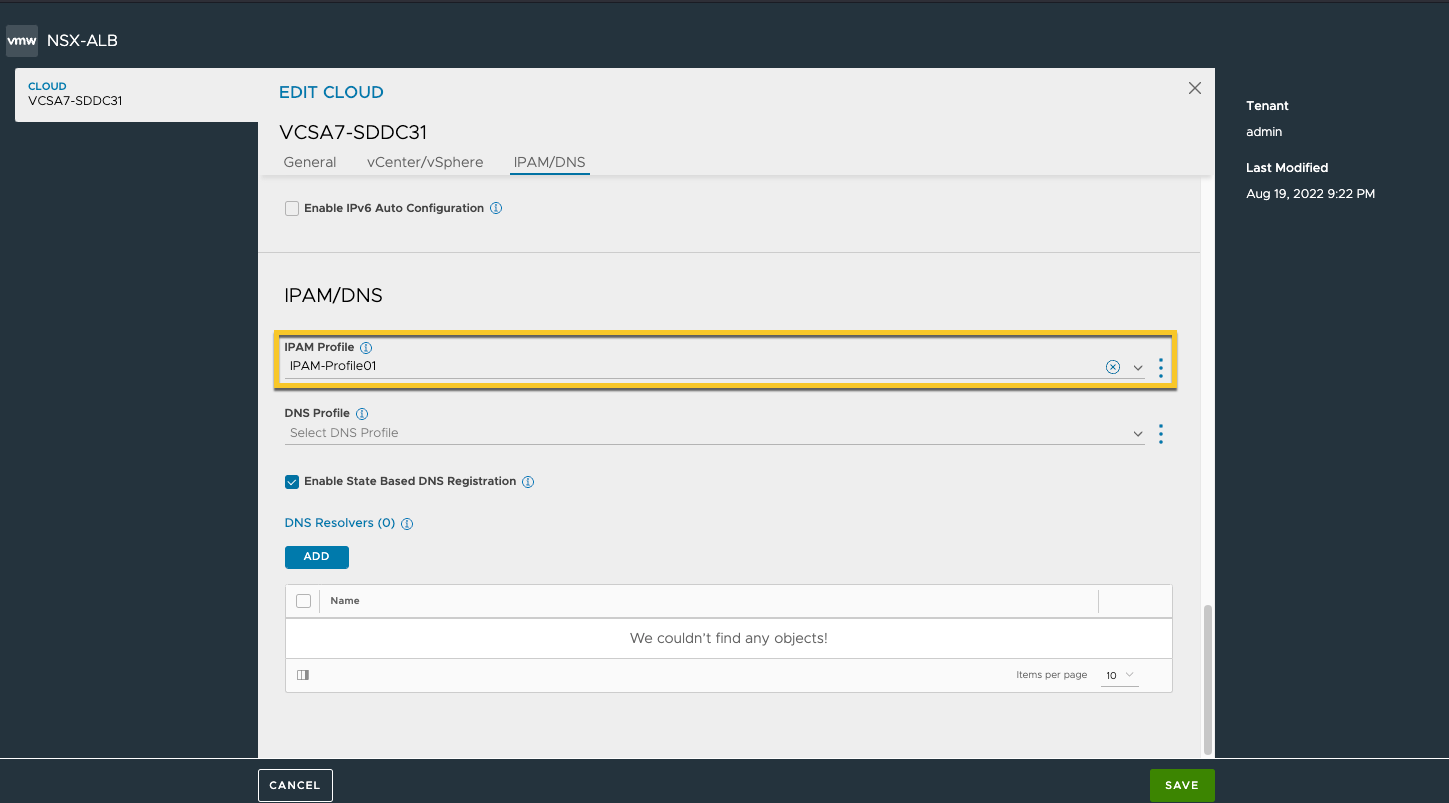
# 创建IPAM Profile
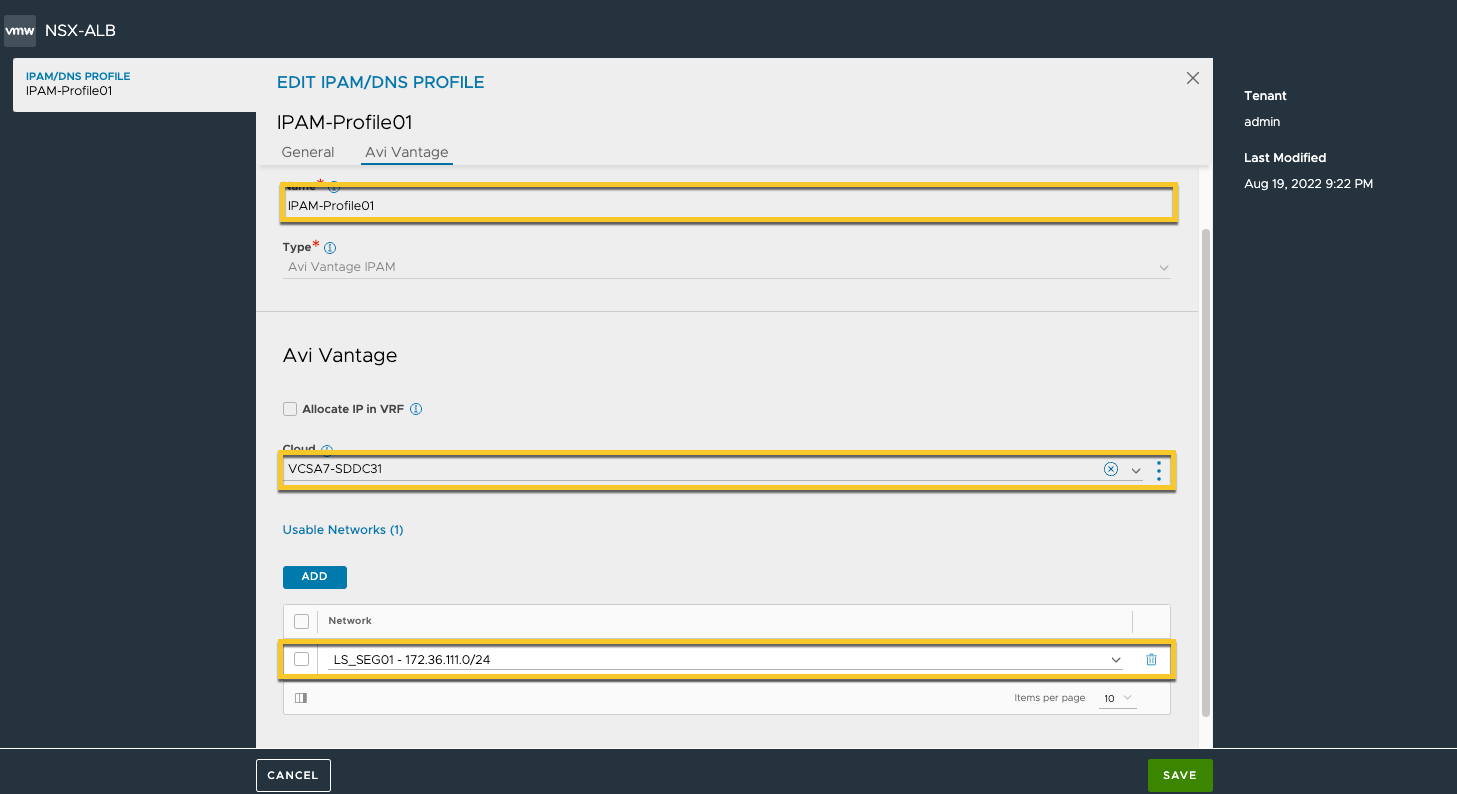
# 关联IPAM到Cloud

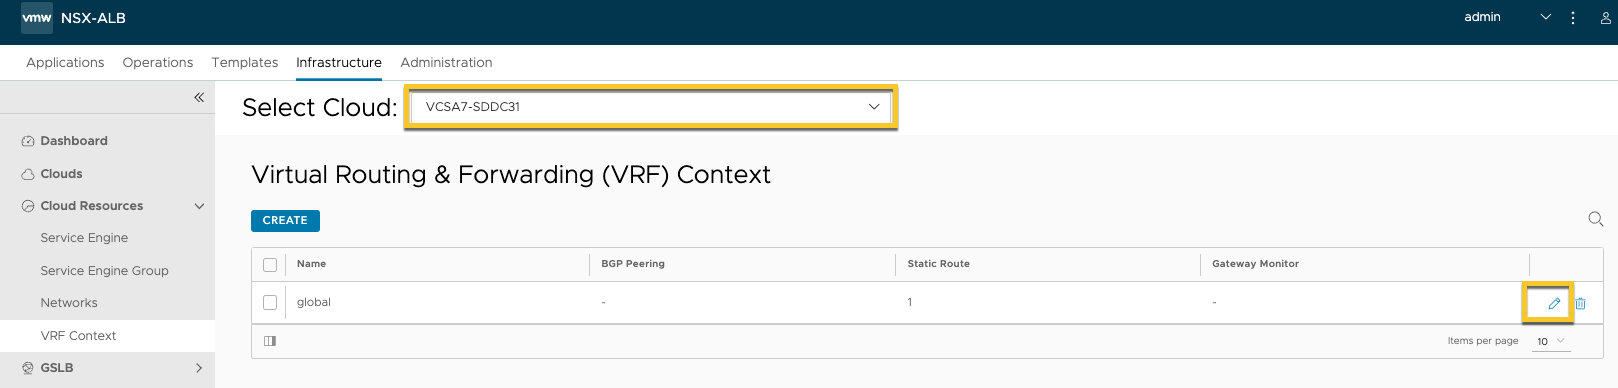
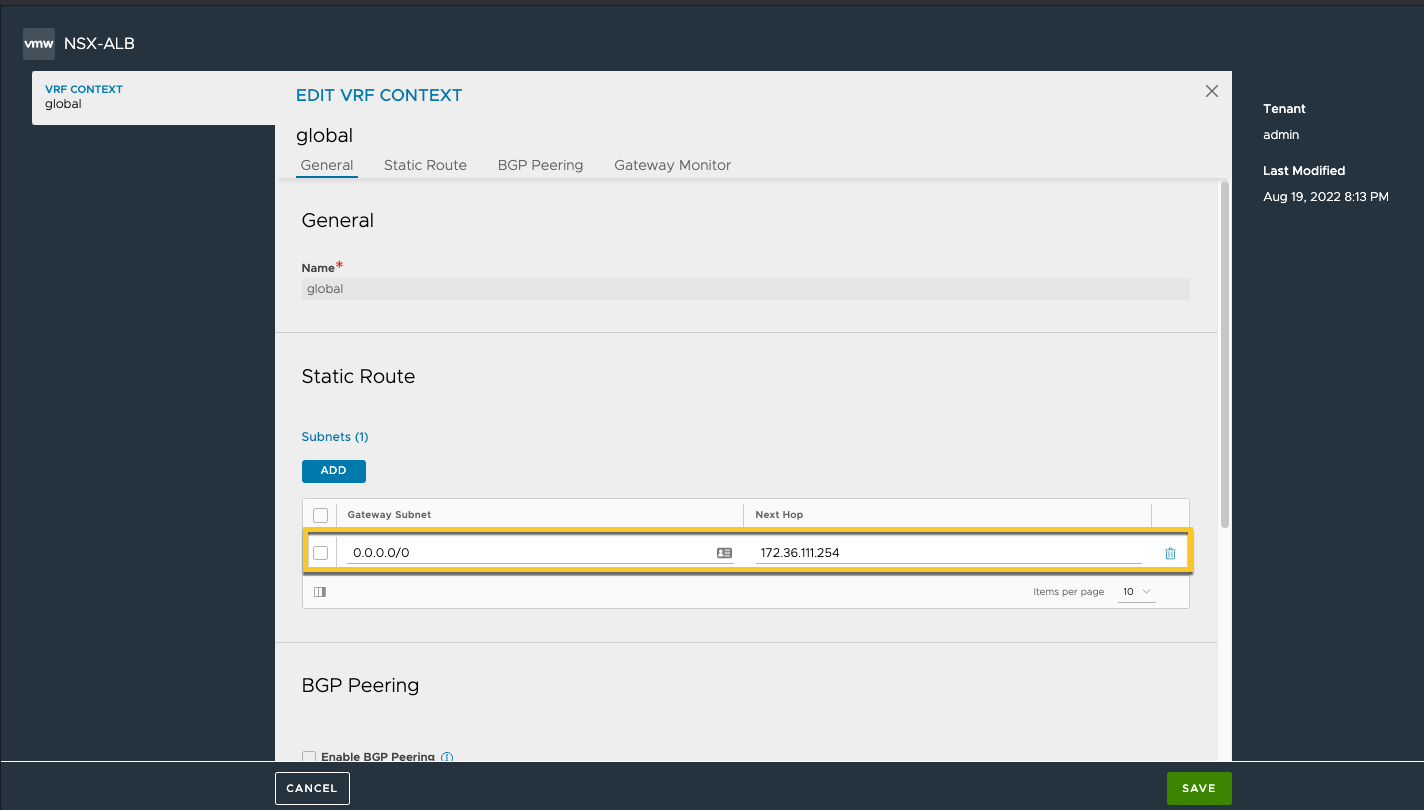
# 配置缺省路由
创建证书
如果希望OCP上TLS Settings为reencrypt类型的Routes同步在Avi上生成VS,需要在avi-system命名空间下配置默认的SSL证书。
# 通过key manager生成证书
# 导出证书并上传至Operator VM ,运行如下命令产生route-certs-default
| [root@Operator ~]# kubectl -n avi-system create secret tls router-certs-default –cert=*.apps.sddc3ocp.vmwlab.net_chain.crt –key=*.apps.sddc3ocp.vmwlab.net_key.key |
AKO安装
# 获取当前版本信息及Manifests文件
| [root@Operator ~]# kubectl create ns avi-system |
| [root@Operator ~]# helm repo add ako https://projects.registry.vmware.com/chartrepo/ako |
| [root@Operator ~]# helm search repo |
| [root@Operator ~]# helm show values ako/ako –version 1.7.2 > values.yaml |
# 根据实际环境修改values.yaml里的参数
| [root@Operator ~]# vi values.yaml |
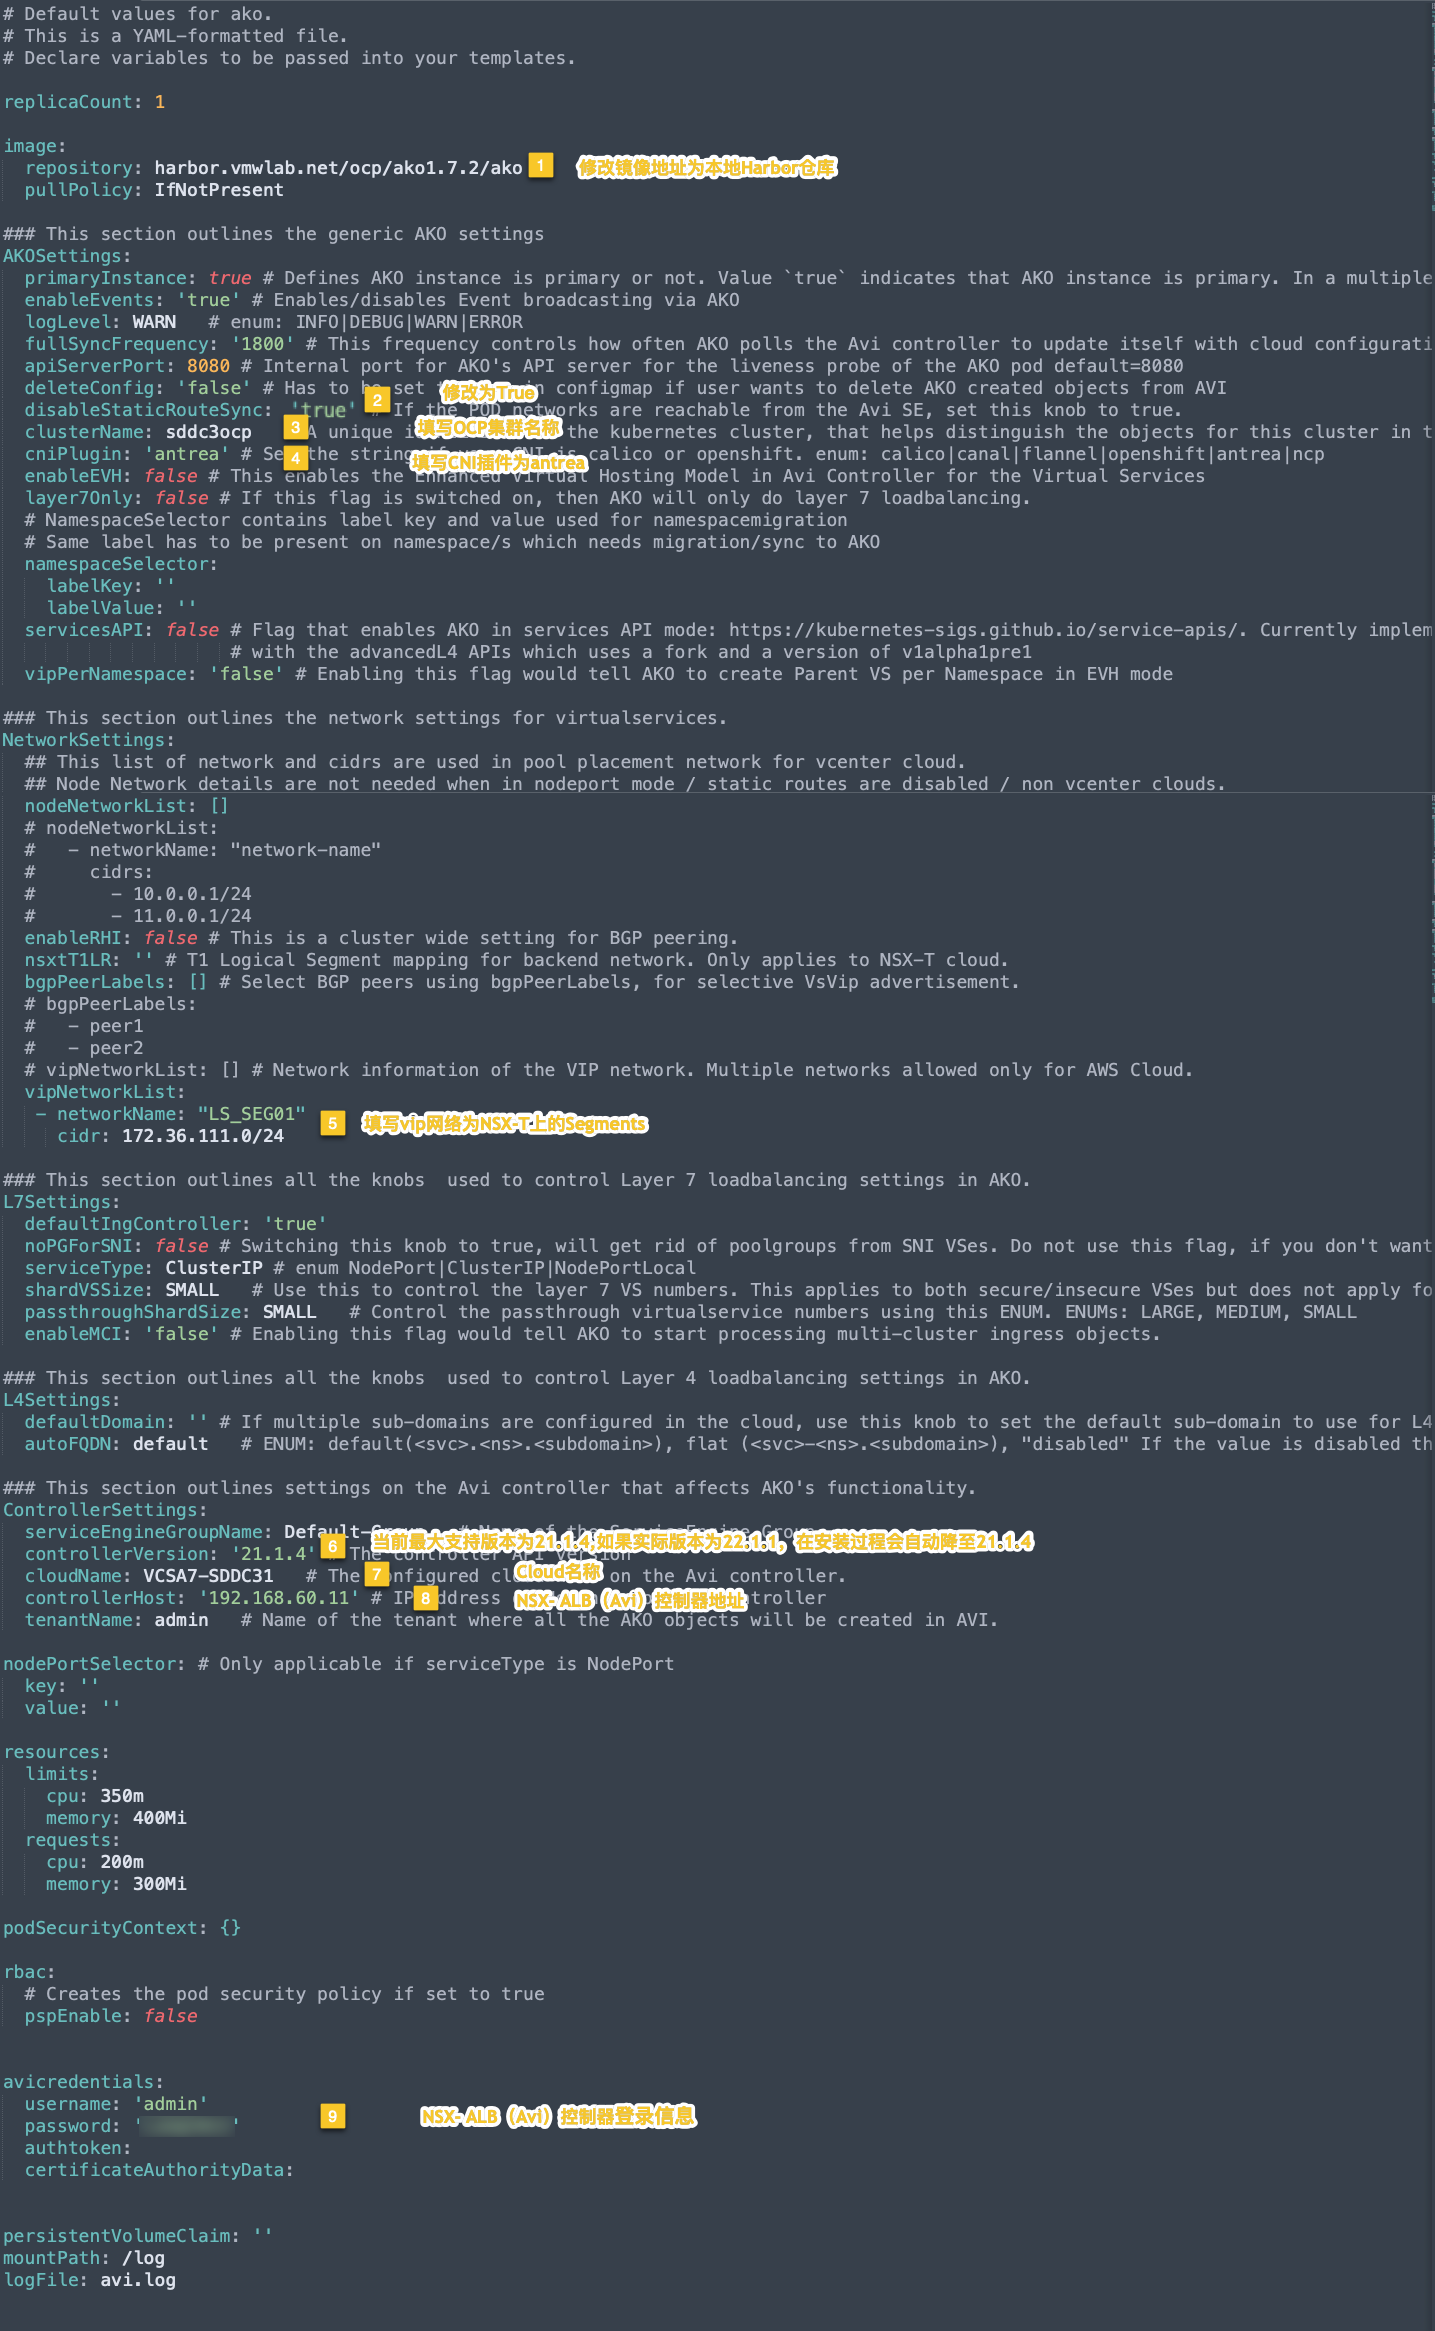 |
# 开始安装
| [root@Operator ~]# helm install ako/ako –generate-name –version 1.7.2 -f values.yaml –namespace=avi-system |
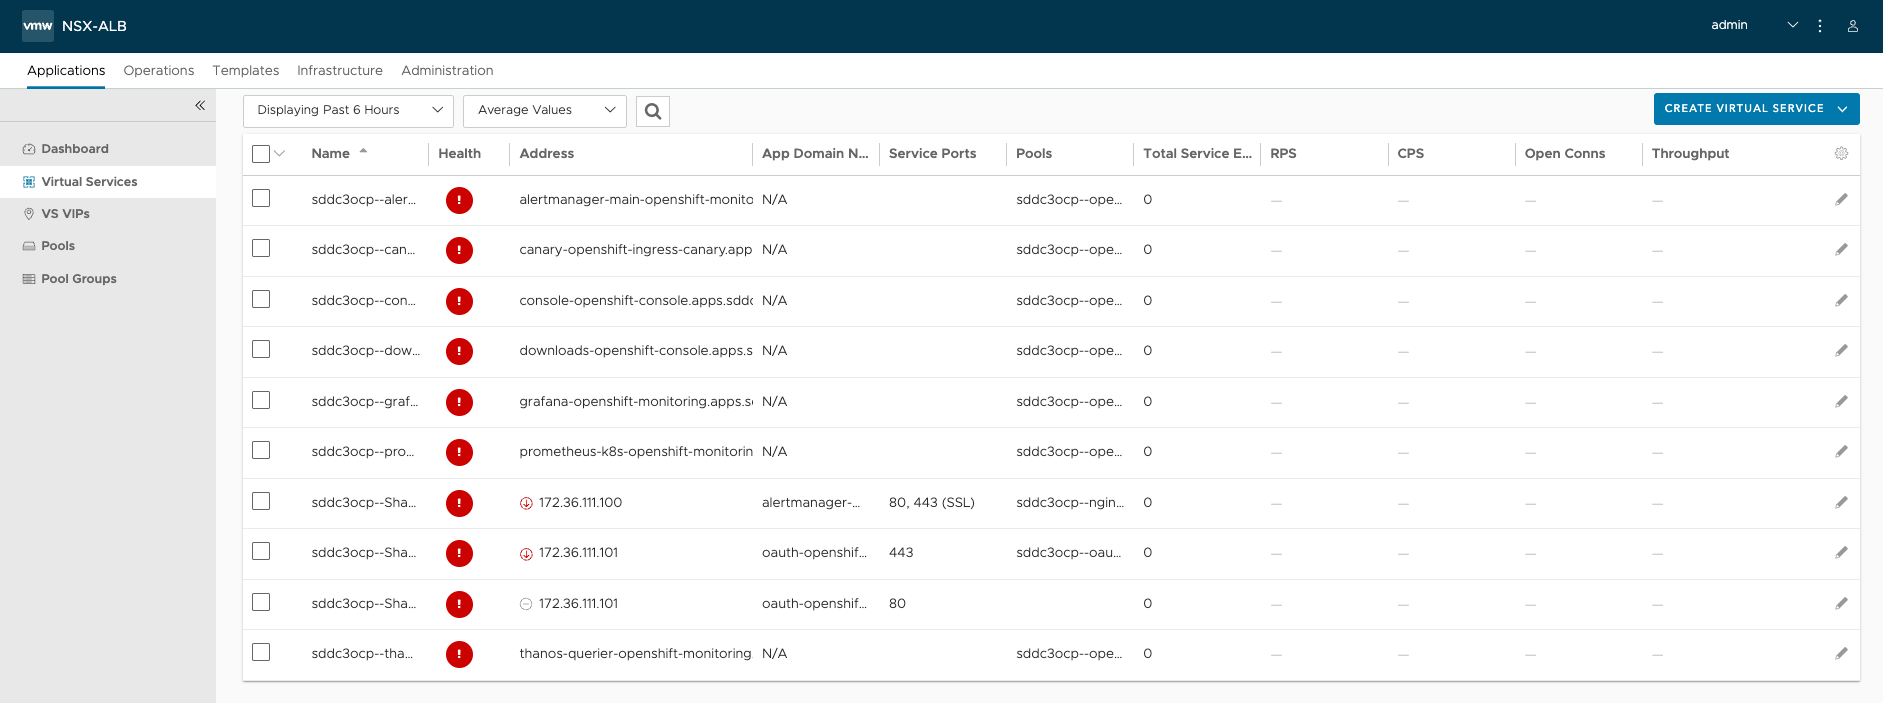
# 观察VS 初始状态
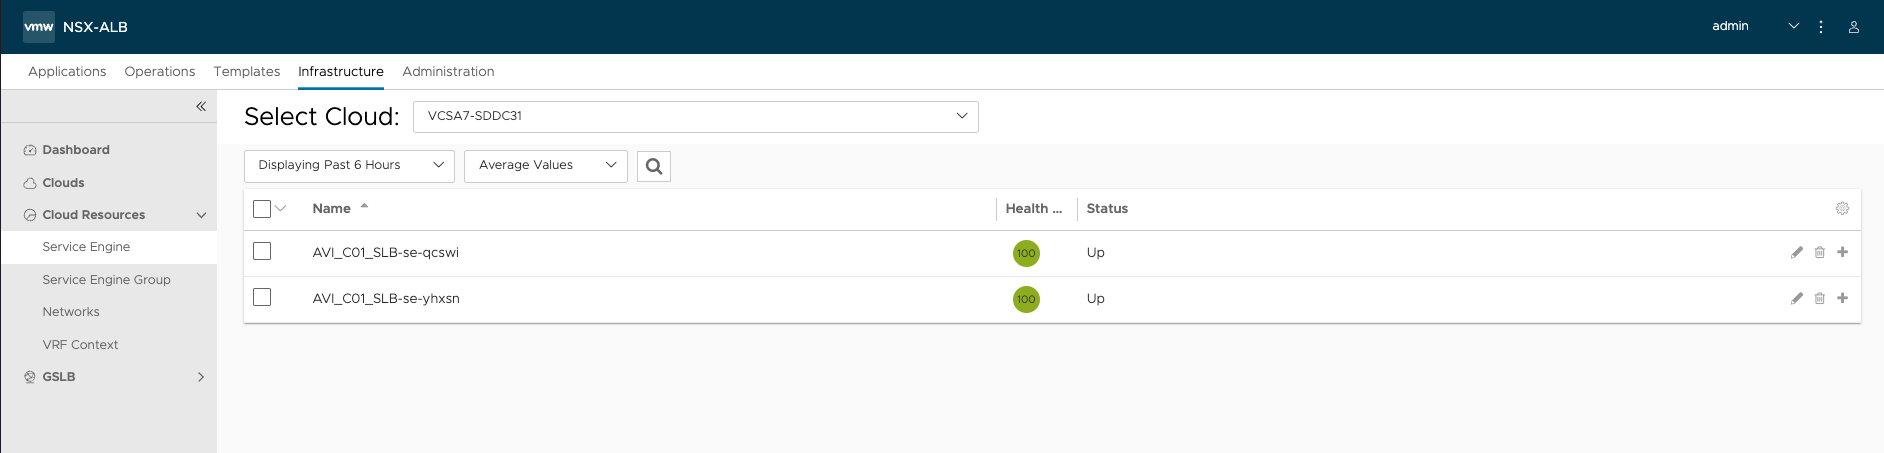
# 等待SE创建完成
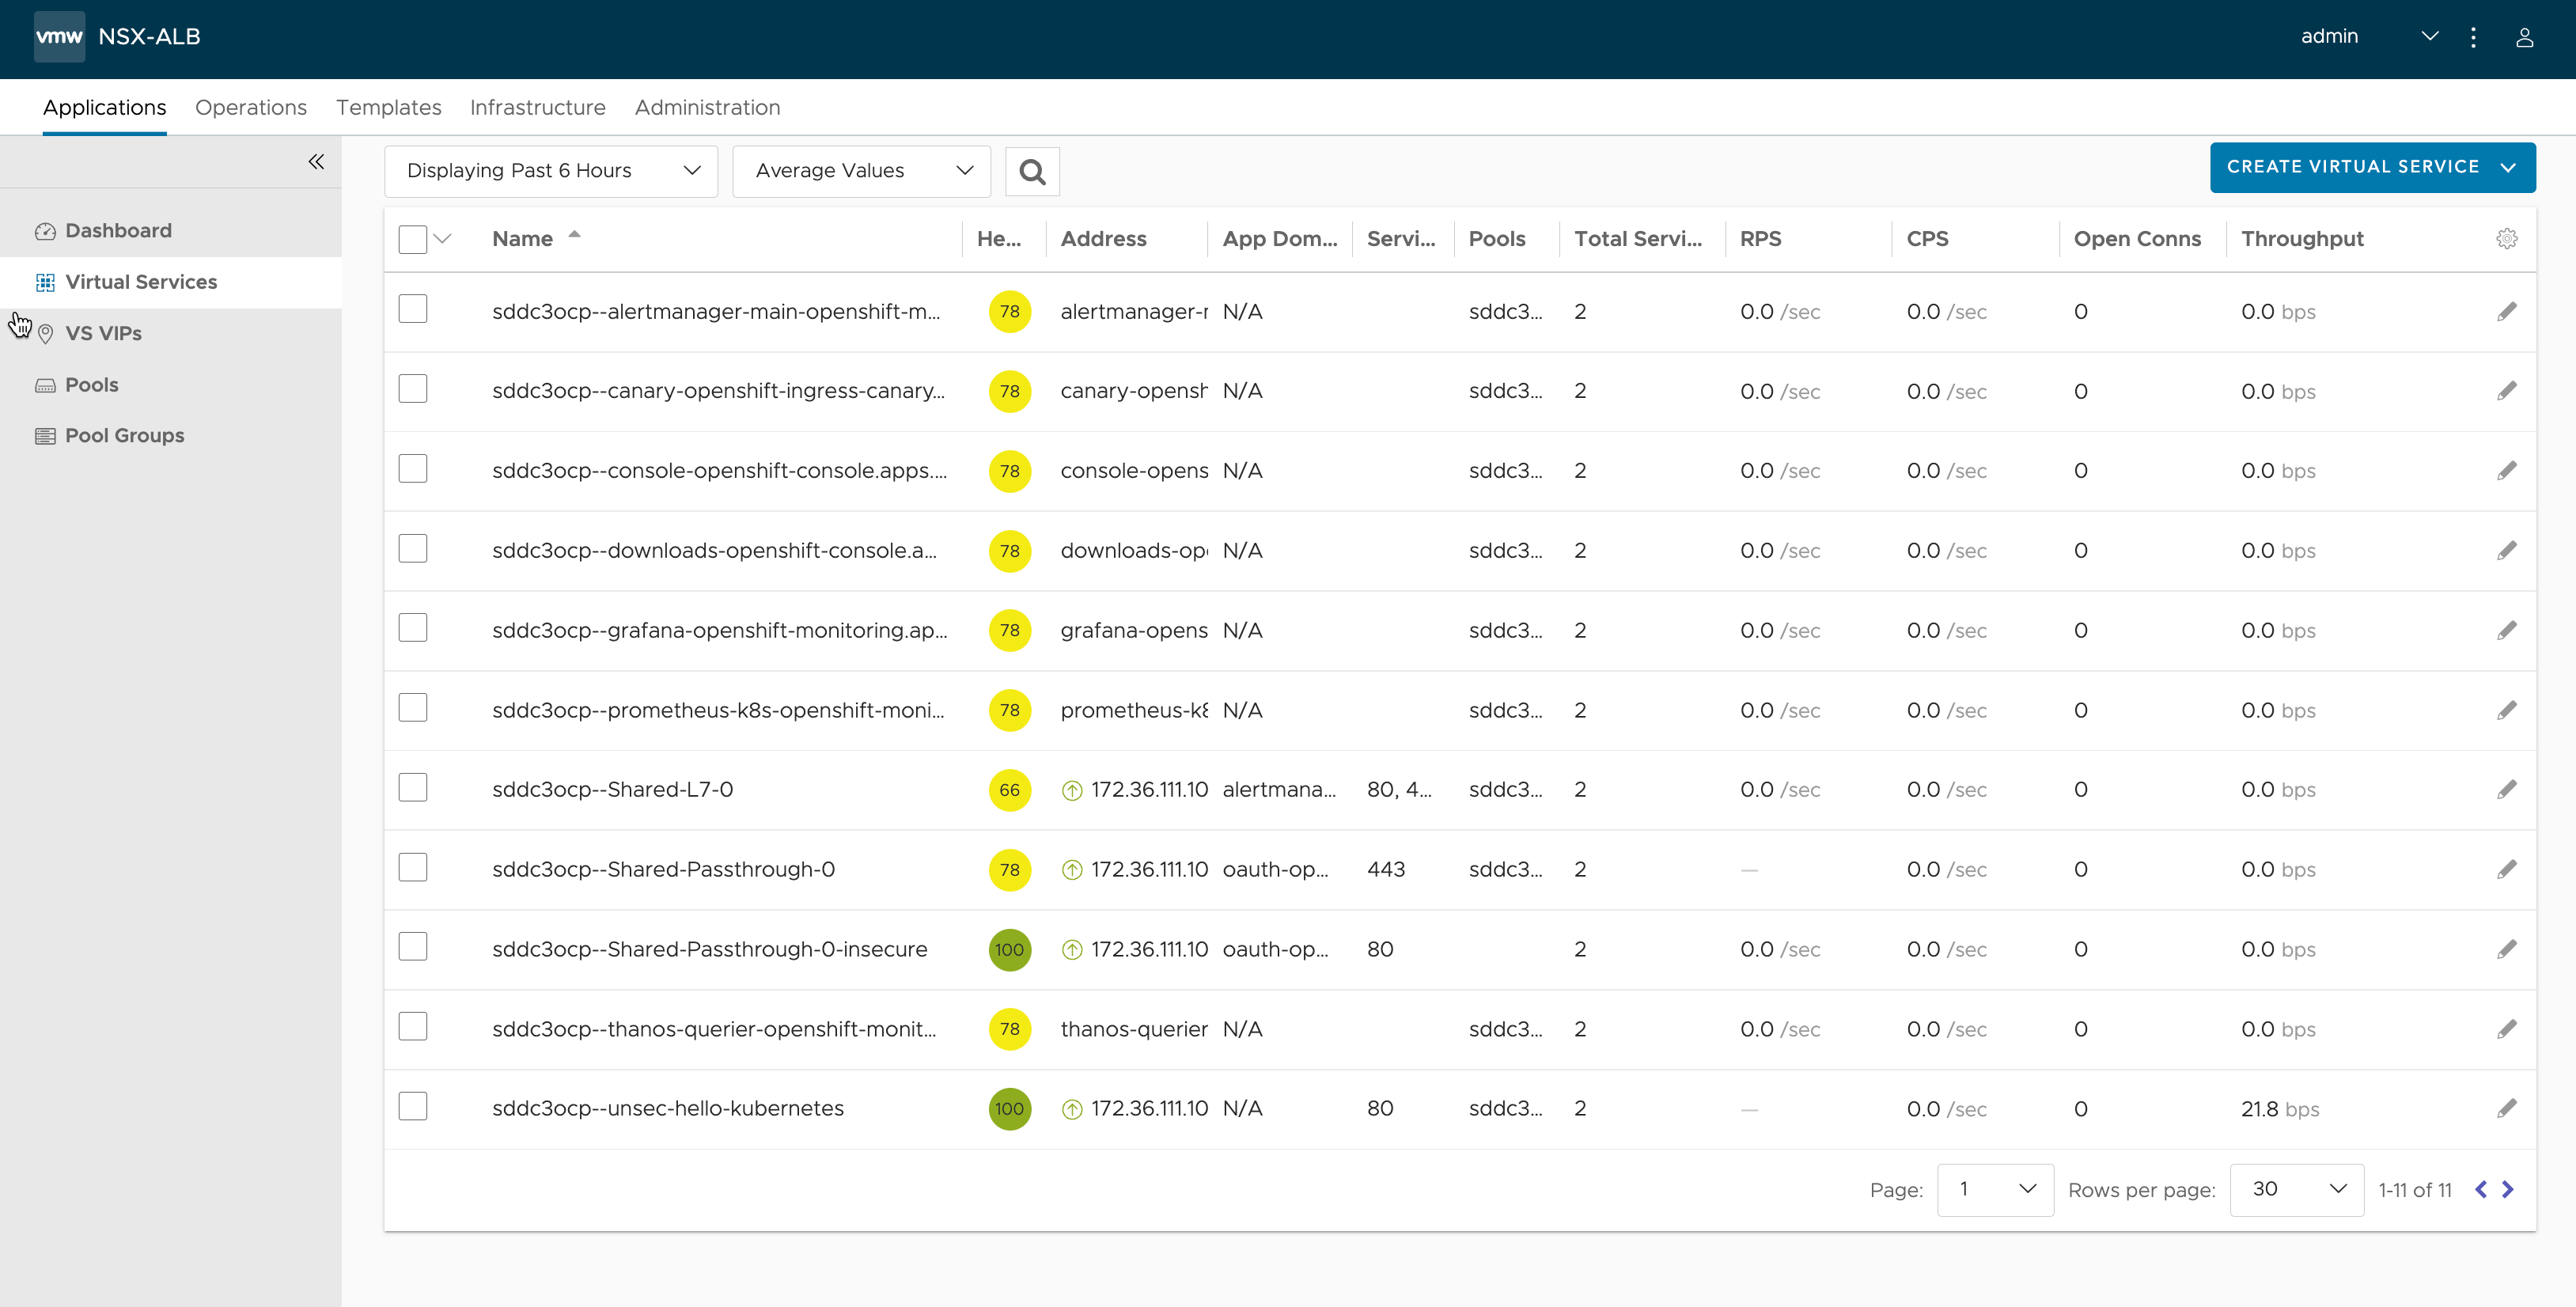
# 再次查看VS状态
其它操作
| [root@Operator ~]# helm list -n avi-system |
| [root@Operator ~]# helm uninstall ako-1661337260 -n avi-system |
Antrea部分基本测试验证
容器网络验证
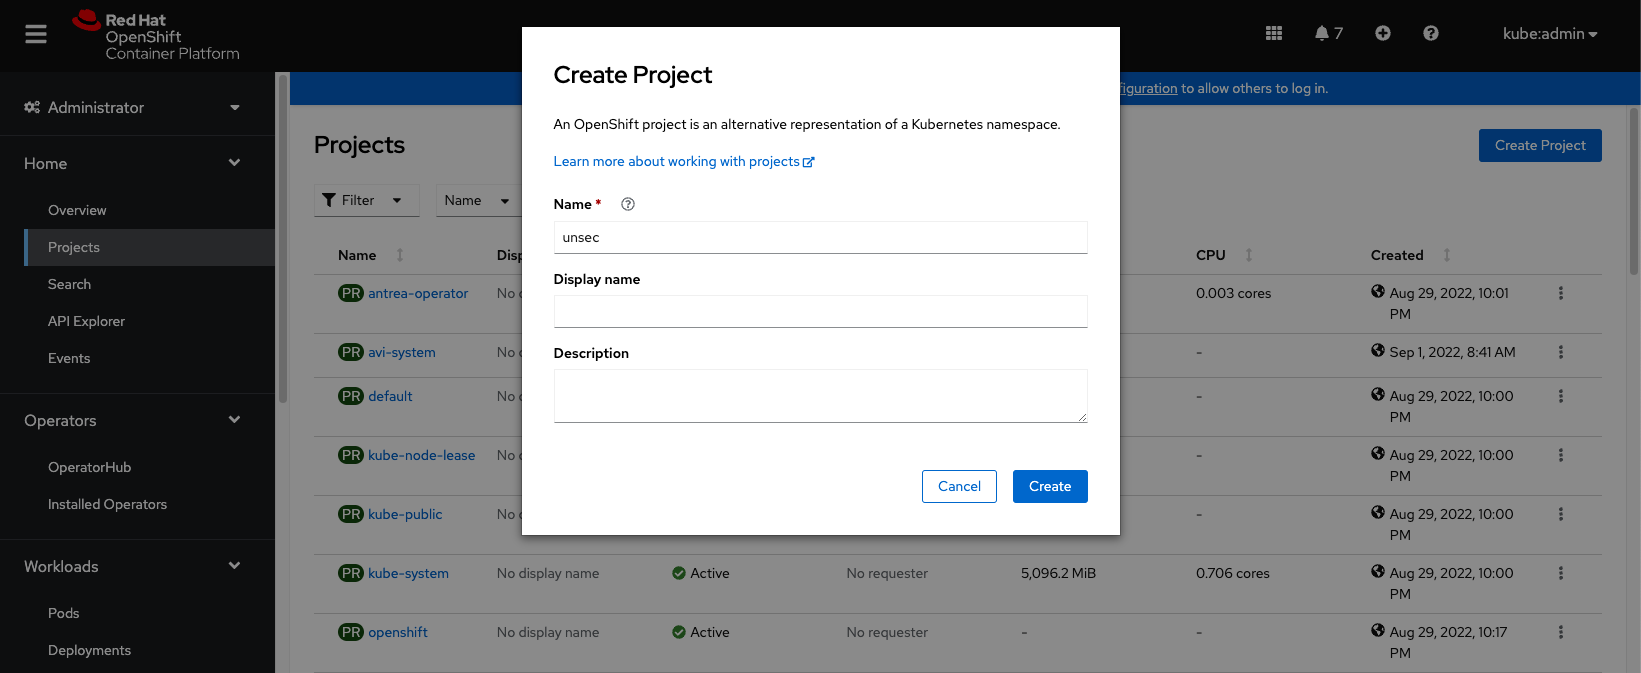
# 创建Project
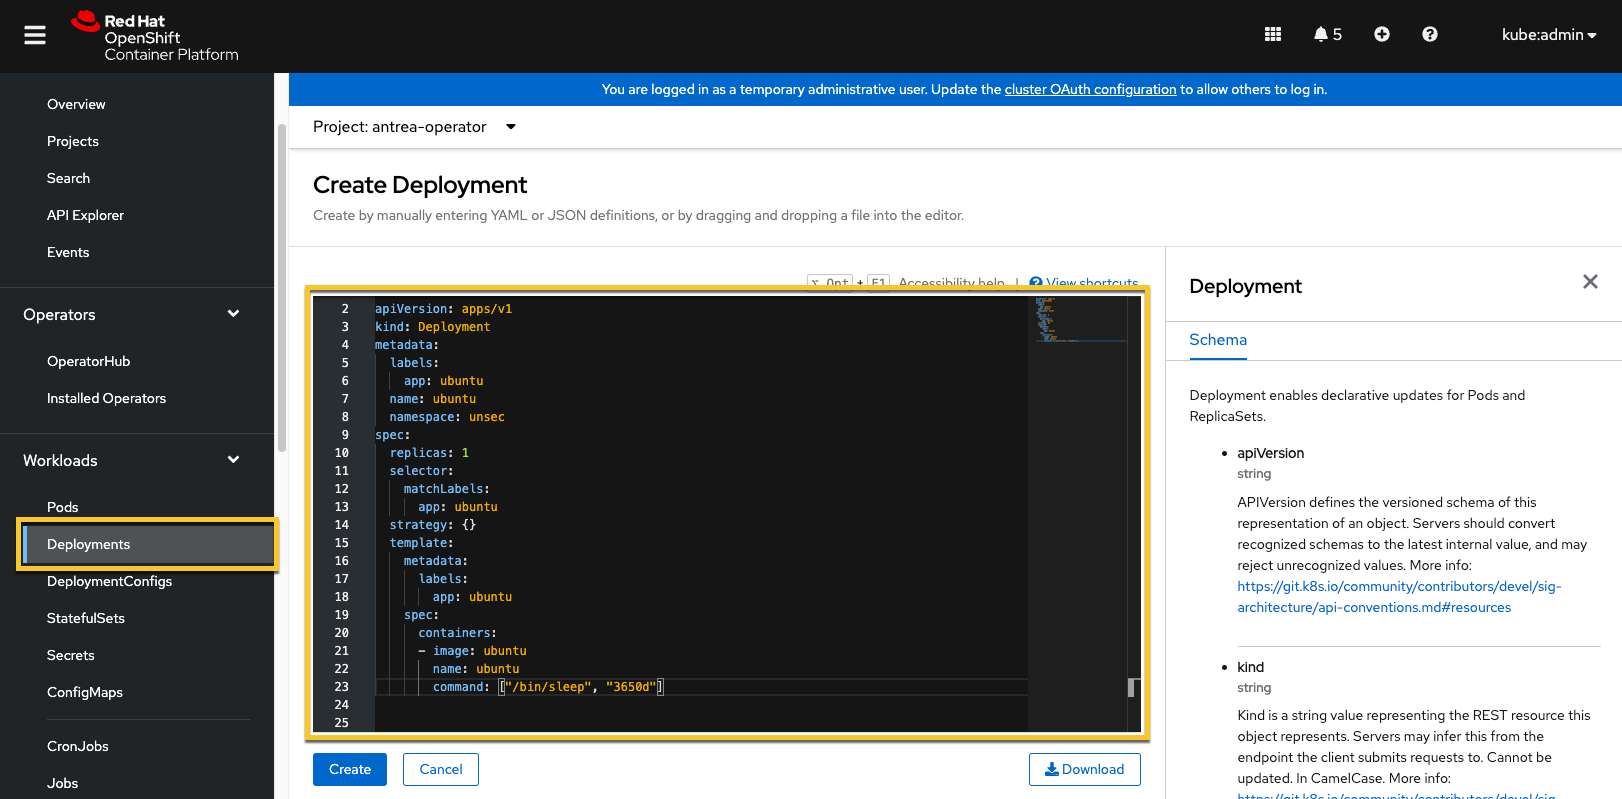
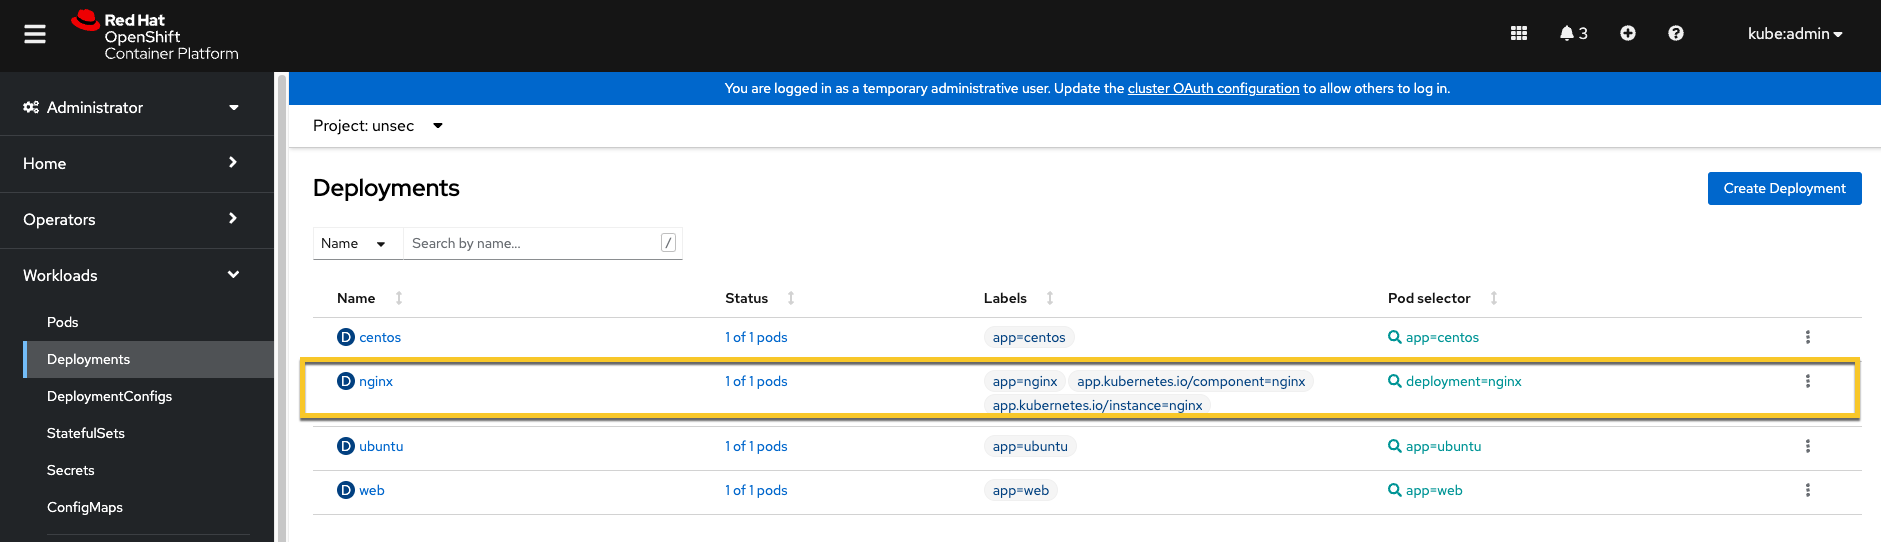
# 创建Deployments(ubuntu)
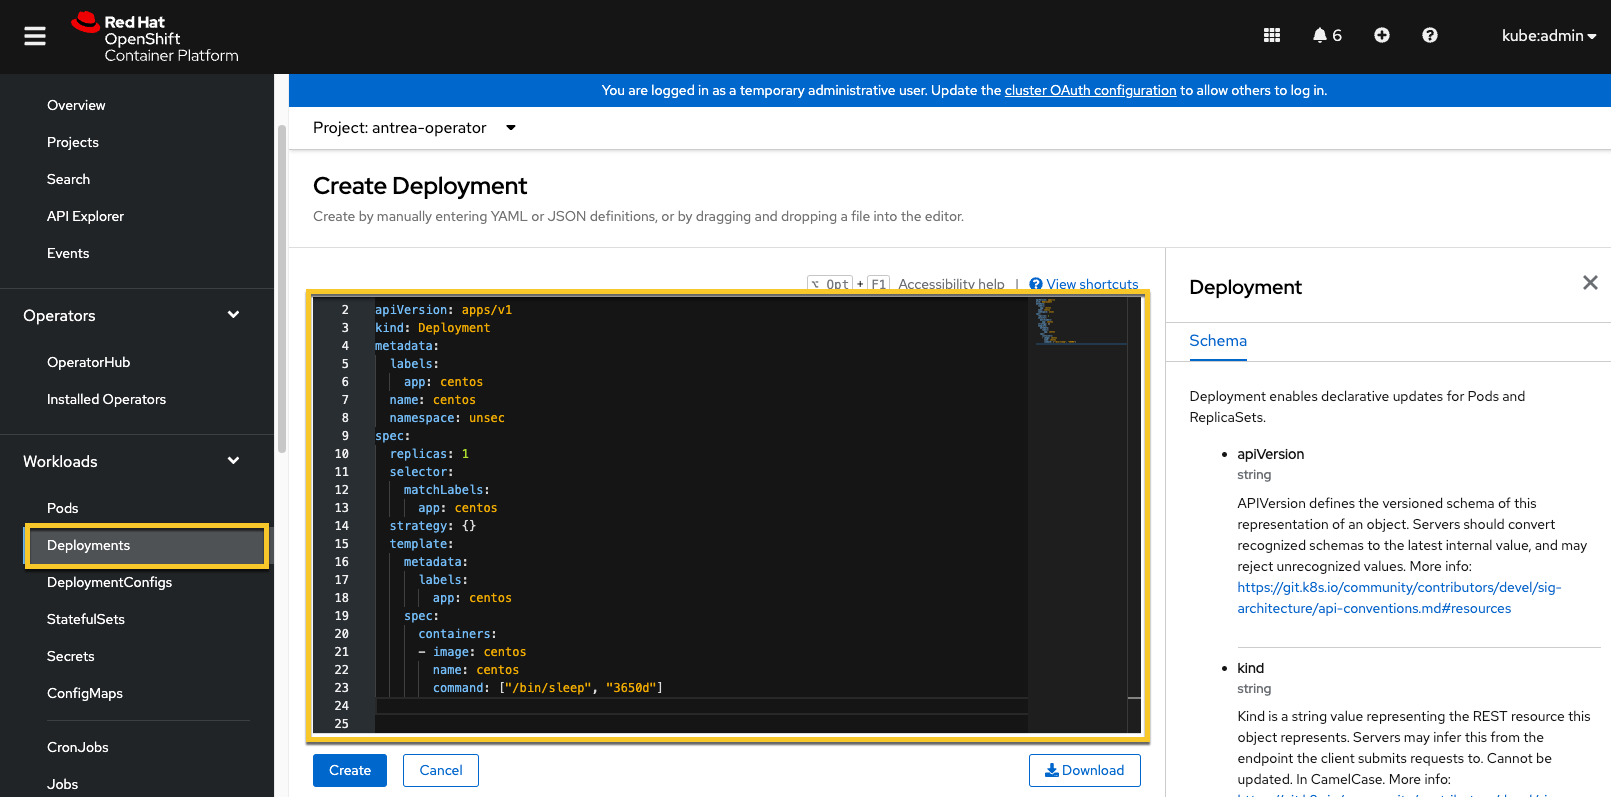
# 创建Deployments(centos)
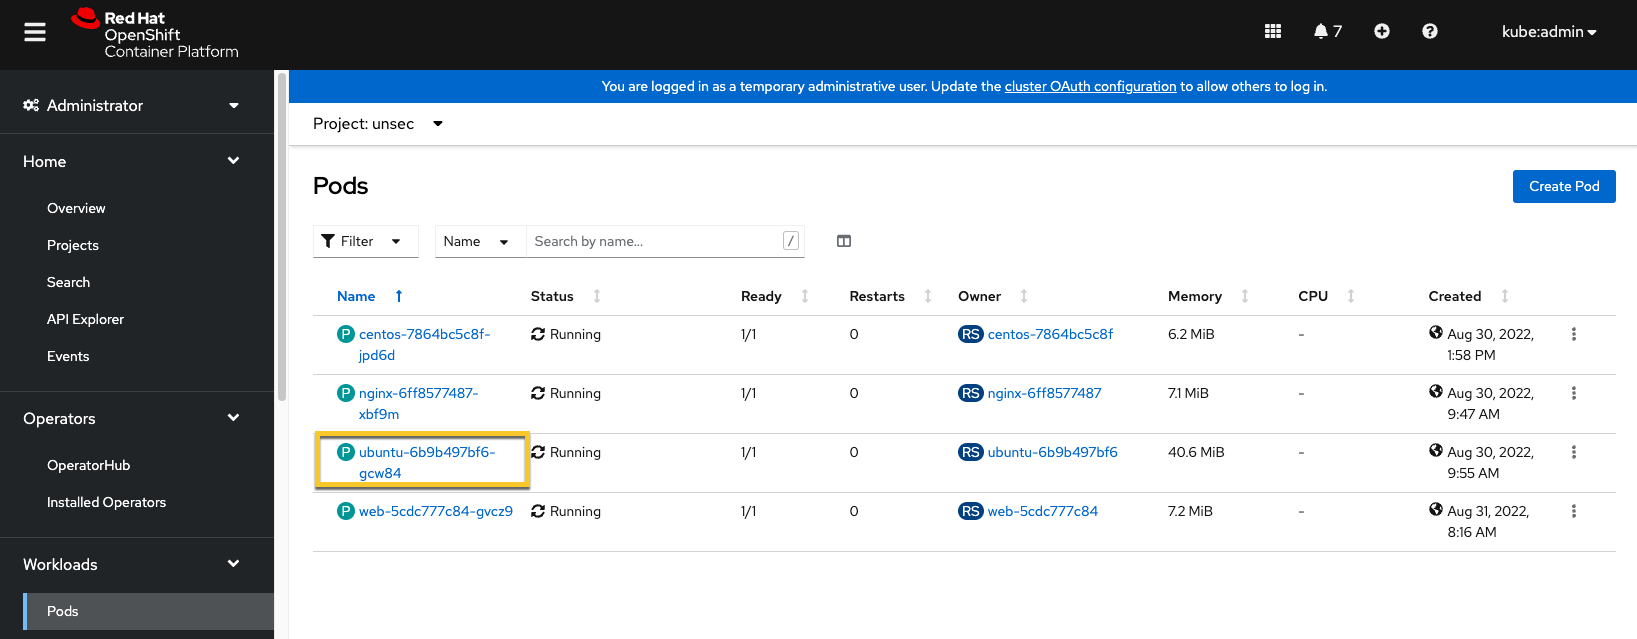
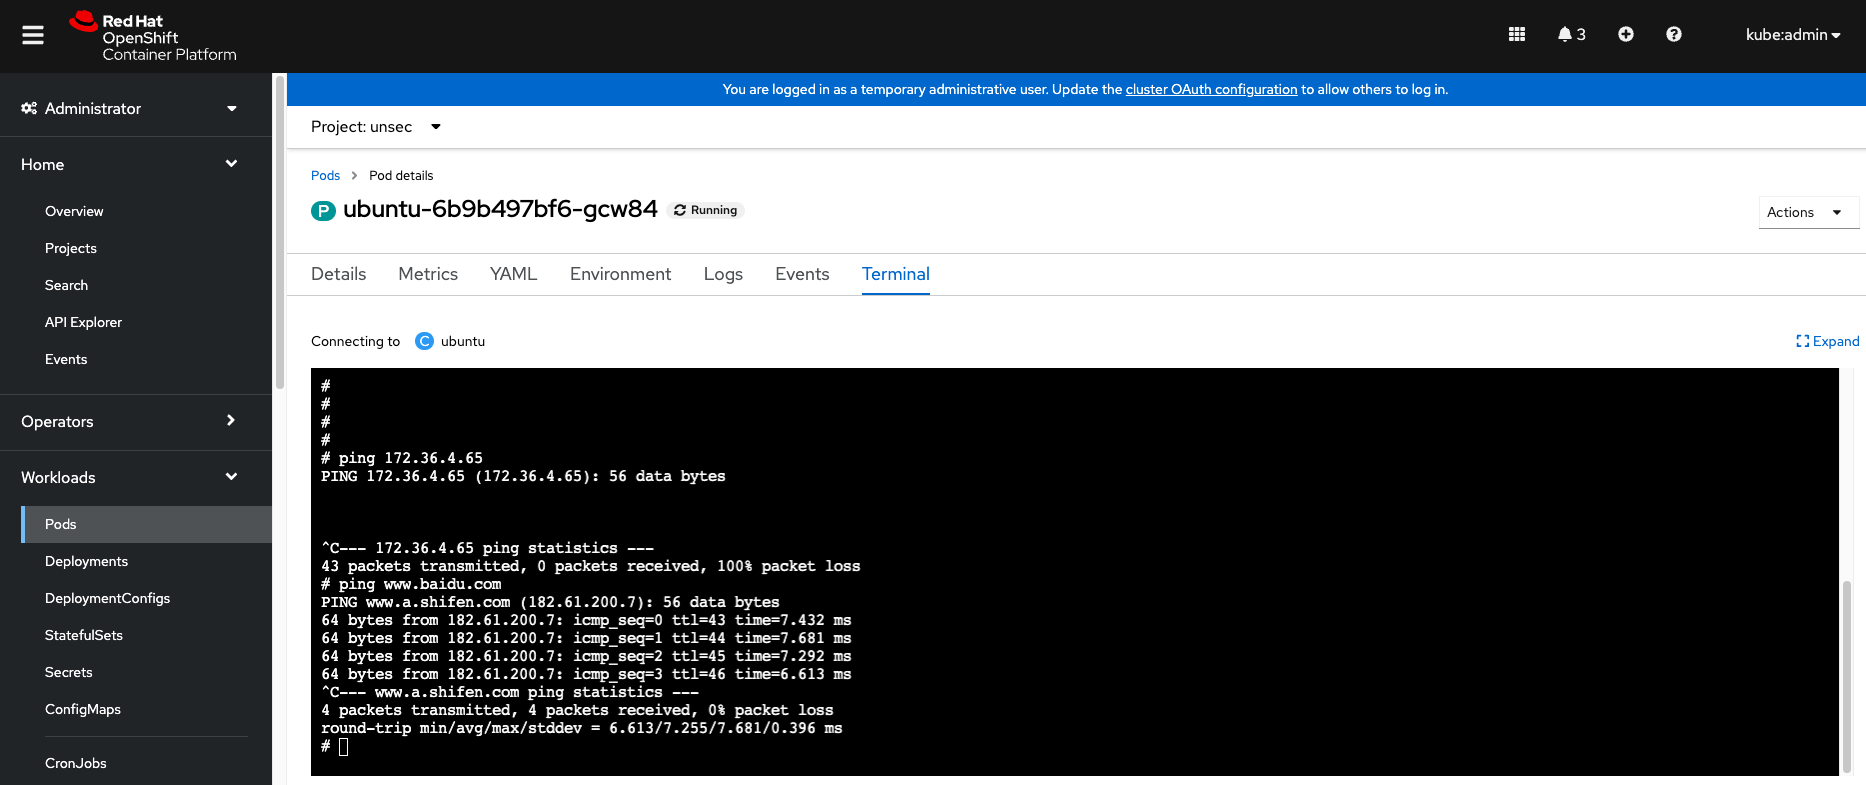
# 测试Pod间访问(ubuntu pod访问centos pod)
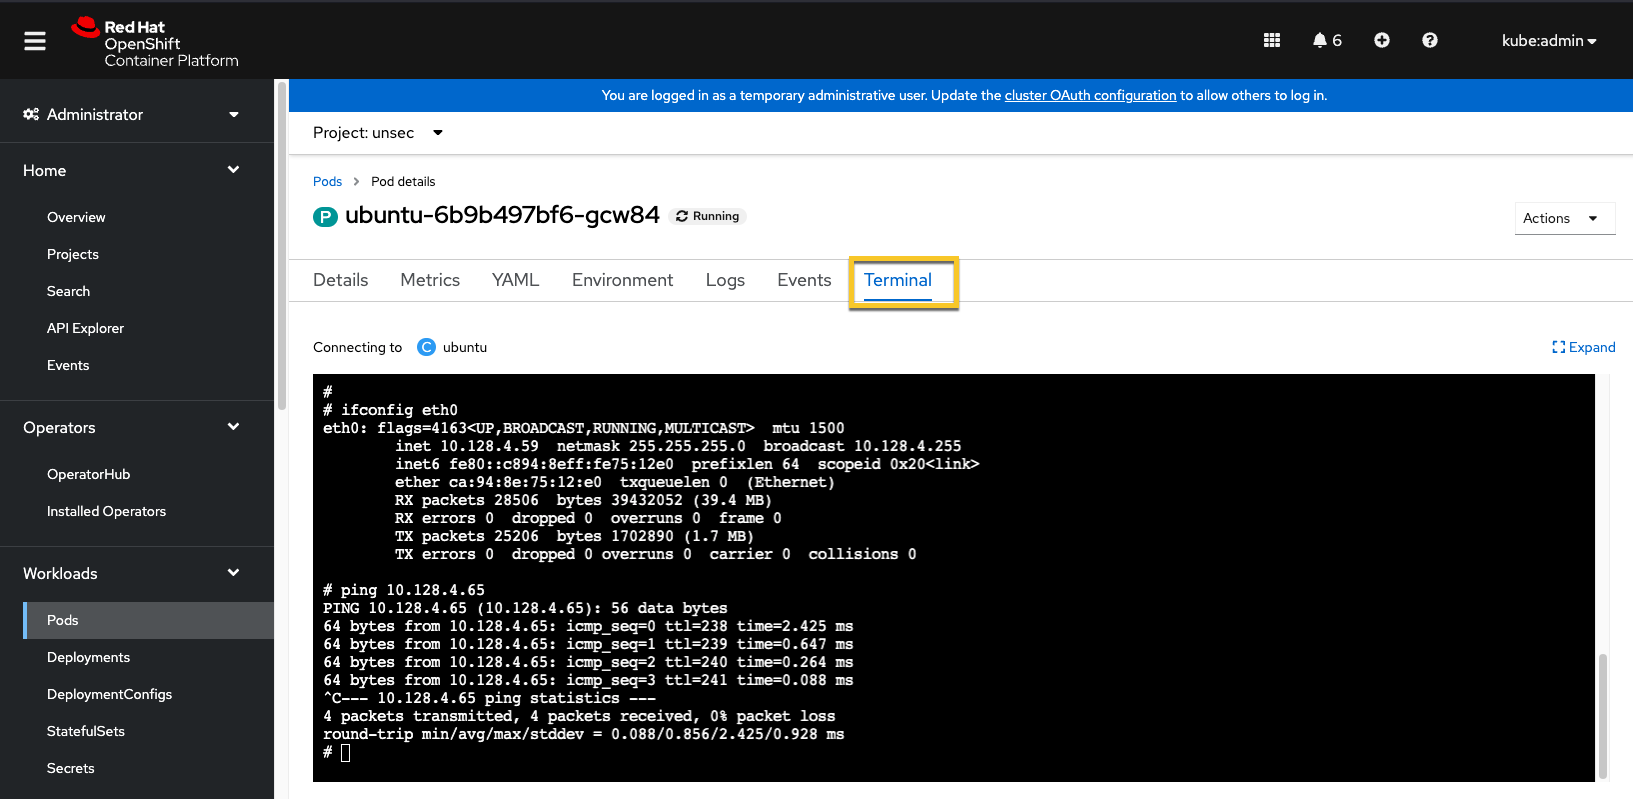

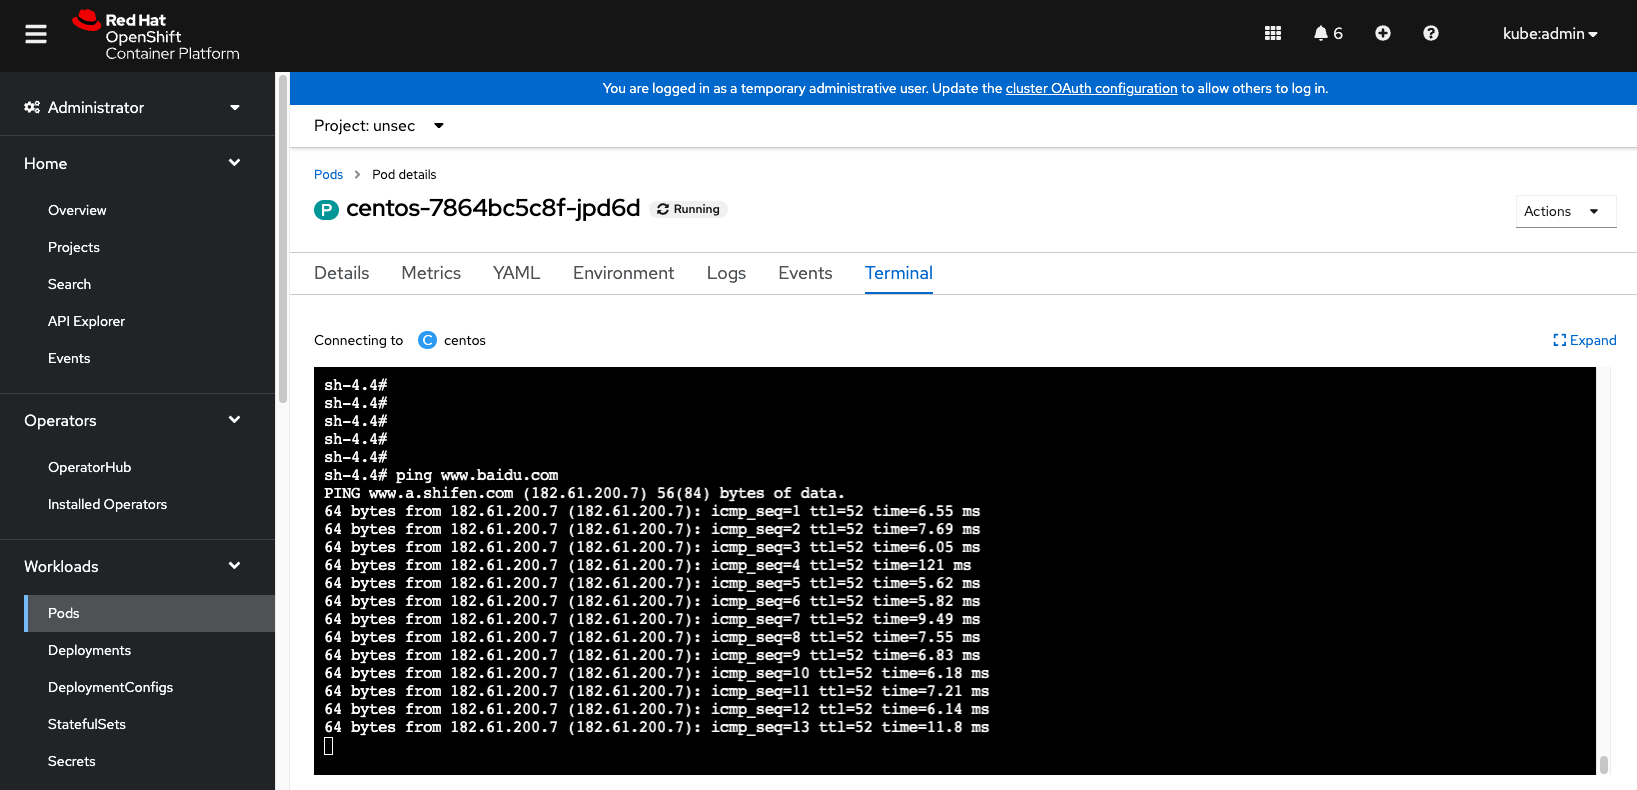
# 测试Pod到外部网络的出向访问
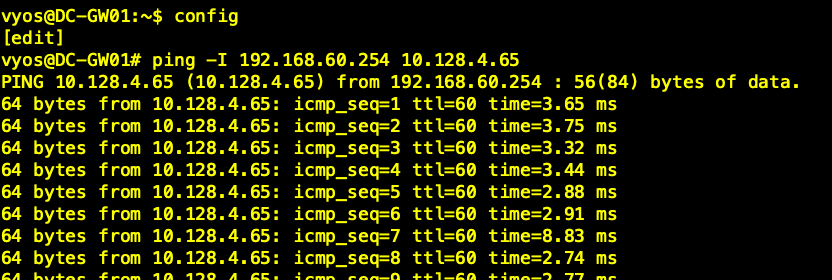
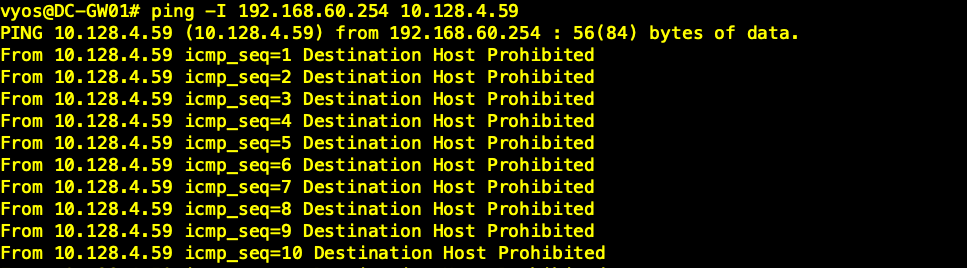
# 测试外部网络到Pod入向访问(在外部网络的Physical Router上测试)
NSX-T集成Antrea安全策略验证
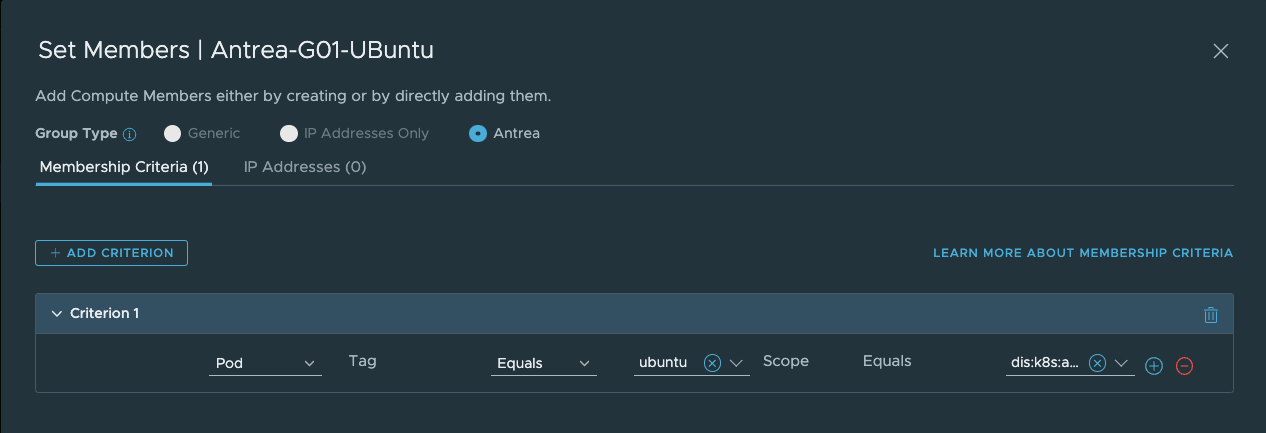
# 创建Group(Antrea-G01-Ubuntu)
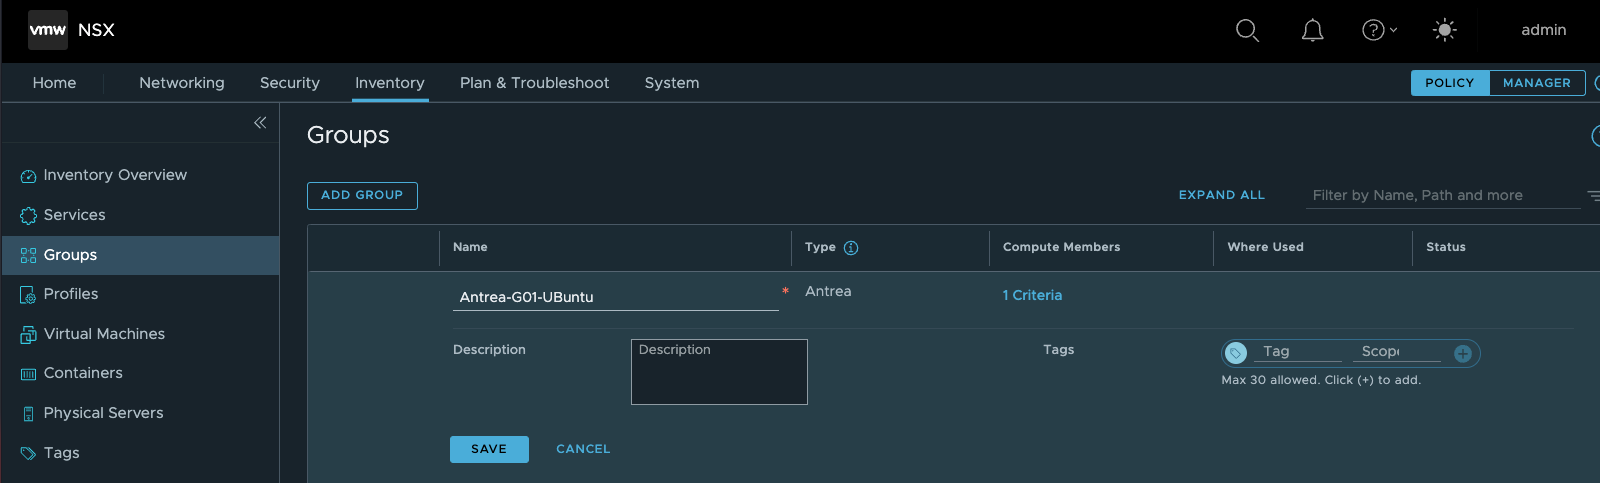
# 设置Group(Antrea-G01-Ubuntu)的成员条件
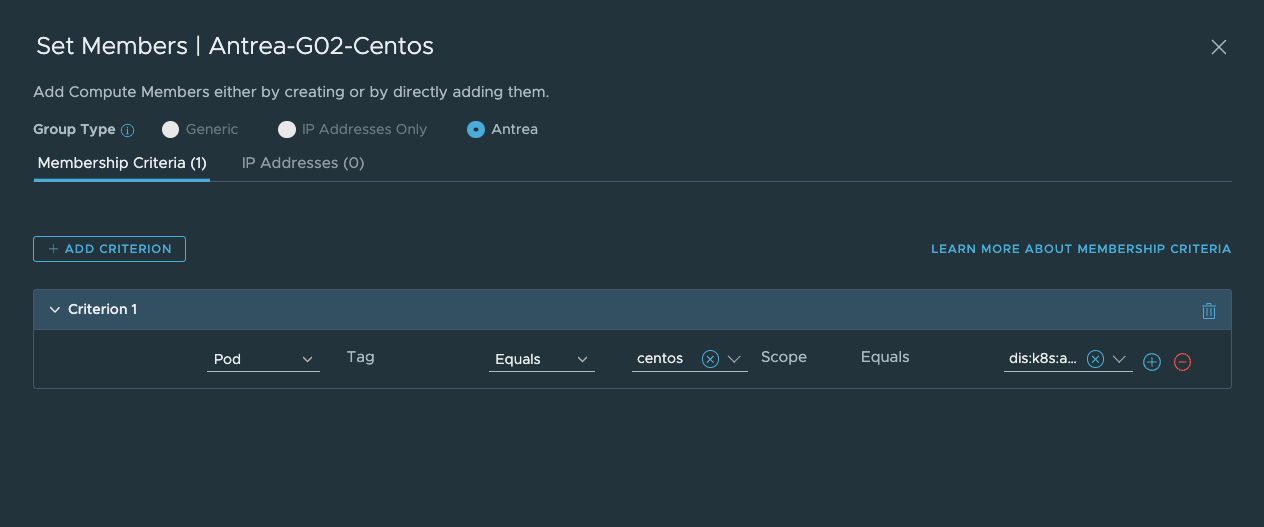
# 创建Group(Antrea-G02-Centos)
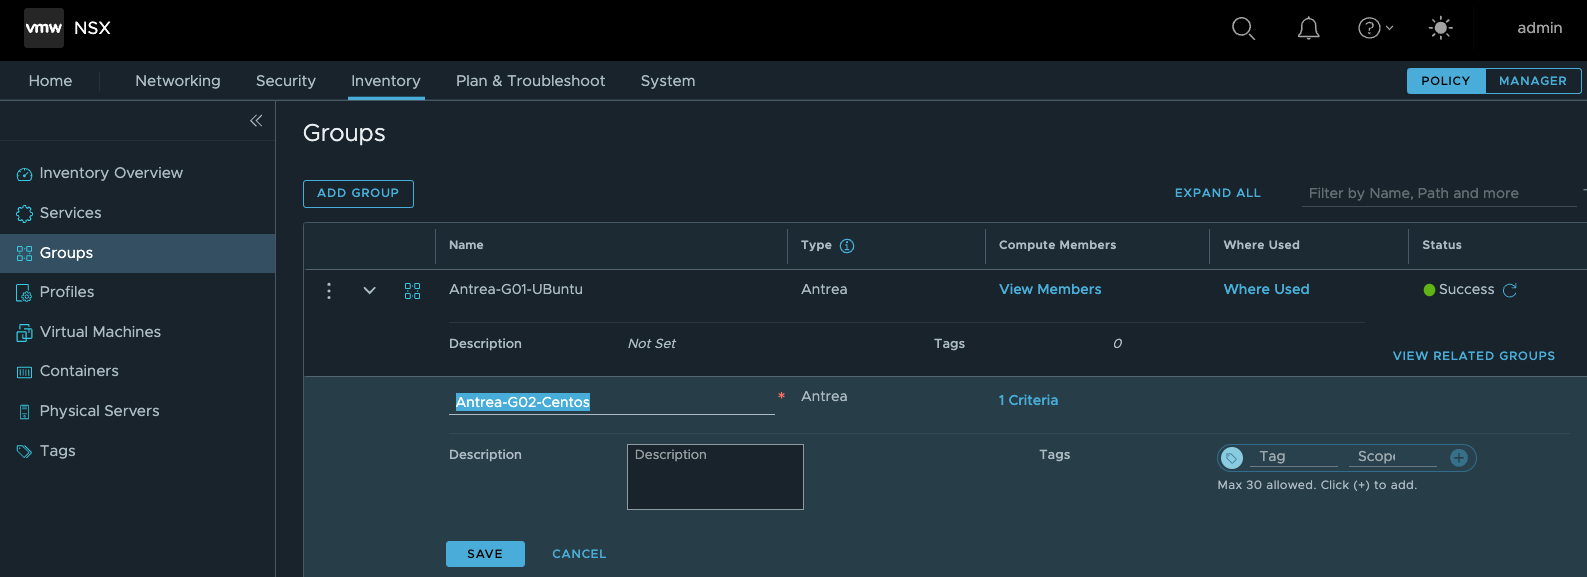
# 设置Group(Antrea-G02-Centos)的成员条件
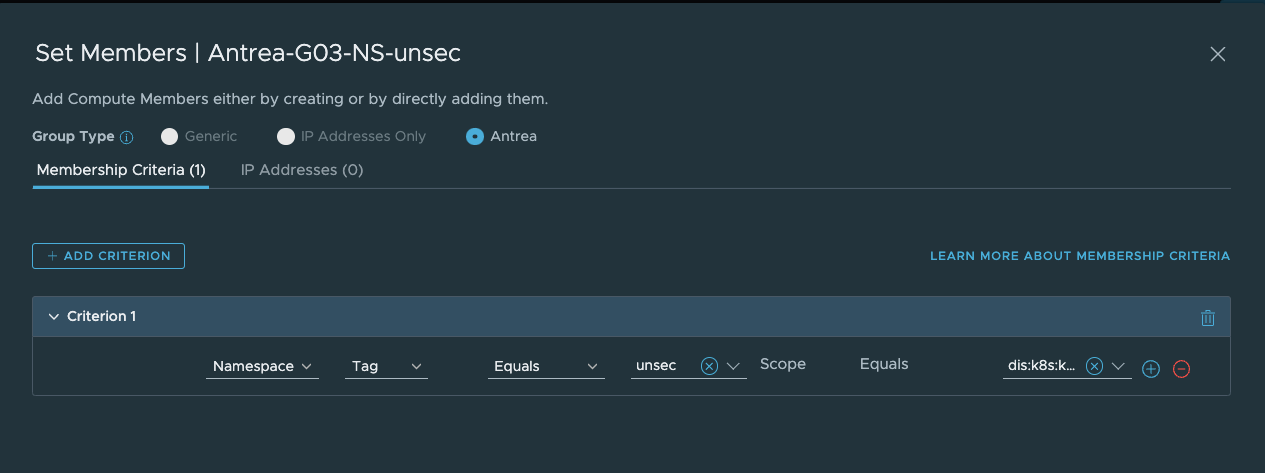
# 创建Group(Antrea-G03-NS-unsec)
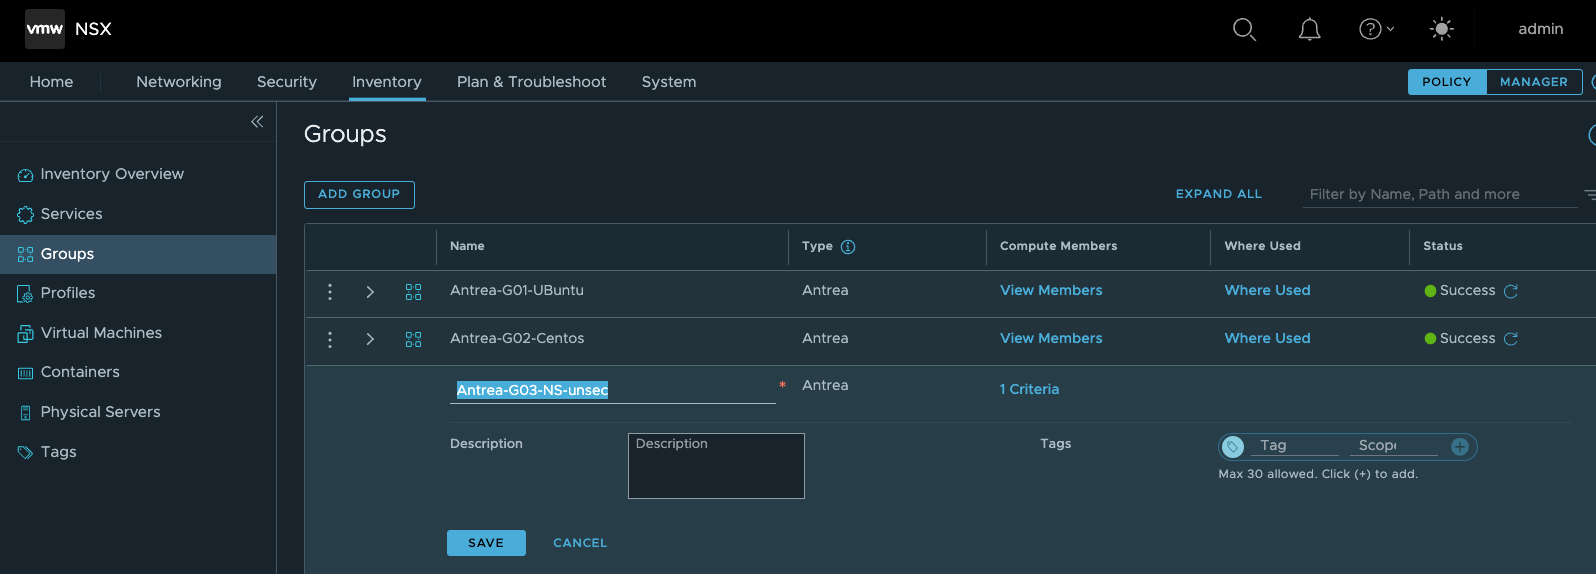
# 设置Group(Antrea-G03-NS-unsec)的成员条件
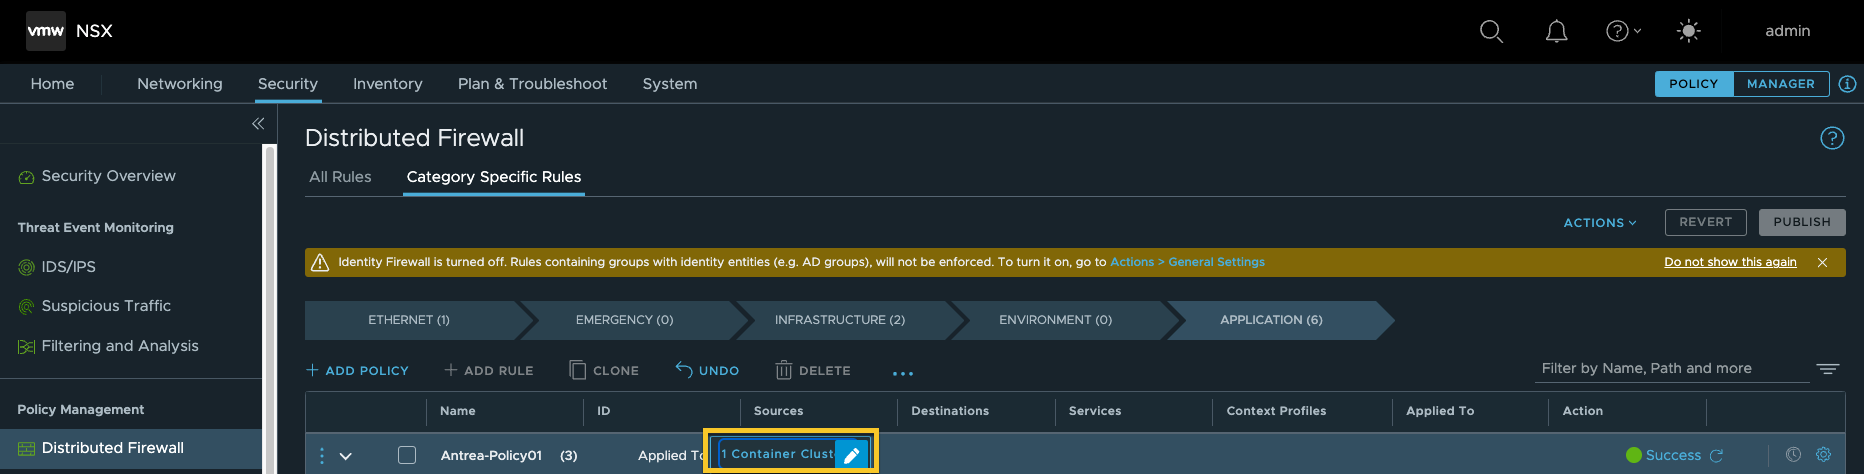
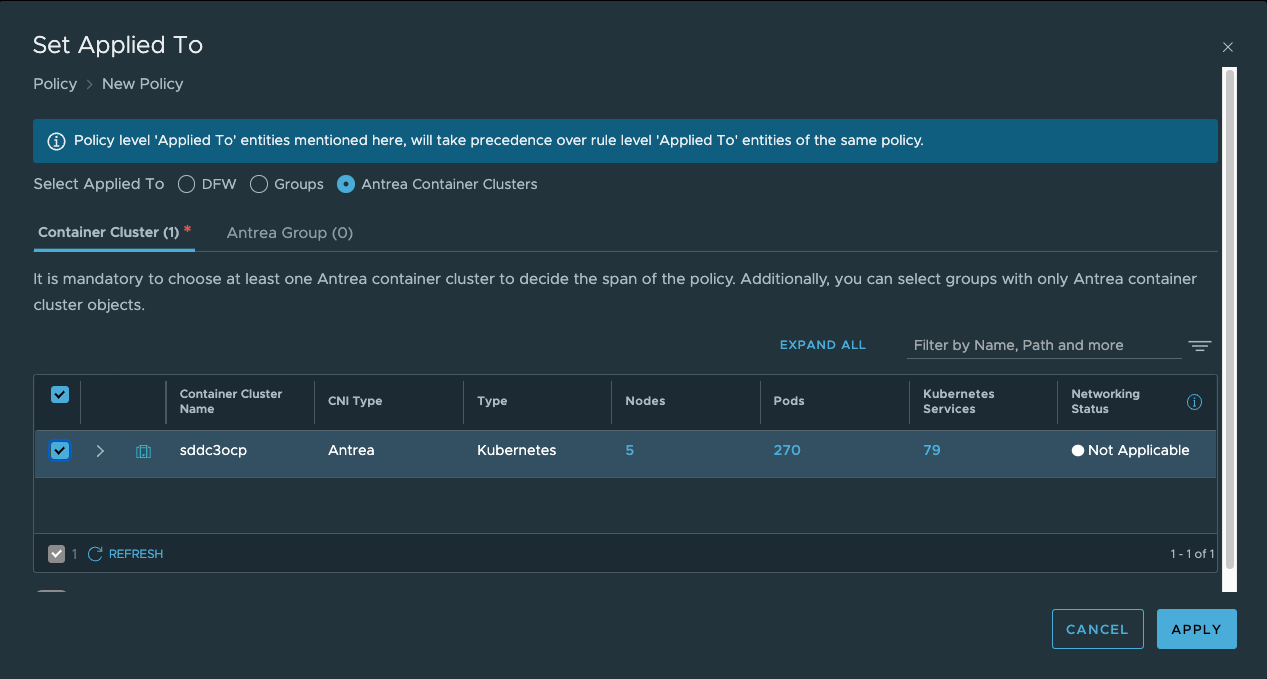
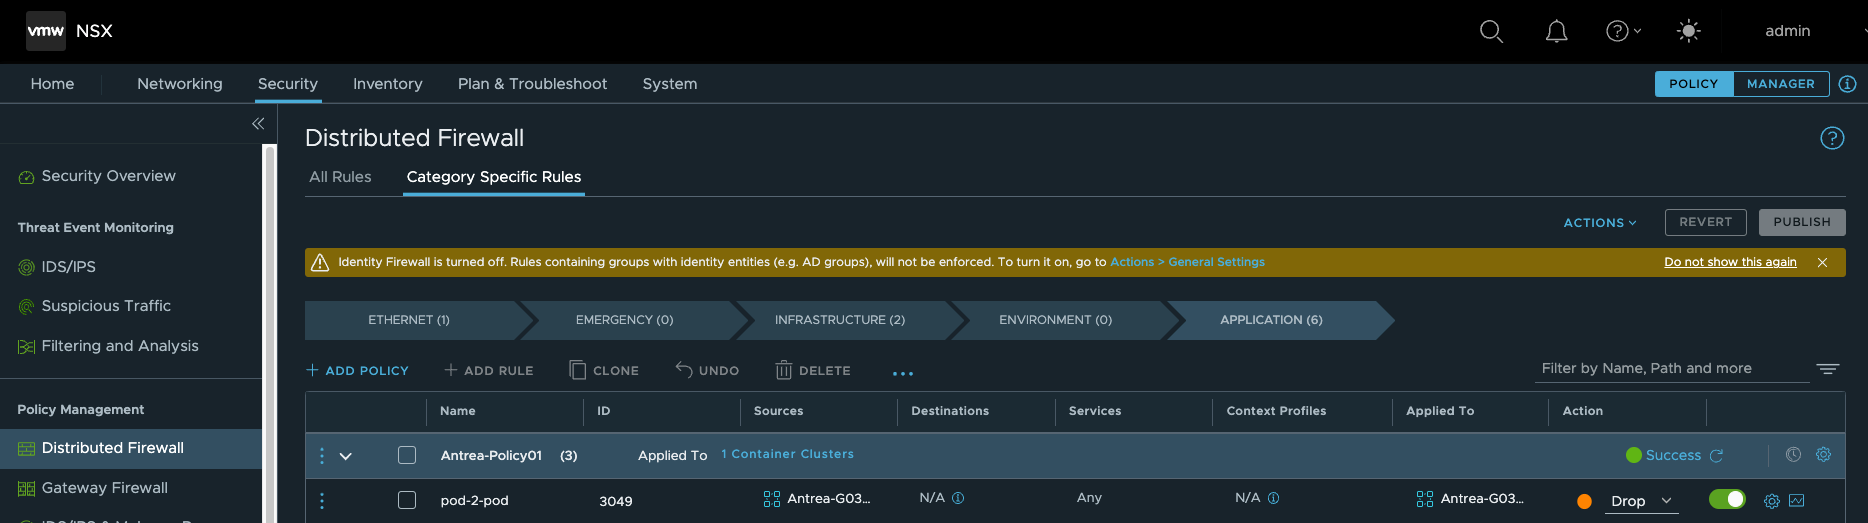
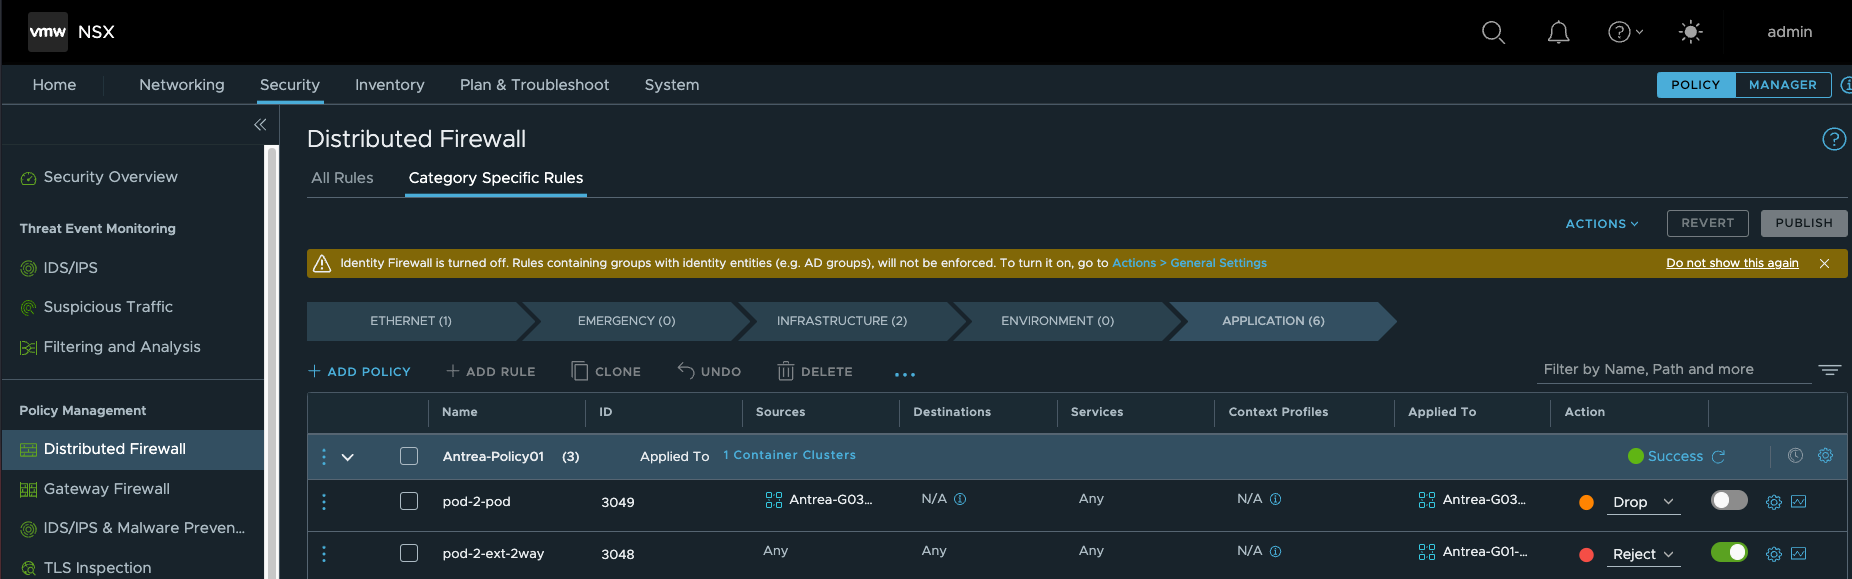
# 创建防火墙安全策略
# 设置规则拒绝Pod间访问
# 设置规则拒绝外部访问Pod
服务发布验证
# 通过命令行发布服务
| [root@Operator ~]# oc new-app –image=docker.io/bitnami/nginx:1.20.2 |
 |
 |
| [root@Operator ~]# oc expose service/nginx |
 |
 |
Ako部分基本测试验证
LB类型服务发布验证
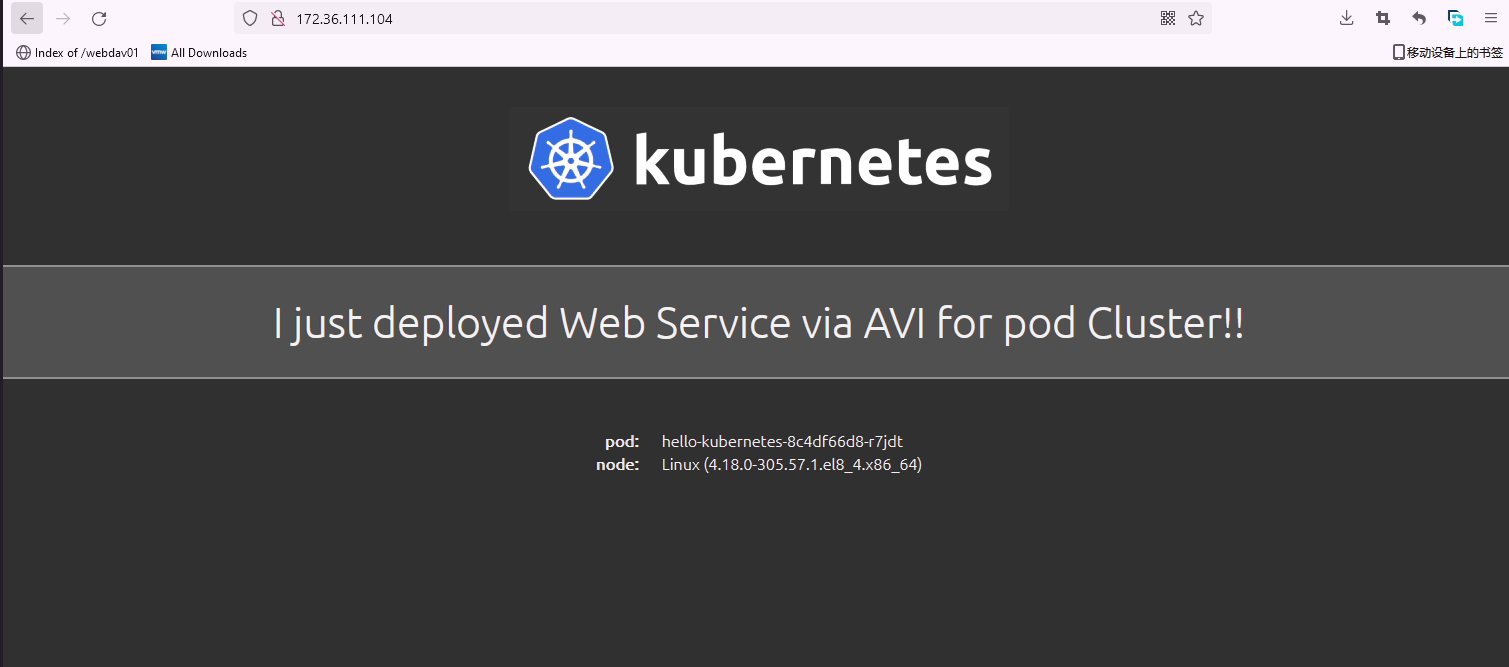
# 编写测试yaml
|
apiVersion: v1kind: Service metadata: name: hello-kubernetes spec: type: LoadBalancer ports: – port: 80 targetPort: 8080 selector: app: hello-kubernetes — apiVersion: apps/v1 kind: Deployment metadata: name: hello-kubernetes spec: replicas: 3 selector: matchLabels: app: hello-kubernetes template: metadata: labels: app: hello-kubernetes spec: containers: – name: hello-kubernetes image: paulbouwer/hello-kubernetes:1.5 ports: – containerPort: 8080 env: – name: MESSAGE value: I just deployed Web Service via AVI for pod Cluster!! |
# 应用yaml文件
| [root@Operator ~]# kubectl apply -f hellok8s.yaml |
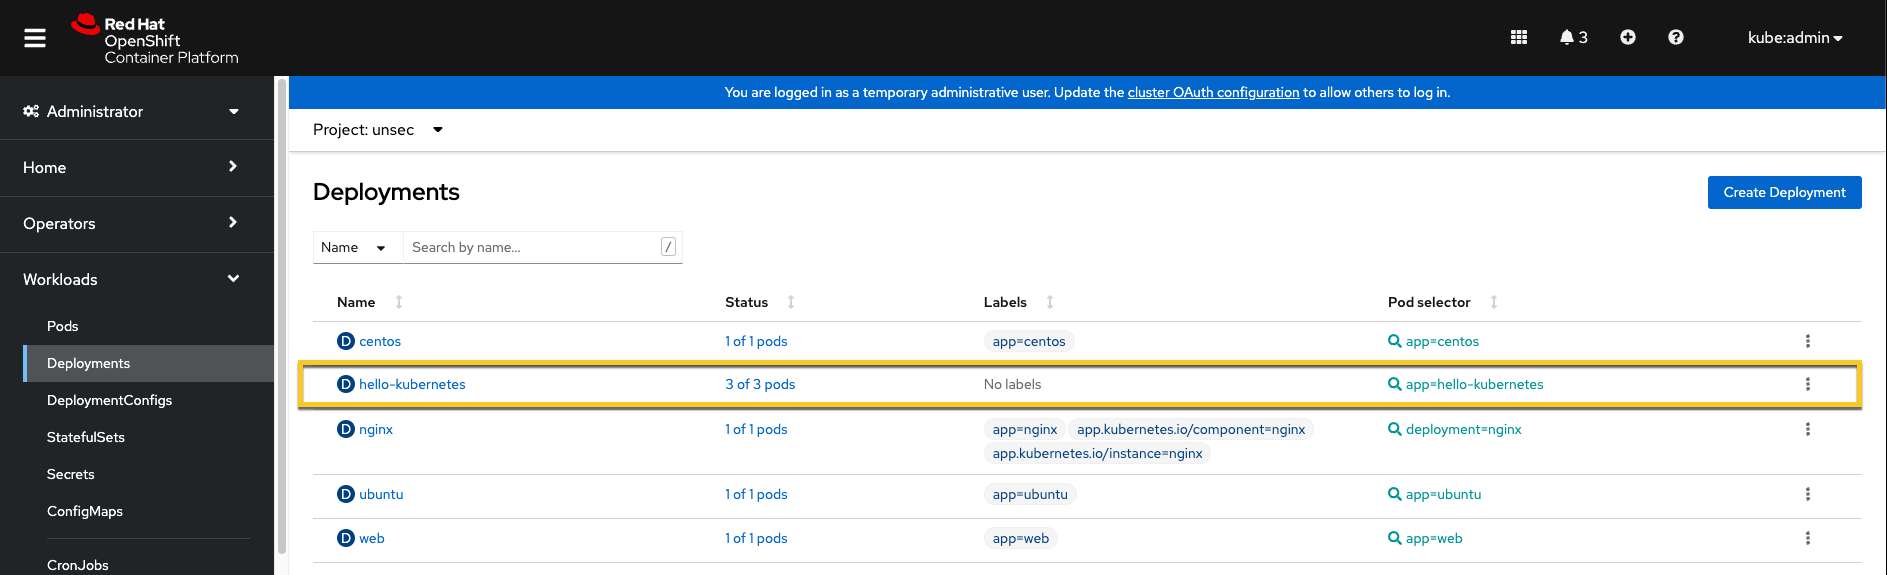
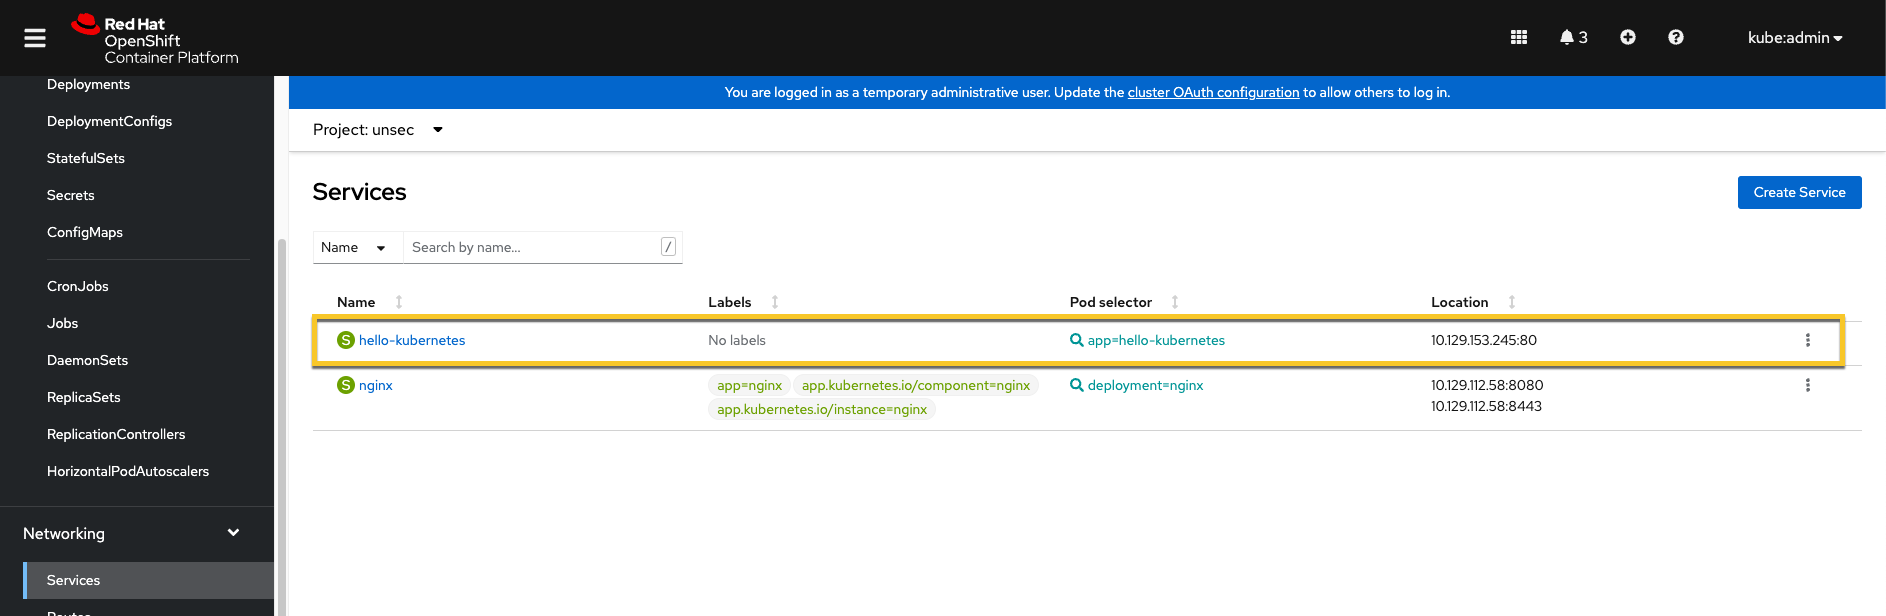
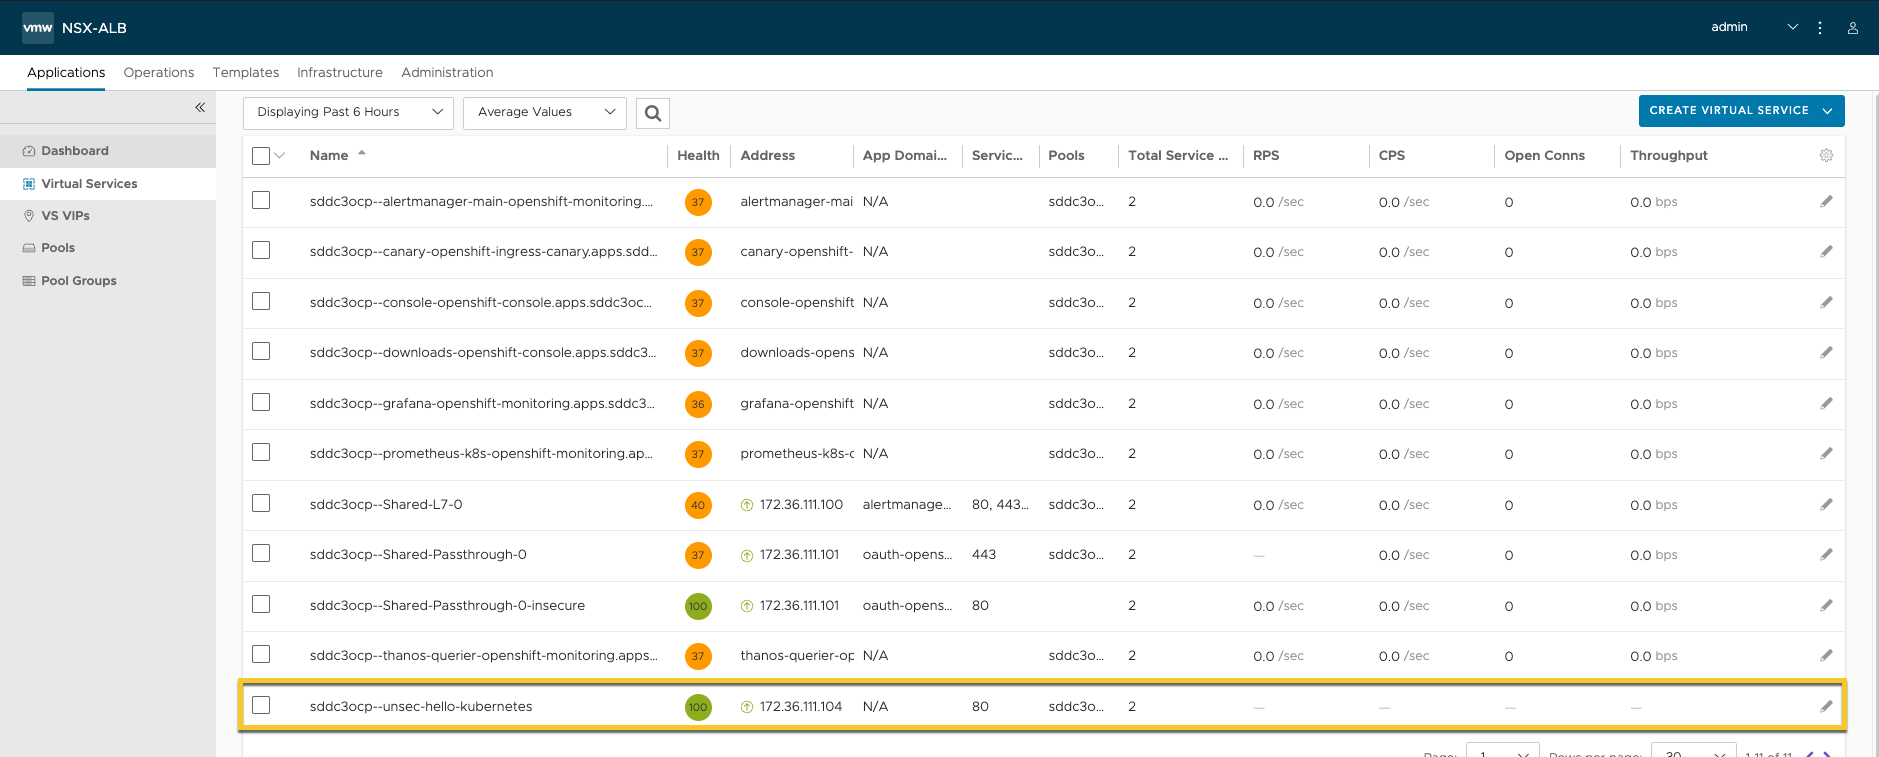
# 查看部署情况
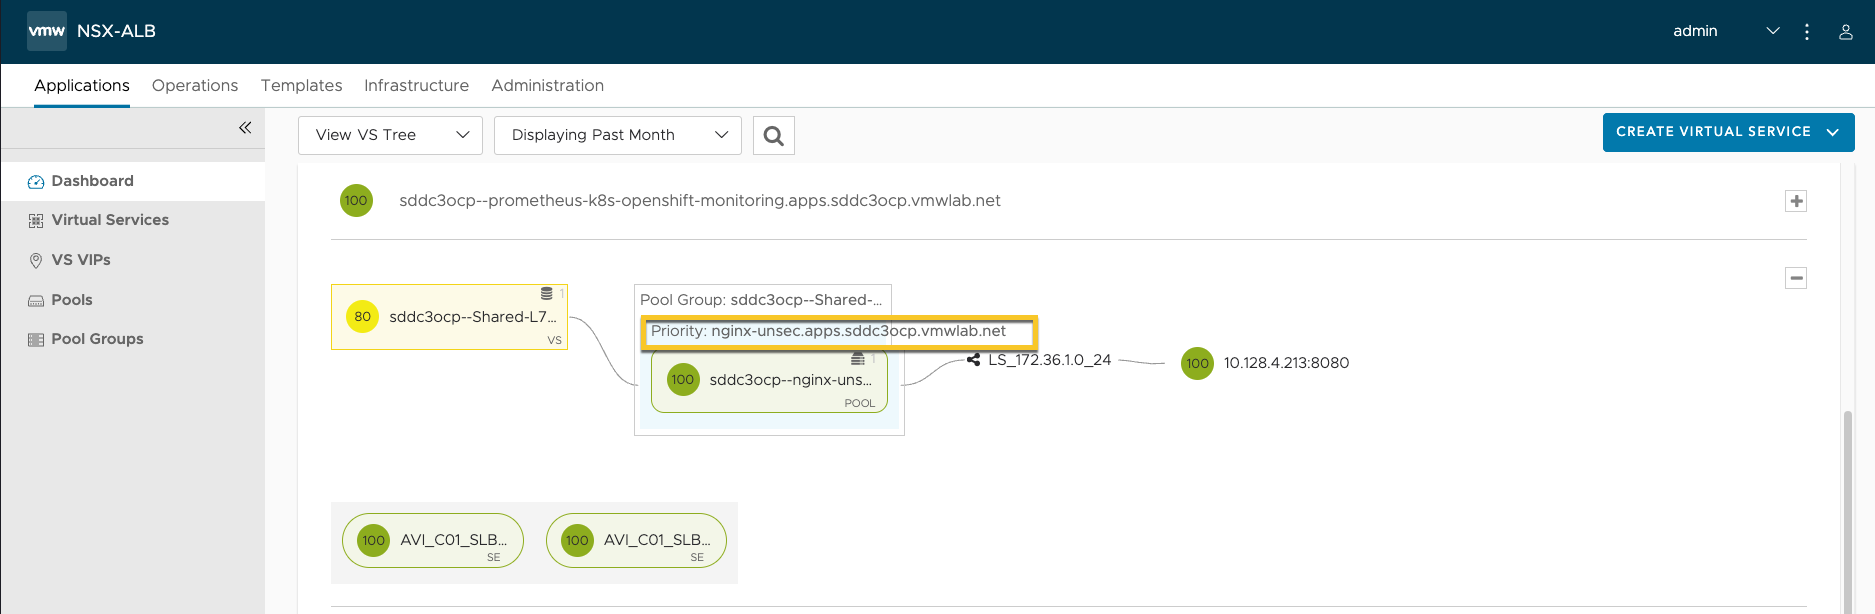
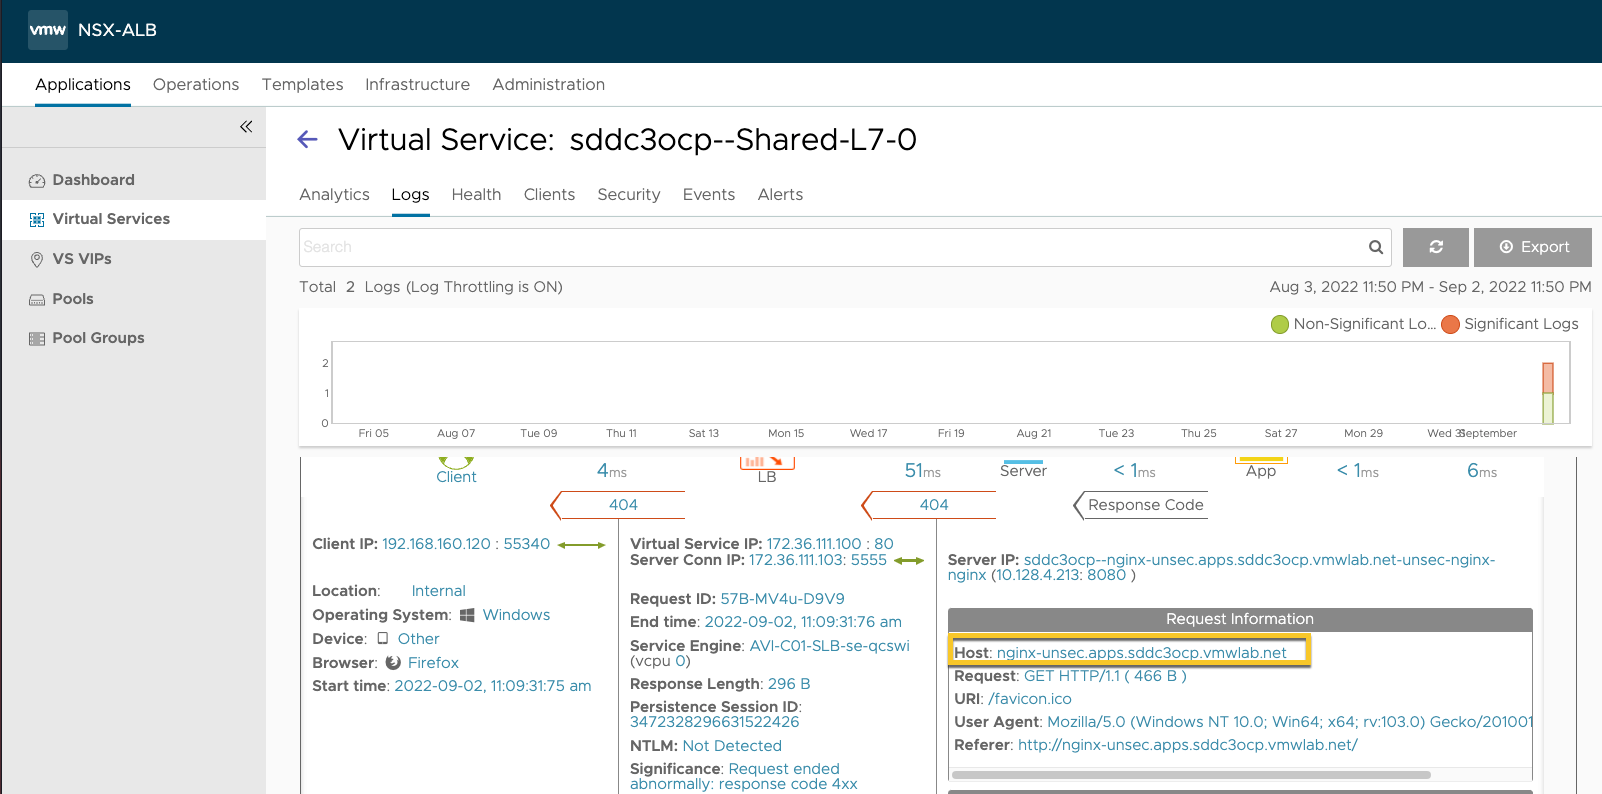
Routes发布验证
# 通过11.3小节发布的routes服务,在avi上查看是否已经生成7层VS
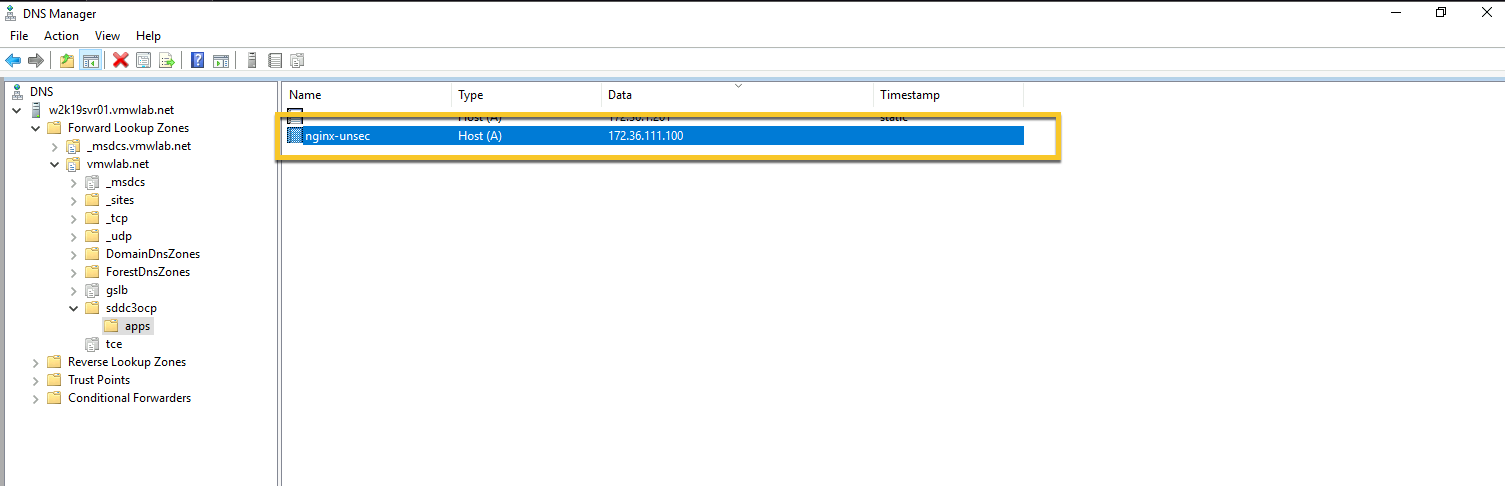
# 添加DNS记录
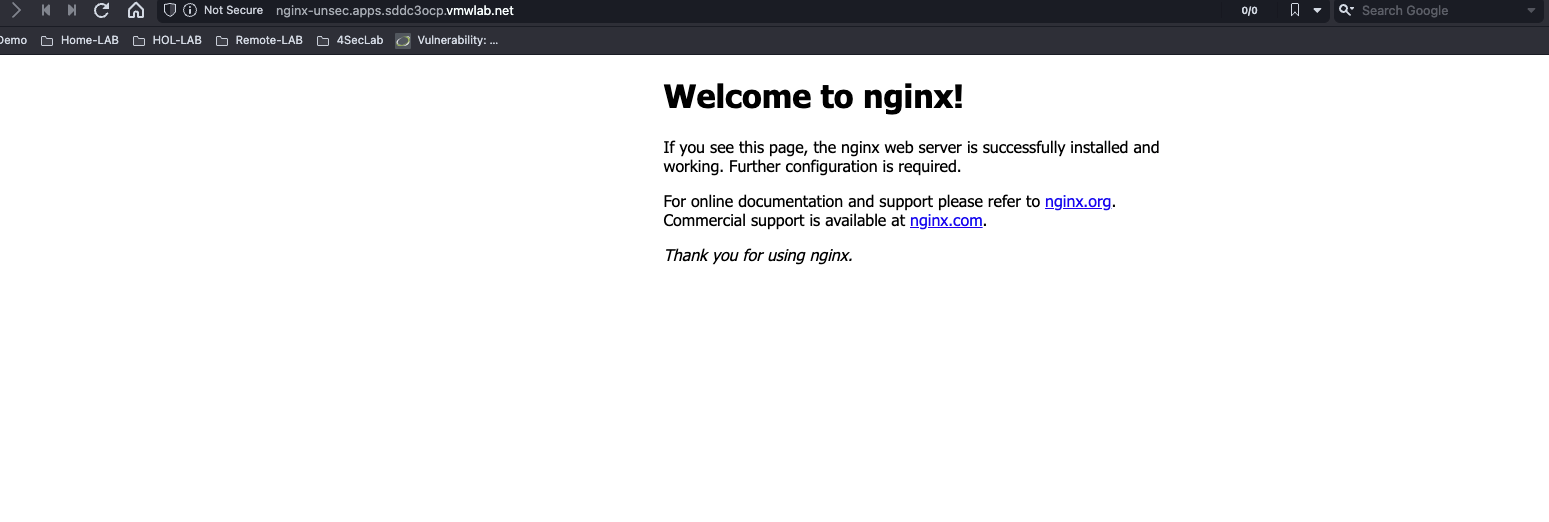
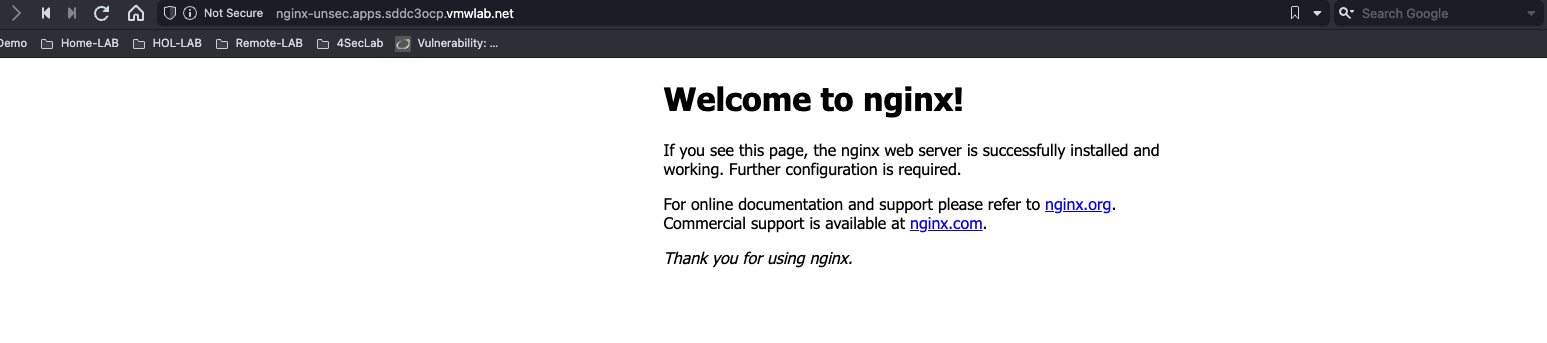
# 验证访问结果

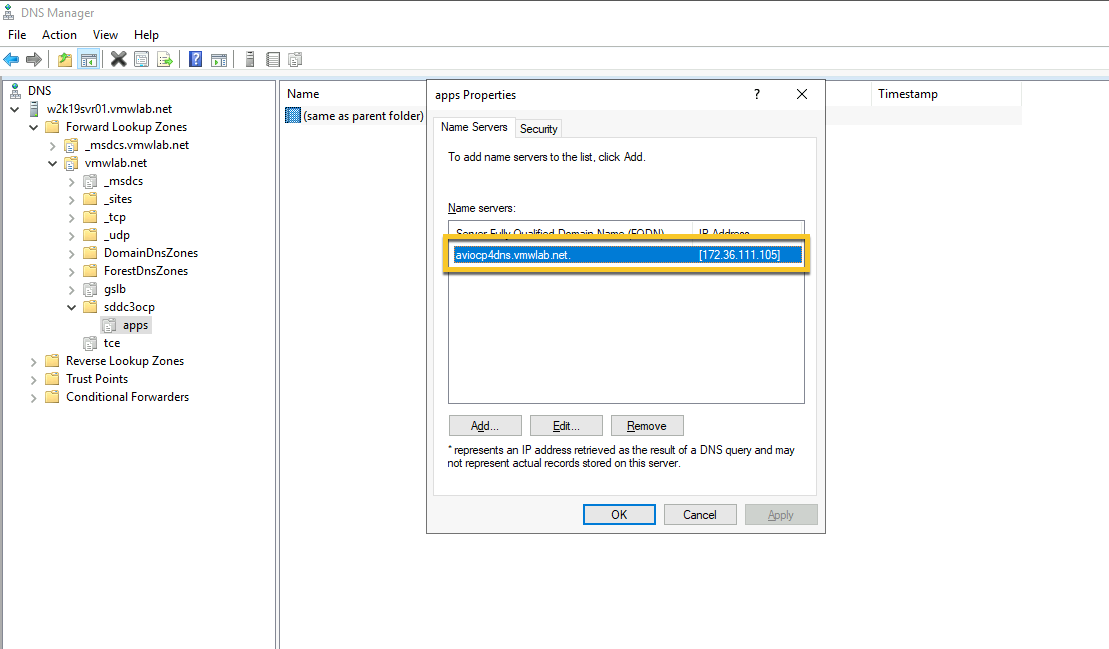
DNS子域委派至Avi
本小节将apps.sddc3ocp.vmwlab.net子域迁移委派至Avi管理,便于动态生成DNS映射,不在手动逐条添加。
DNS Server委派设置
# 删除原先的apps子域,添加apps子域委派
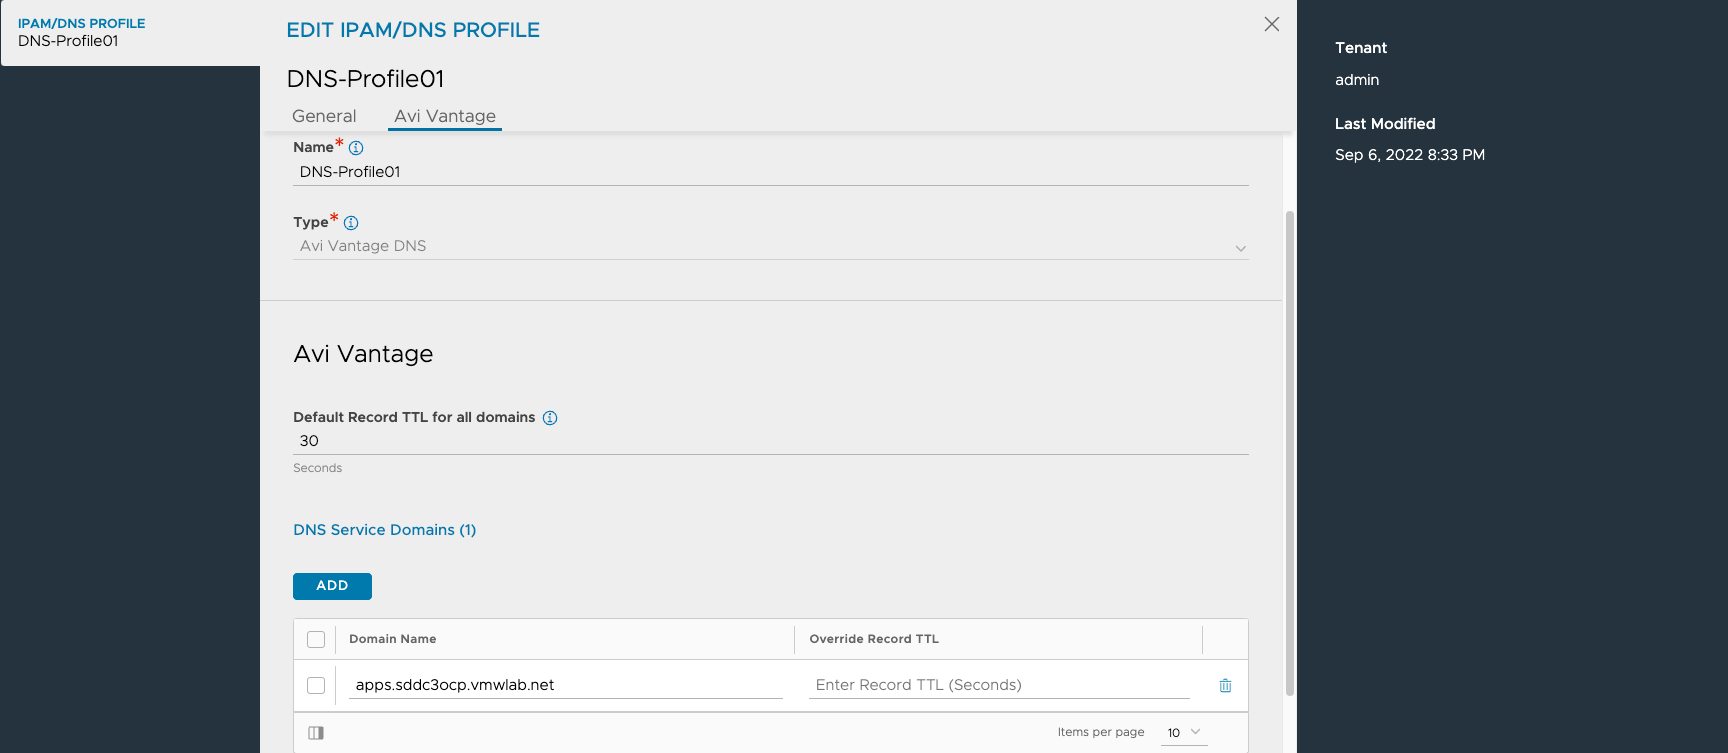
Avi DNS设置
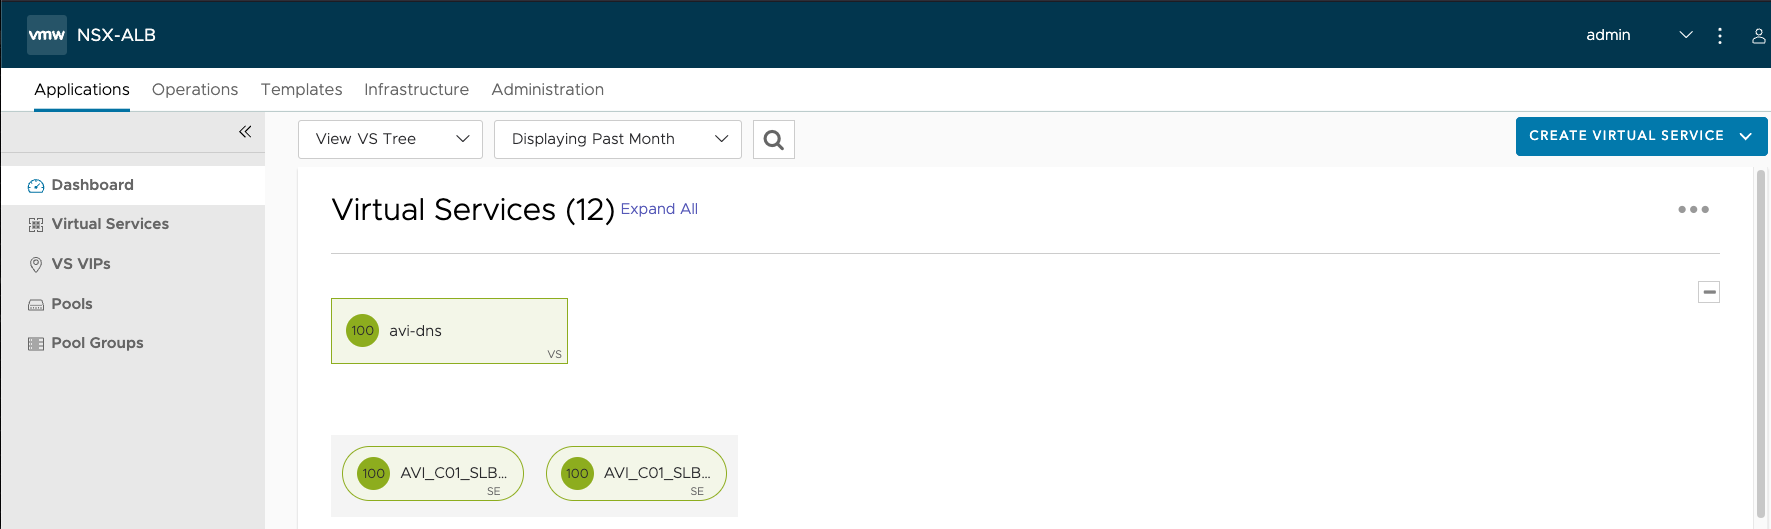
# 创建DNS的VS

# 添加DNS Profile
# 关联DNS Profile到Cloud
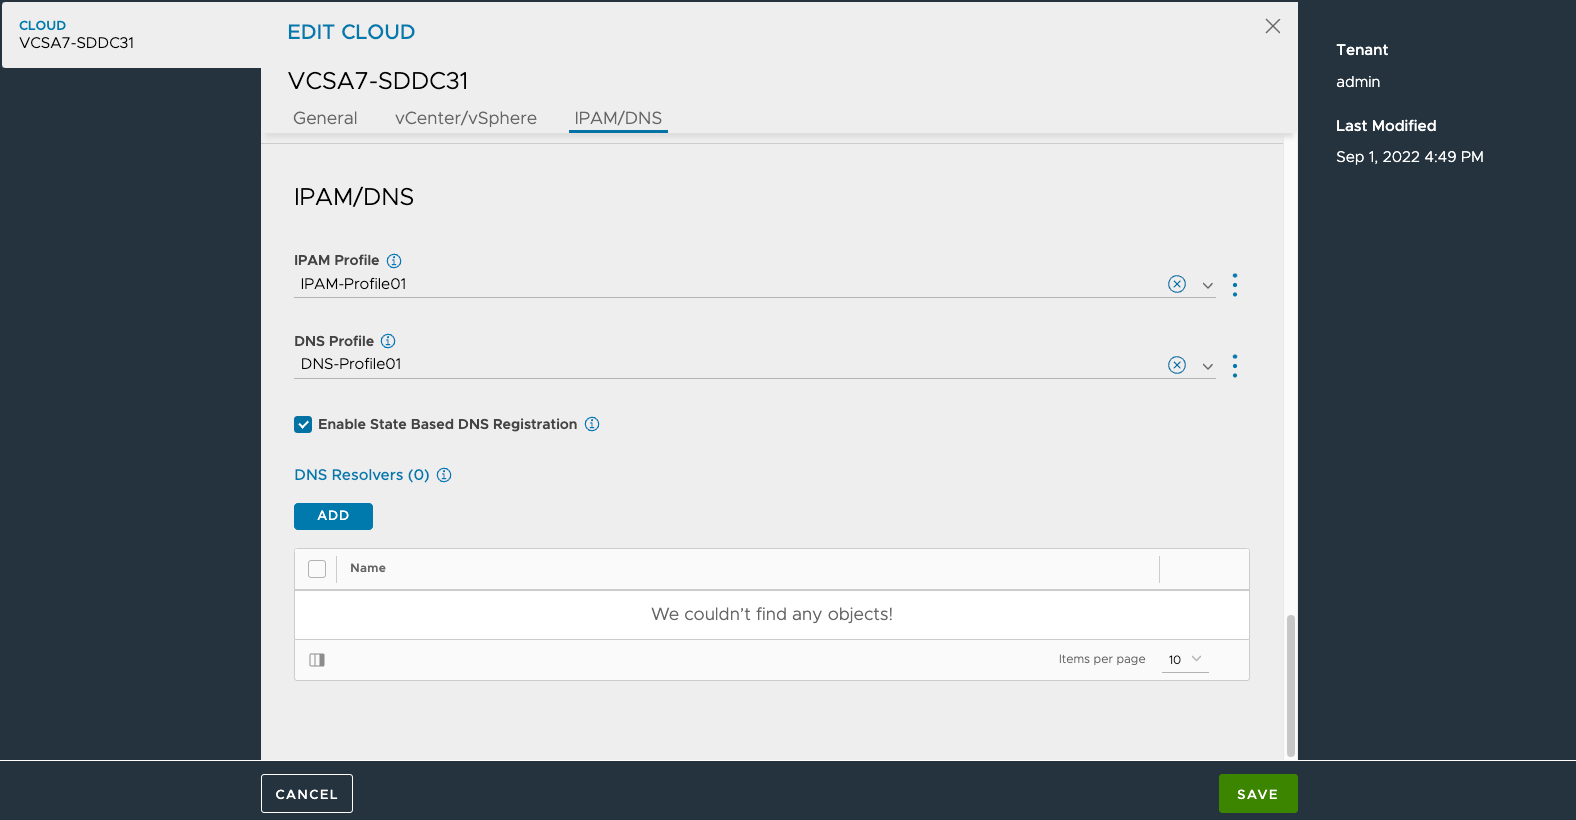
# 在DNS服务中关联DNS VS
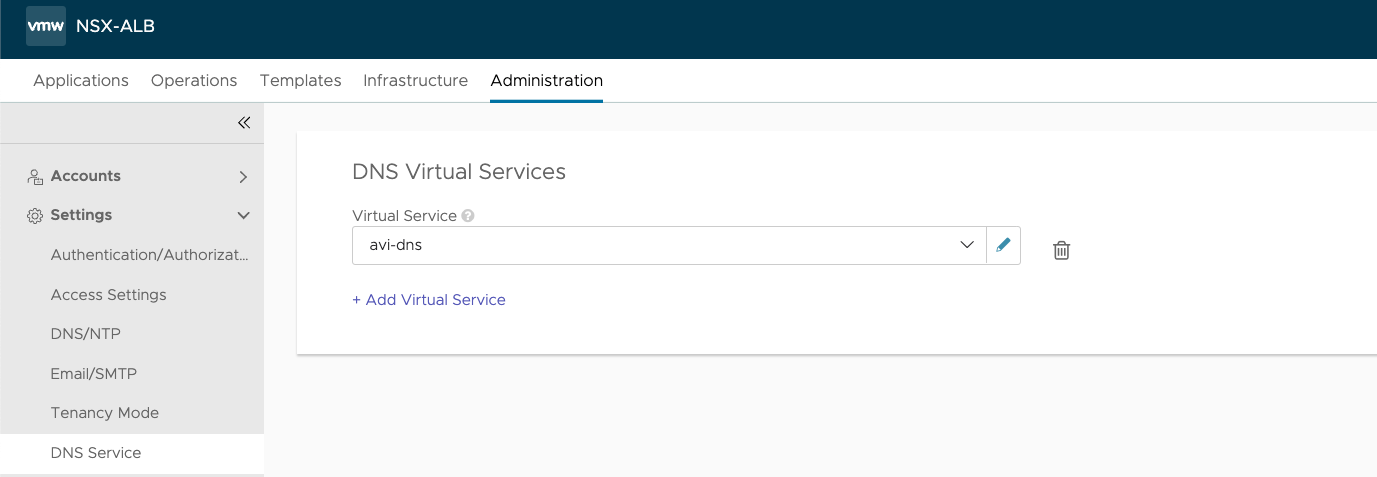
# 检查DNS 状态
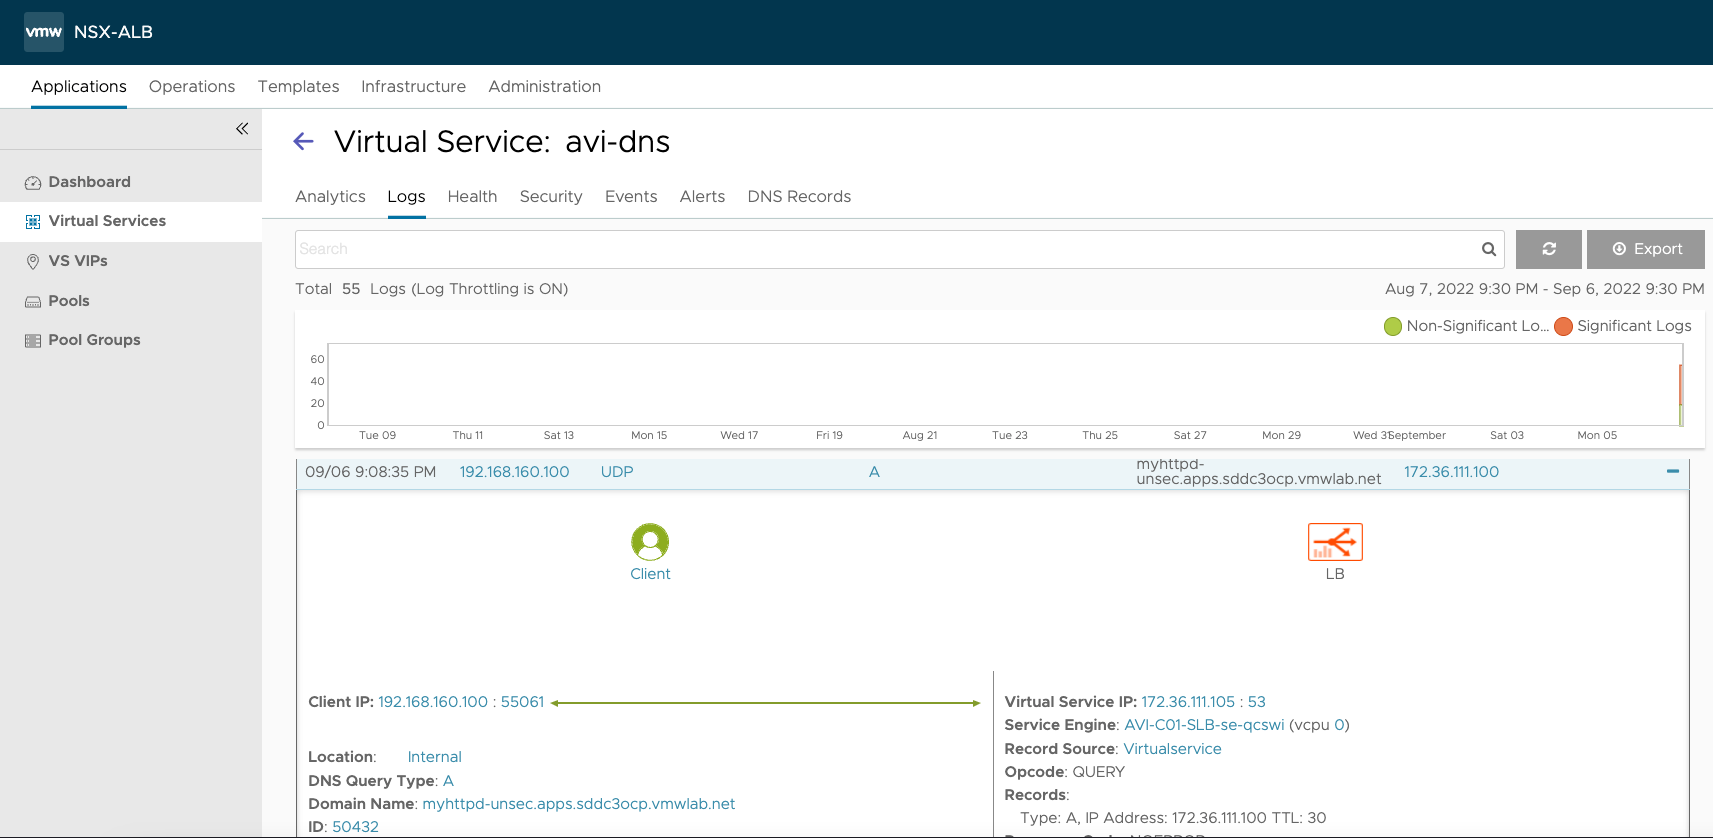
Routes发布验证
# 通过命令行创建routes
| [root@Operator ~]# oc new-app –image=docker2017713/myhttpd:latest[root@Operator ~]# oc expose service/myhttpd |
# 检查routes已经创建并在avi上以L7 VS出现
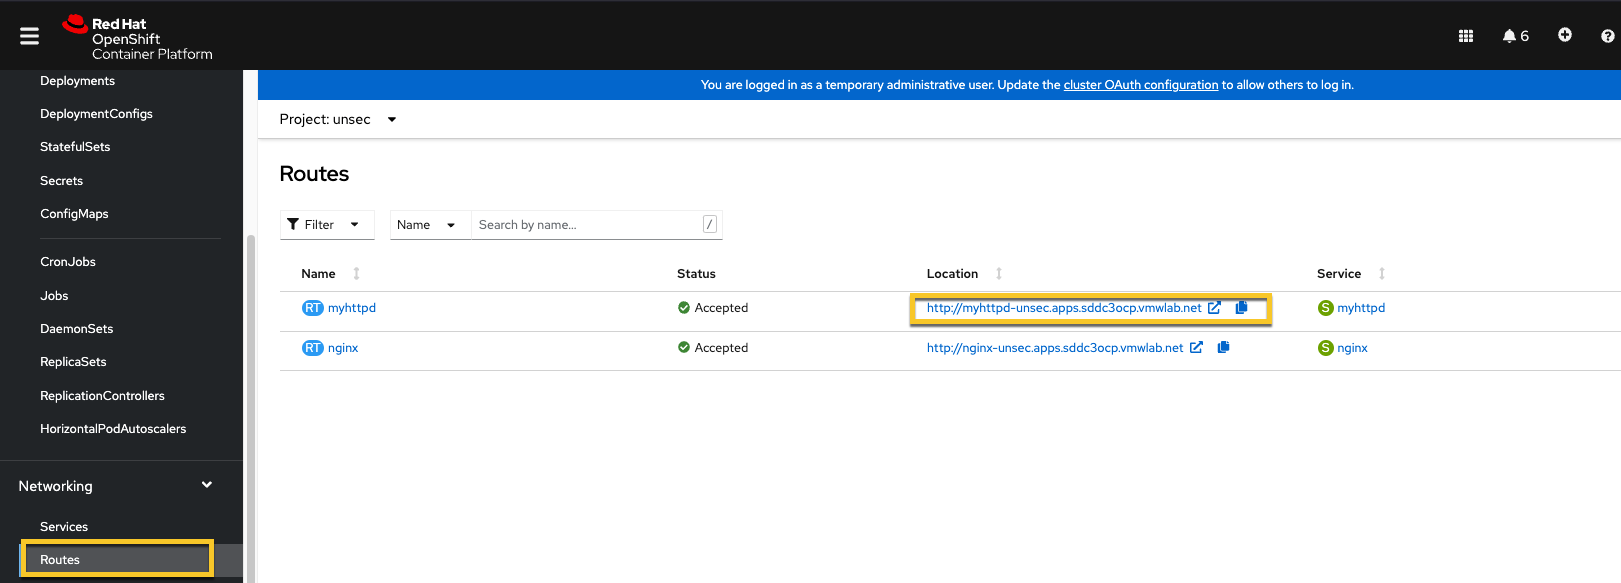
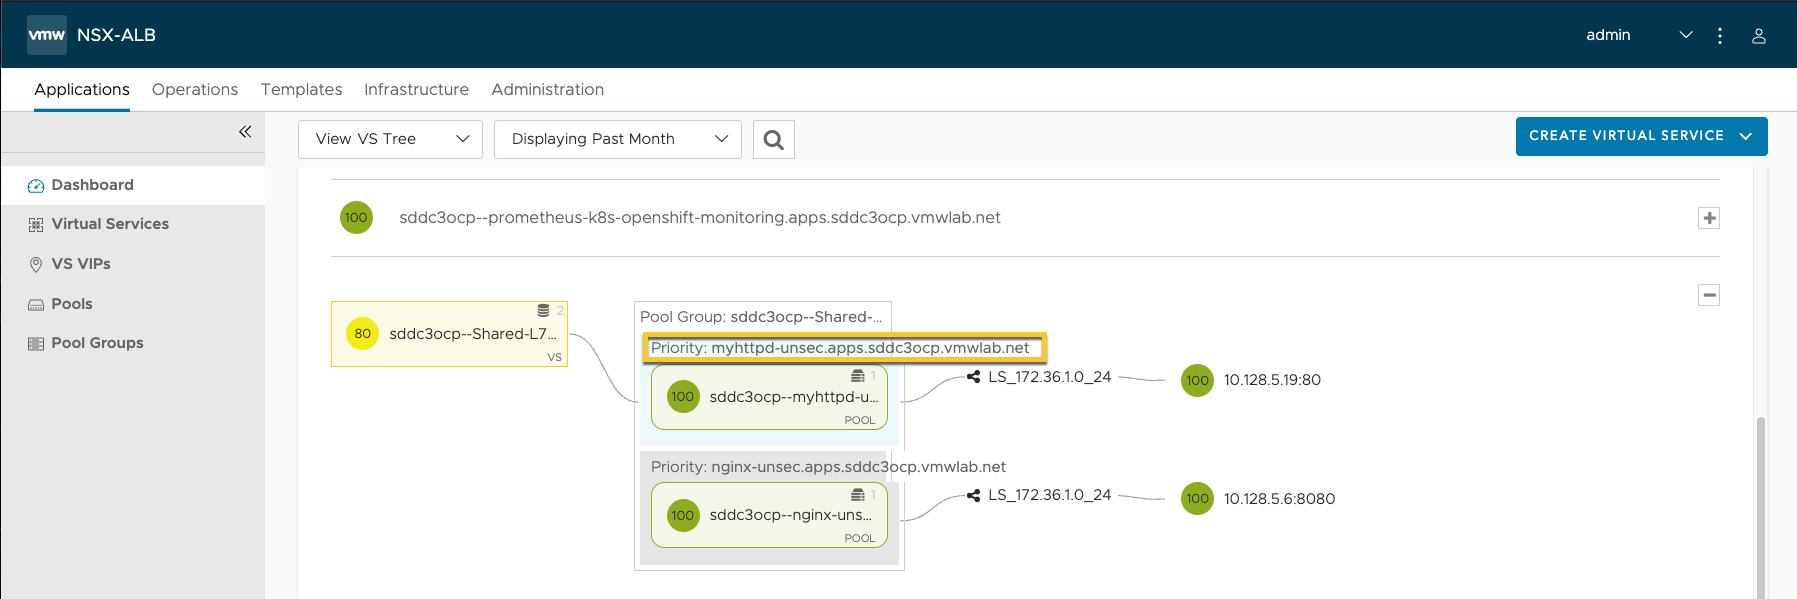
# 测试访问
# DNS映射有AVI自动完成,不再需要手工添加。