
Antrea 安装
Antrea的基本安装属于常规操作,本文不再赘述,确保如下参数开启即可
|
trafficEncapMode: noEncap noSNAT: true AntreaProxy: true |
离线镜像准备
# 准备vsphere-cloud-controller-manager 镜像,上传至本地离线Harbor仓库
|
[root@Operator ~]# docker pull gcr.io/cloud-provider-vsphere/cpi/release/manager:v1.23.1 [root@Operator ~]# docker tag gcr.io/cloud-provider-vsphere/cpi/release/manager:v1.23.1 harbor.vmwlab.net/ocp/cpi1.23/manager:v1.23.1 [root@Operator ~]# docker push harbor.vmwlab.net/ocp/cpi1.23/manager:v1.23.1 |
创建CPI configMap
# 添加vsphere.conf 文件
| [root@Operator vsphere-cpi]# vi vsphere.conf |
|
[Global] port = “443” insecure-flag = “1” secret-name = “cpi-engineering-secret” secret-namespace = “kube-system” [VirtualCenter “192.168.60.17”] datacenters = “SDDC3” [Workspace] server = “192.168.60.17” datacenter = “SDDC3” [Route] router-path = /infra/tier-1s/T1-GW01 [NSXT] user = admin password = Lab@20220315 insecure-flag = true host = 192.168.60.18 [Disk] scsicontrollertype = pvscsi [Network] public-network = “VM Network” |
| # 以下选项,无需修改 |
| scsicontrollertype = pvscsi |
| public-network = “VM Network” |
| # 部分选项含义 |
| Insecure-flag:是否检查证书,1为不检查。 |
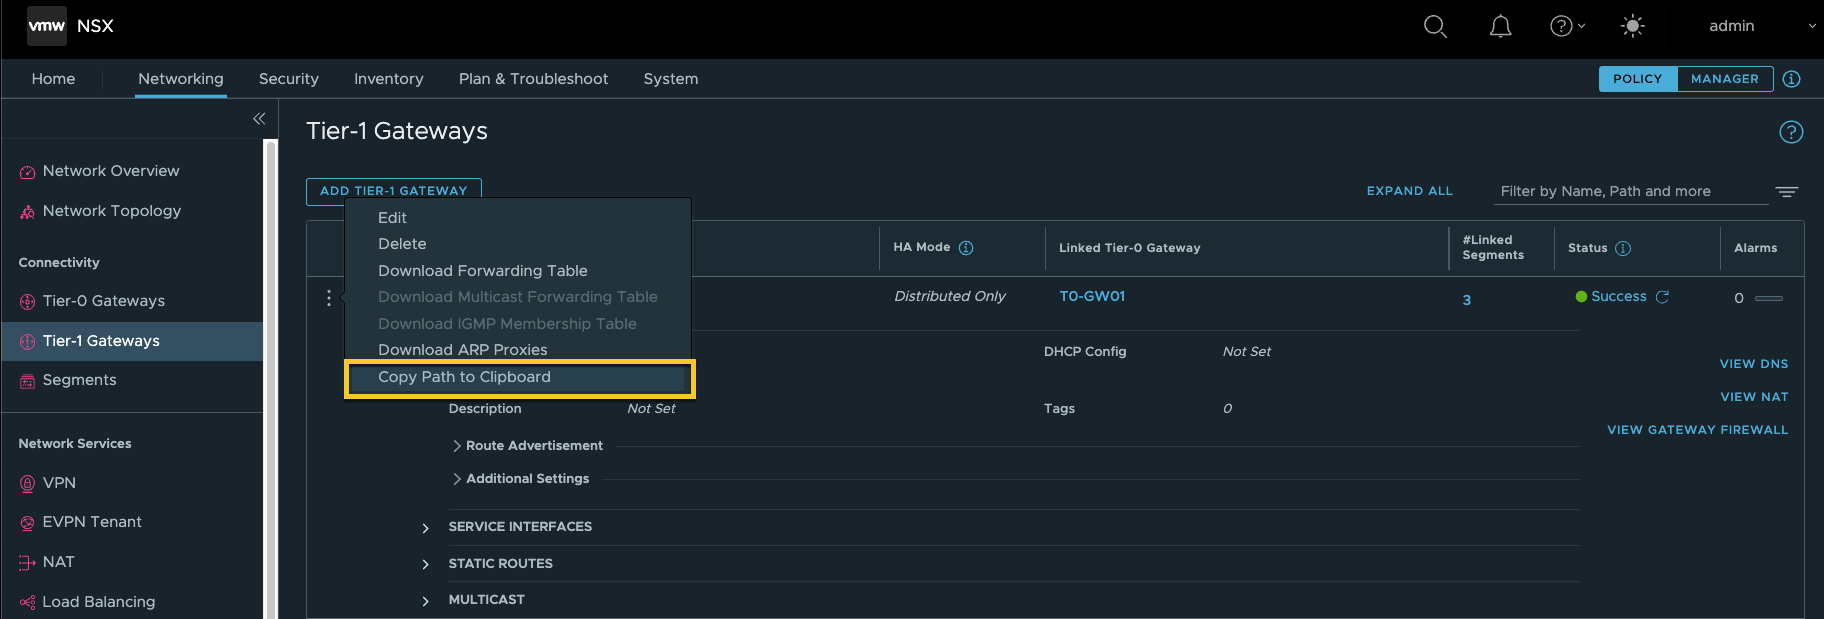
| router-path = Policy 模式下的Path |
 |
# 创建 Configmap
| [root@Operator ~]# oc create configmap cloud-config –from-file=vsphere.conf –namespace=kube-system |
| [root@Operator ~]# oc get configmap cloud-config –namespace=kube-syste |
# 创建secret
| [root@Operator ~]# vi secret.yaml |
|
apiVersion: v1 kind: Secret metadata: name: cpi-engineering-secret namespace: kube-system stringData: 192.168.60.17.username: “administrator@vmwlab.net” 192.168.60.17.password: “xxxx” |
| [root@Operator ~]# oc apply -f secret.yaml |
| [root@Operator ~]# oc get secret cpi-engineering-secret –namespace=kube-system |
通过OC CLI 安装CPI
#创建Role,Rolebinding
#修改daemonset的yaml
| [root@Operator ~]# wget https://github.com/kubernetes/cloud-provider-vsphere/raw/master/manifests/controller-manager/vsphere-cloud-controller-manager-ds.yaml |
| [root@Operator ~]# vi vsphere-cloud-controller-manager-ds.yaml |
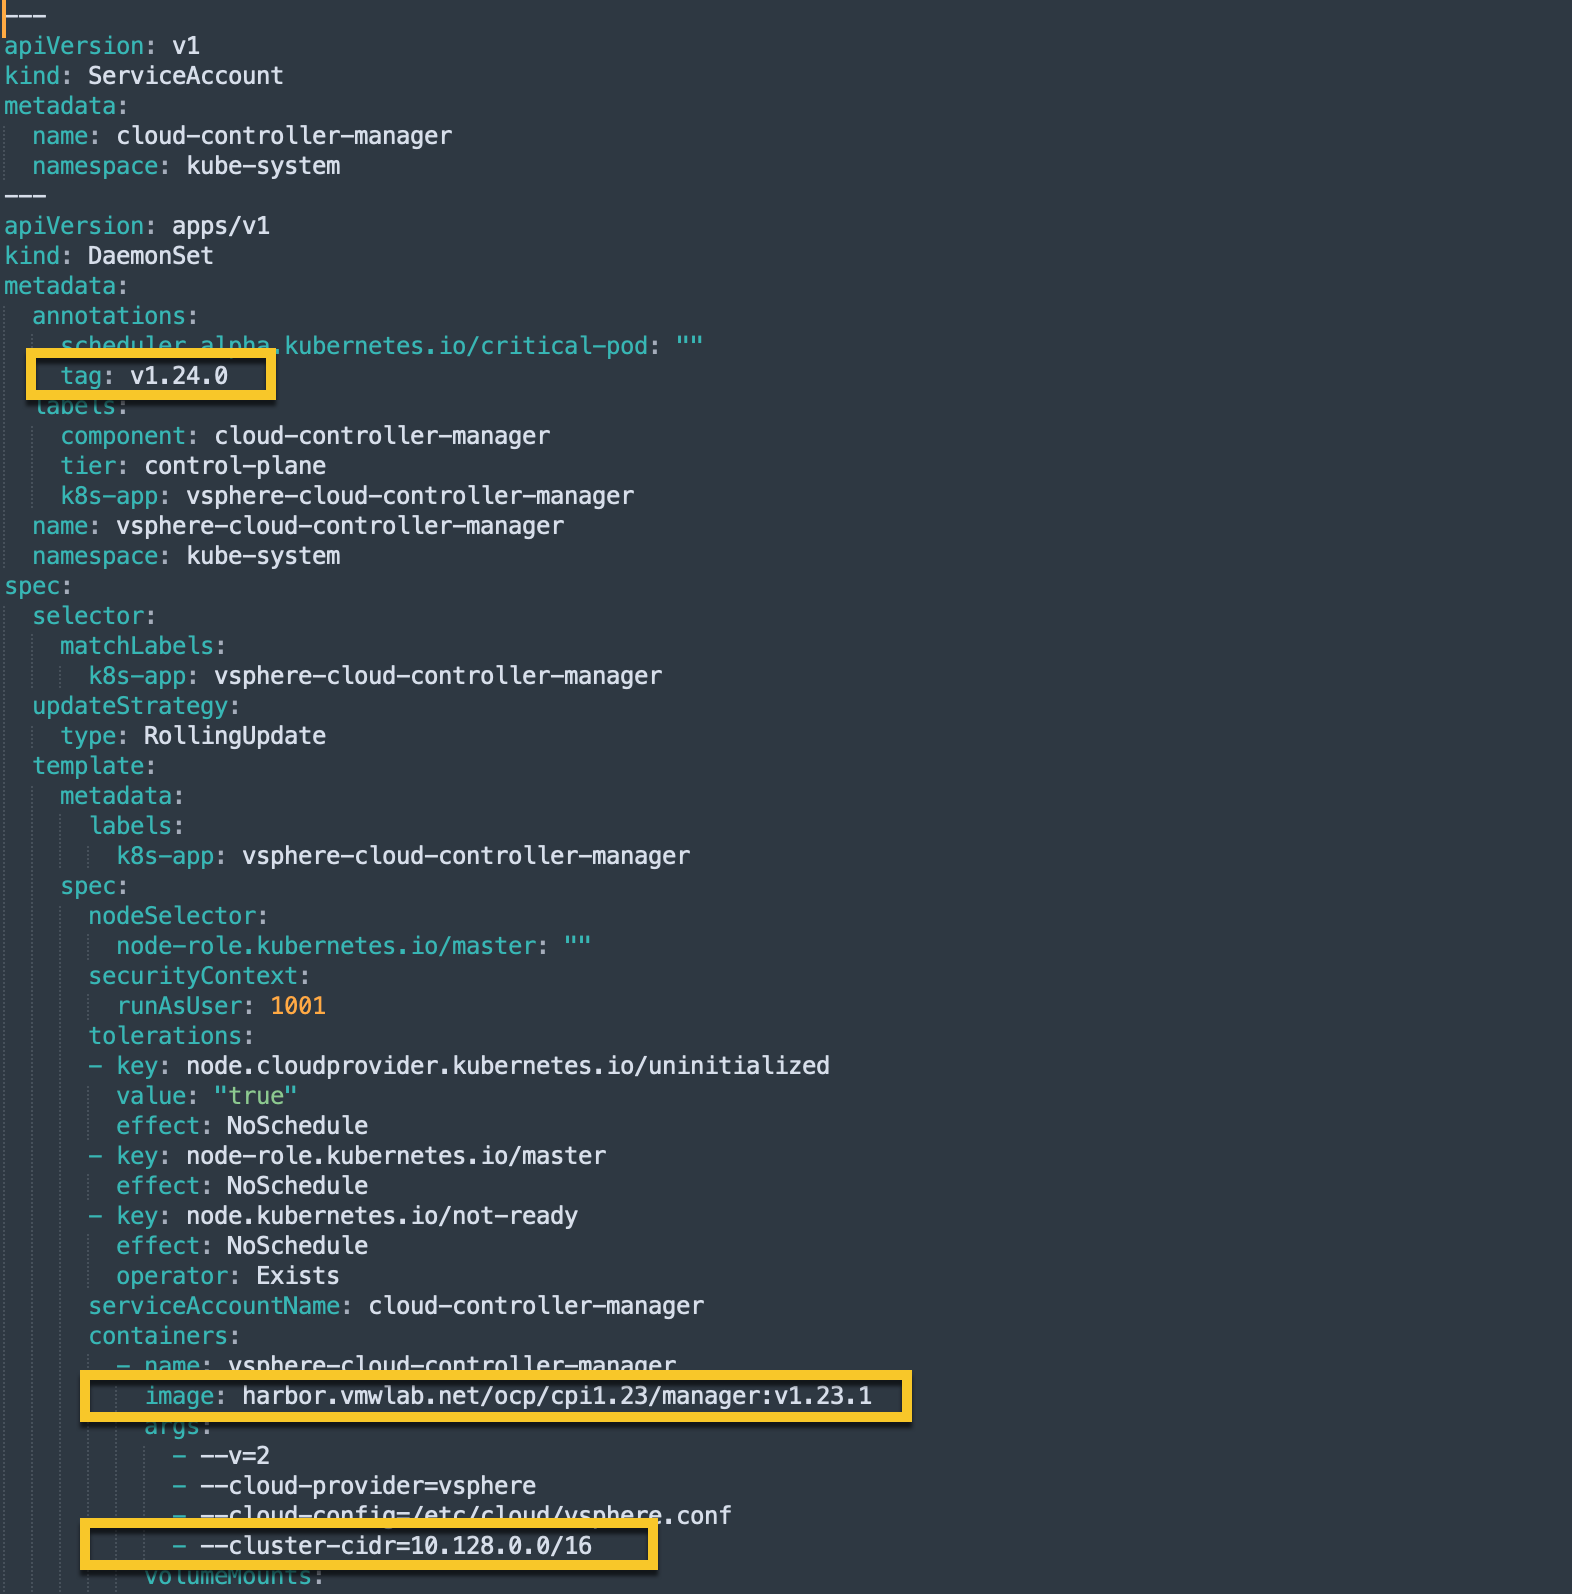 |
| [root@Operator ~]# oc apply -f vsphere-cloud-controller-manager-ds.yaml |
检查
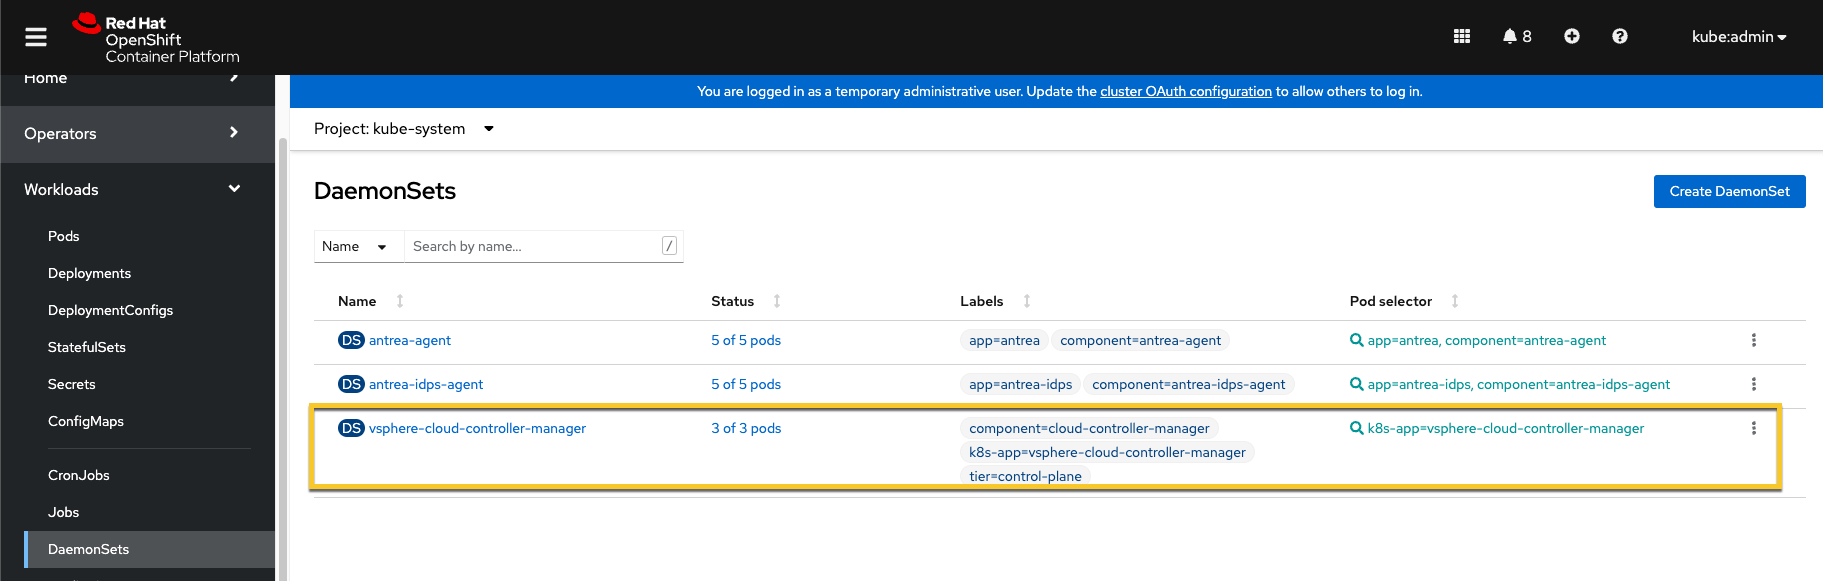
# 在OCP上已经生成DaemonSets
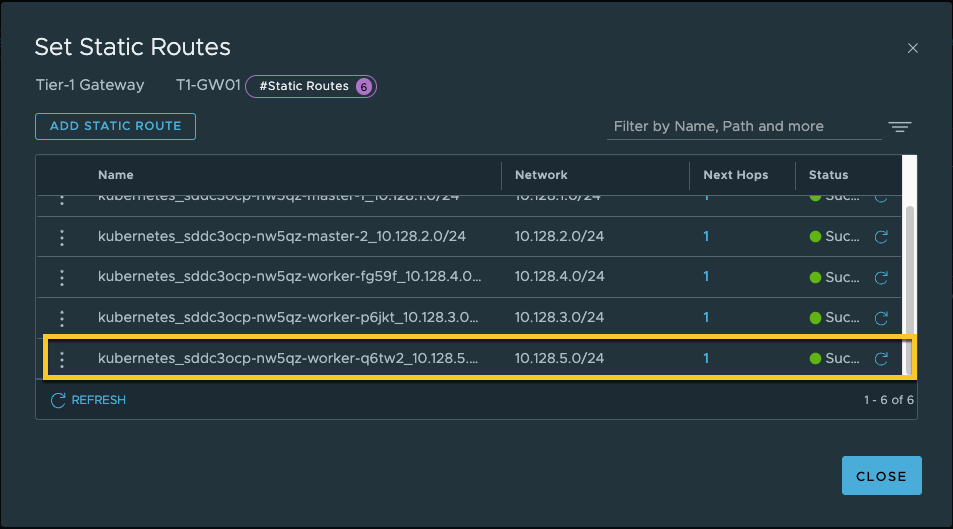
# 在NSX-T上已经自动生成静态路由

# 在OCP上查看POD日志,了解整个过程中的详细信息

新增节点测试
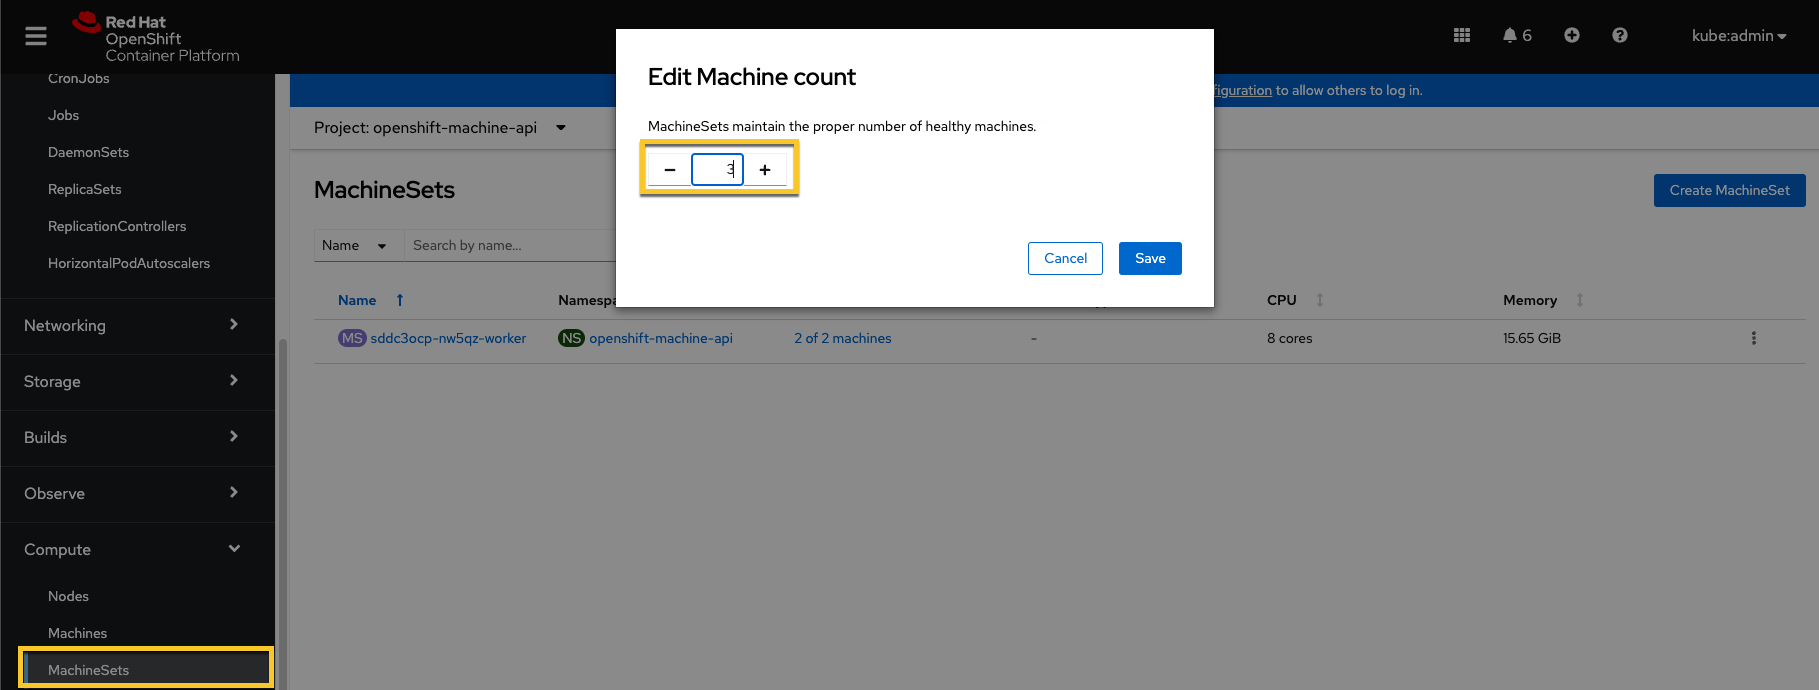
# 通过GUI界面增加worker节点至3
# 在T1静态路由配置中发现新增相应节点的Pod路由
删除节点测试
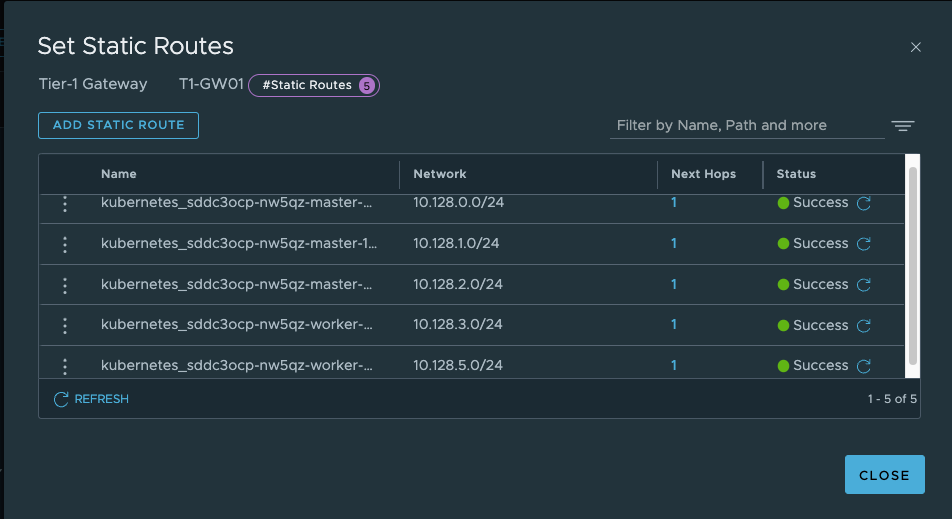
# 通过GUI界面再次减少worker节点至2

# 此时已经删除10.128.4.0/24 路由
The sentences flow with ease, yet carry weight. There is a balance between momentum and reflection, creating a reading experience both engaging and contemplative.